For this project, I will be creating a short but informative video on how people can create and order their own PCBs using software like Eagle. I will do a short voiceover that covers the subject more in-depth that the animation with the animation adding and emphasizing phrases. The video will progress also have some light explainer music, maybe something more techno to go with the subject matter. The colors and icons will also be from the manufacturing process and transitions will use traces of “copper” wire to bring the project together.
Script
So, you want to make
a custom PCB.
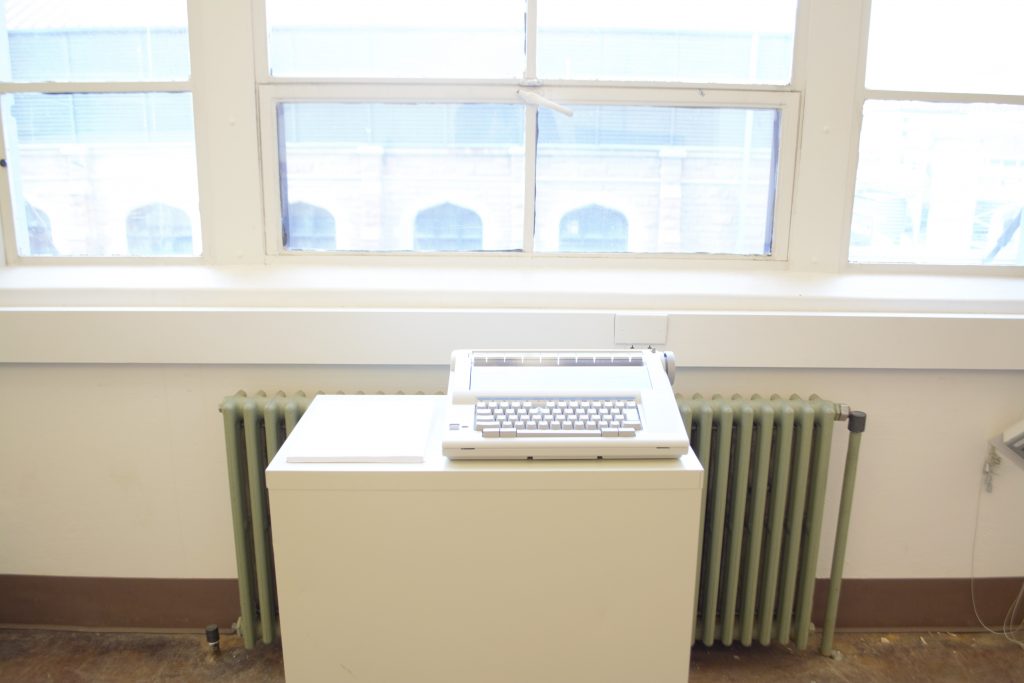
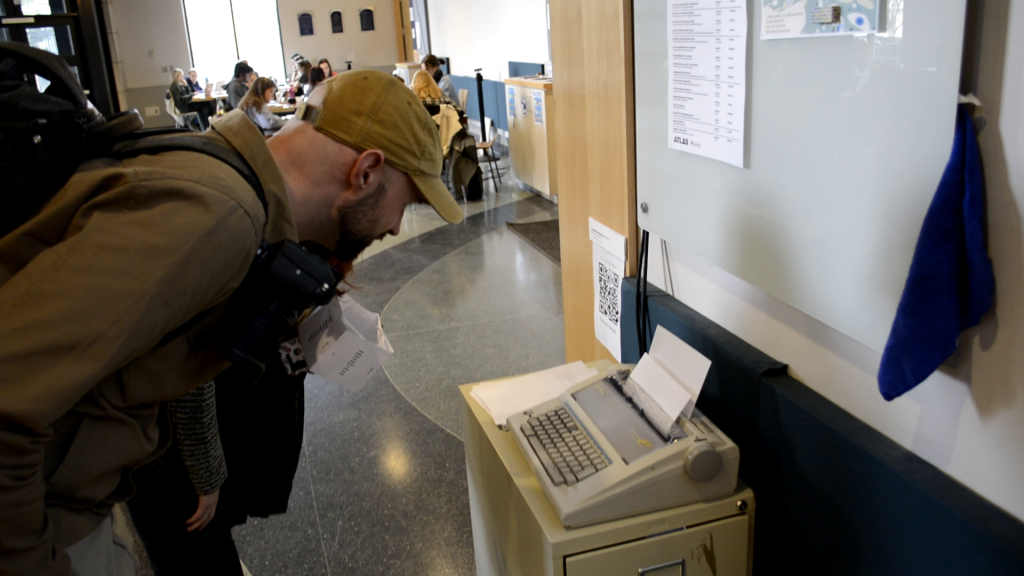
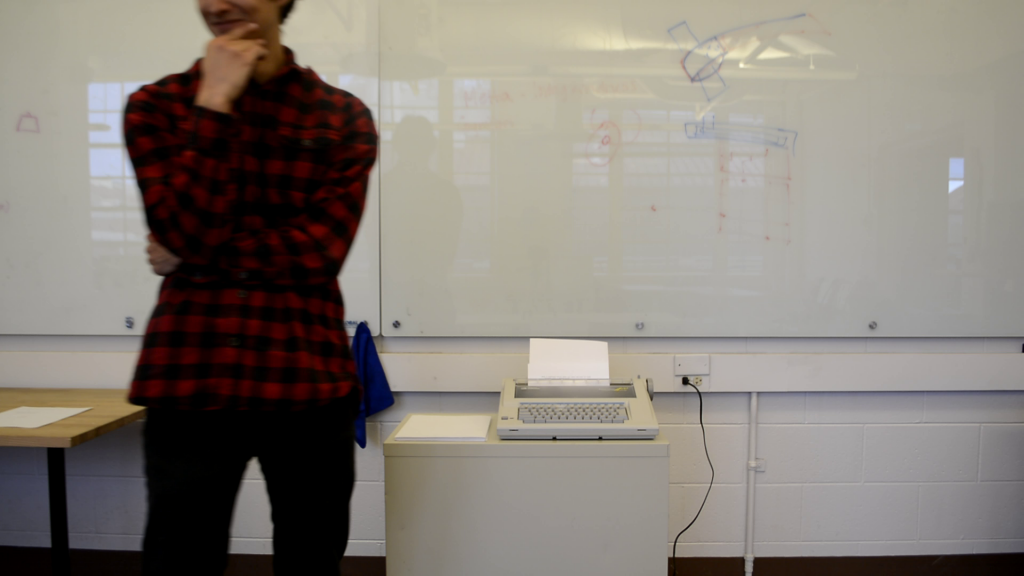
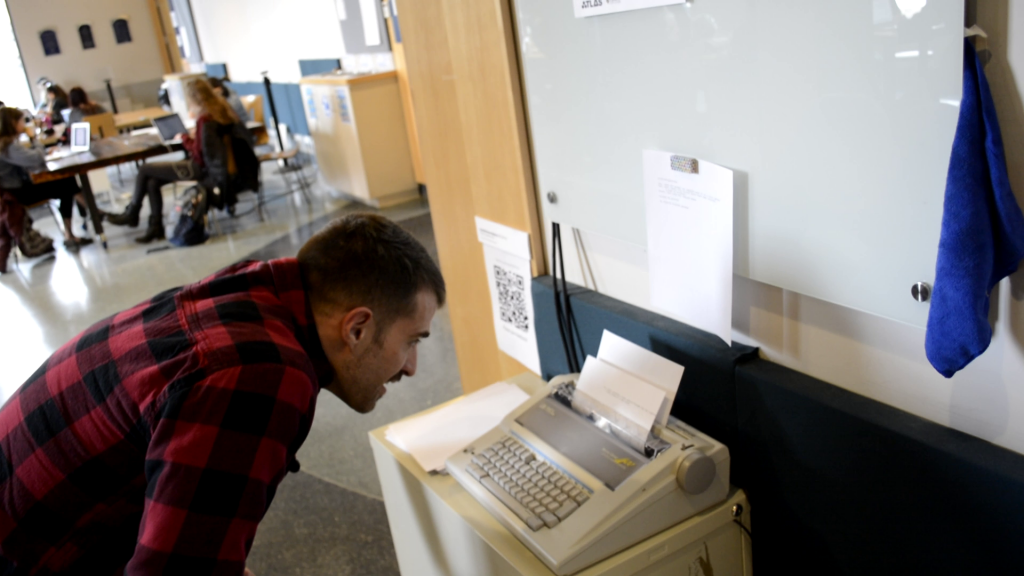
Let’s take this typewriter for example. We want to make it work as a printer for our computer.
First, we need to
figure out how the PCB will work and draw a schematic for it.
Next, we need to
figure out what manufacturer we want to use and the parts they will have
available. Alternatively, we can buy the parts and solder them ourselves
Now, we can start
designing our PCB.
Start by finding the parts we will be using in our PCB.
For this PCB, we
will only need 2n3904 Transistors and 0805 resistors.
Add all the parts to
the schematic file and add connections in the correct places.
Now, we will move on
to the board.
Put all the parts in
the right places and add the traces where we want them.
Make sure there are
can overlaps and that all the parts can be soldered
After sending off
the PCB to be printed, it will be ready in a few weeks.
The Turkish Typewriter is an interactive object that will take words spoken near it and convert them into poems. I was inspired to create this creation because it is a nice combination of technological fabrication, coding, and art. While it wasn’t my first idea, I had planned on creating something far more controversial and purely code-based, the idea for a physical installation stuck with me. I wanted this project to at least give people pause, to stop and consider what the project meant and what art is as a whole.
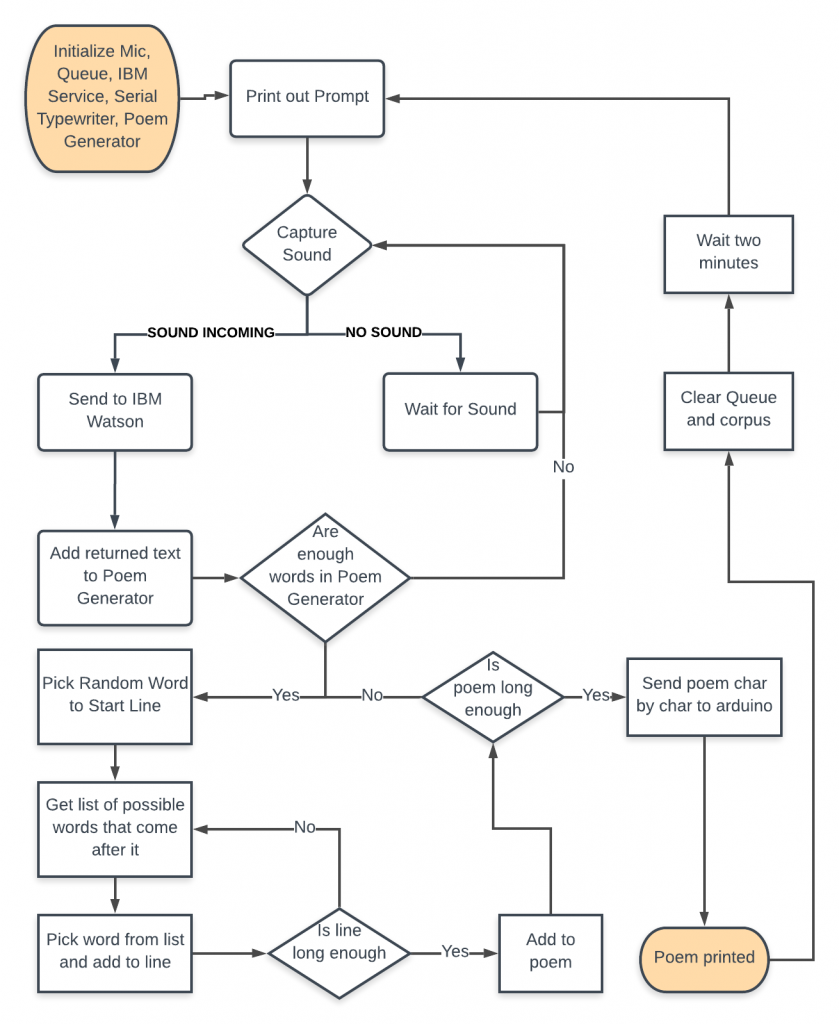
The project works by capturing sound and sending it to IBM’s Watson to convert it to text. The resulting text is then returned and entered into a poem generator. The poem generator creates poems using Markov chains. Markov chained text takes a couple of words from a corpus and then finds what words go after that string in a given corpus. Then the last two or three words of the resulting string are used to repeat the process until the desired length is reached.
The poem generator works backward from the end of a line and creates Markov chains of two words until 5 or 7 syllables are reached. The lines are built backward in order to accommodate rhyming functionality.
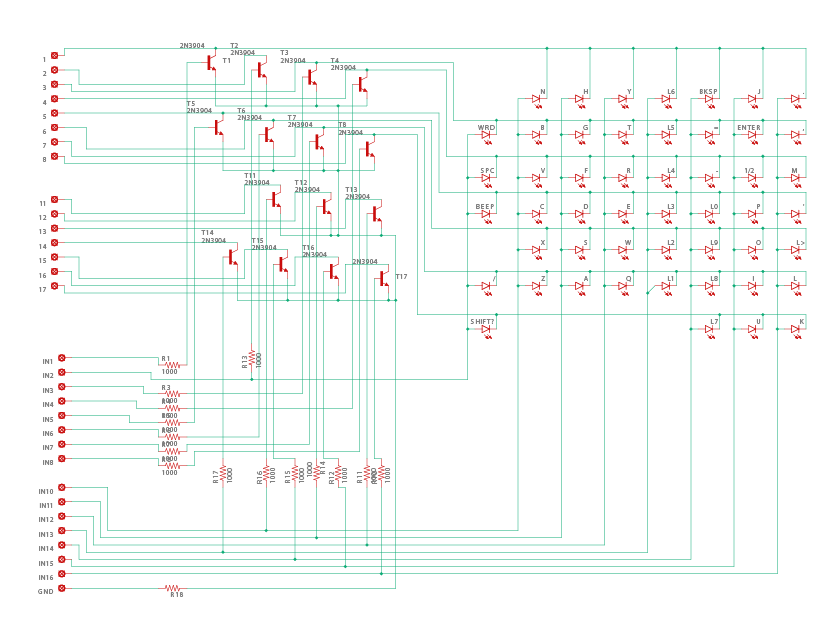
After the length is reached, the poem is sent character by character to an Arduino which triggers the two relevant pins in a matrix. For example, when an ‘n’ is sent, the Arduino triggers transistor 1 and 11. These transistors then close a circuit, trigger the typewriter’s carriage to print an ‘n’. In addition, the triggered transistors close the circuit for an led. The LEDs should ideally give additional feedback to the users and the appearance that the system is working
There was a single issue with there not being the keys not firing when on the same board as the lights. This issue may have been the typewriter pins being grounded by the lights or there not being enough power to power both the lights and the transistors.
Interactions
Users are able to interact with the machine by reading the given prompt and responding to it in a verbose manner. The more verbose and diverse the resulting corpus is, the better the resulting poem will be.
Schematics
The schematics for this project were created in Eagle and printed by JLCPCB. There is an issue on the board that the ‘T’ and ‘Y’ keys are switched.
Video
Video of InteractionVideo of Lights
Code
Half of the code for this project was written in Python. The Arduino half was written in Arduino. All code (including prototypes and further iterations can be found here
An Unbiased Written Review of a Public Exhibition of a Capstone Project as Written by its Creator
In the same vein as the most famous critics will rave about the paintings of Mark Rothko, poetry critics will someday expound upon the virtuoso poet, Azariah Kierson-Galeano, that was able at the young age of 23 to produce an algorithm that produced poems on the same level as famed haiku author Basho Matsuo. The poems were both enigmatic and surrealist combining the best qualities of the short form poems with a certain Dali-esque flair.
If you are lucky enough to be in the same room as the working Turkish Typewriter prepare to be delighted by the simple, yet tactful selection of words. The project is an ambitious look at how we are monitored in everyday life as well as how our words can be twisted and turned in meaning. There is no better example of subversion in fabricated form yet to date.
Exhibition goers gave such praise as expounding on how the project utilizes the Analog and moves away from today’s heavy saturation of computers whose form lacks function. Praise was also given for the 1980’s storeroom aesthetic, which perfectly encapsulated the viewer’s feelings about monitoring and the surveillance state we are entering.
After users began experimenting with the machine, they quickly took to explain it to other users, who, in turn, spread the news like wildfire. Using focused phrases, users began to move away from simplistic poems and began to utilize concise phrasing to produce works of art aided by the wonderous machine.
This app is a relatively simple app that displays a calendar and allows users to add goals and events to that calendar. The app then tracks goal completion and inform users about their habits
Lessons Learned
I think the biggest lesson I learned from this is that focusing an app on a single operation is the most important aspect in an app. Even trying to create multiple related functions as an MVP lead to each lacking a finishing touch.
Technical Review
Similarly to the technical review for the adapt phase, understanding that Android Studio using Java has a lot of boiler plate code slowed down my work. Using Kotlin instead of Java, or using a wrapper such as React Native or Flutter would have made the final product has a more finished look and the pieces would have fit together more seamlessly.
The over all design was fairly underdeveloped. While the app did achieve some conformity to Material Design, using one of the wrapper s instead of Android Studios would have made the default UI elements pre-styled instead of having the manually change each element as I went.
Future Plans
I think that I will bring this app to completion as I hope to get a job making mobile apps. The app requires several changes including:
Making the calendar, goal list, and dashboard reload when new goals are added
Having the goal list display completed goals correctly
Having the dashboard display graphs
Adding icons
If I can get this working, I will likely only keep it around as a demonstration of capability as it would require a lot of polishing in order to be competitive with existing apps. Especially since Google calendar recently included a goal setting feature.
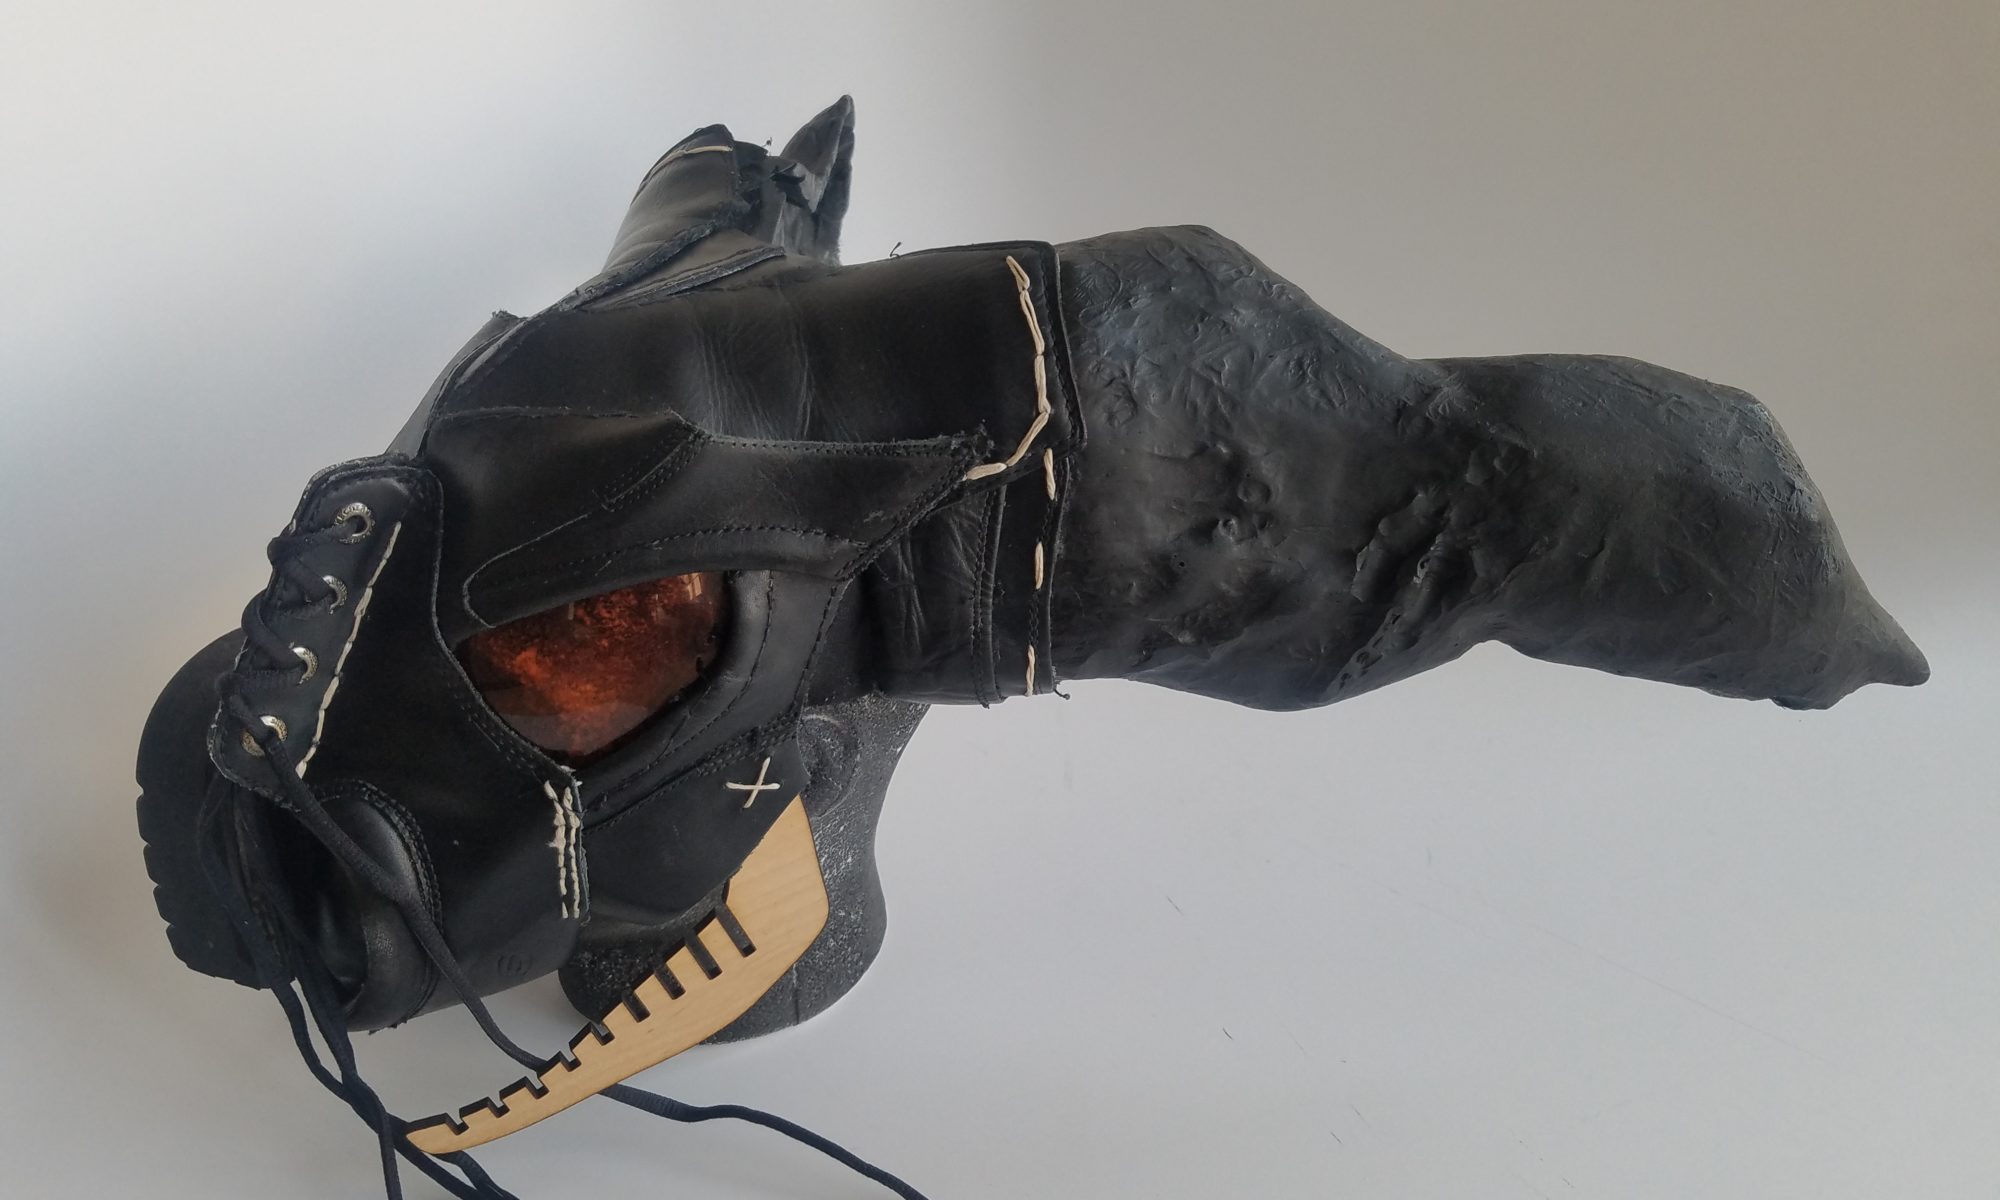
So you want to make a mask? Well here’s how I did it in a nutshell.
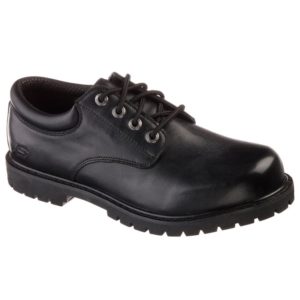
First, get your shoes. New, used, doesn’t matter as long as they are clean and not too complex. I got an old pair of these Sketchers. Don’t worry, if Sketchers aren’t cool now, they weren’t when I made these and I was able to cover most of the branding.
Cost: $15.00
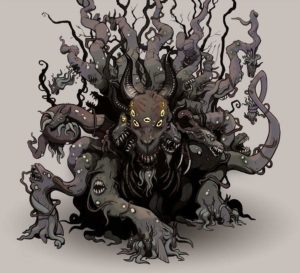
Next, find some inspiration. Have you been playing Behemoth not stop while telling yourself you’re not an edgelord. Maybe, try some Lovecraftian mythos. Too edgy? too bad! I went for Shub-Niggurath, The Black Goat of the Woods with a Thousand Young.
I liked the hircine aspect while not being too intensely Satanic. I also liked the added horns and eyes which could be added in the form of lights.
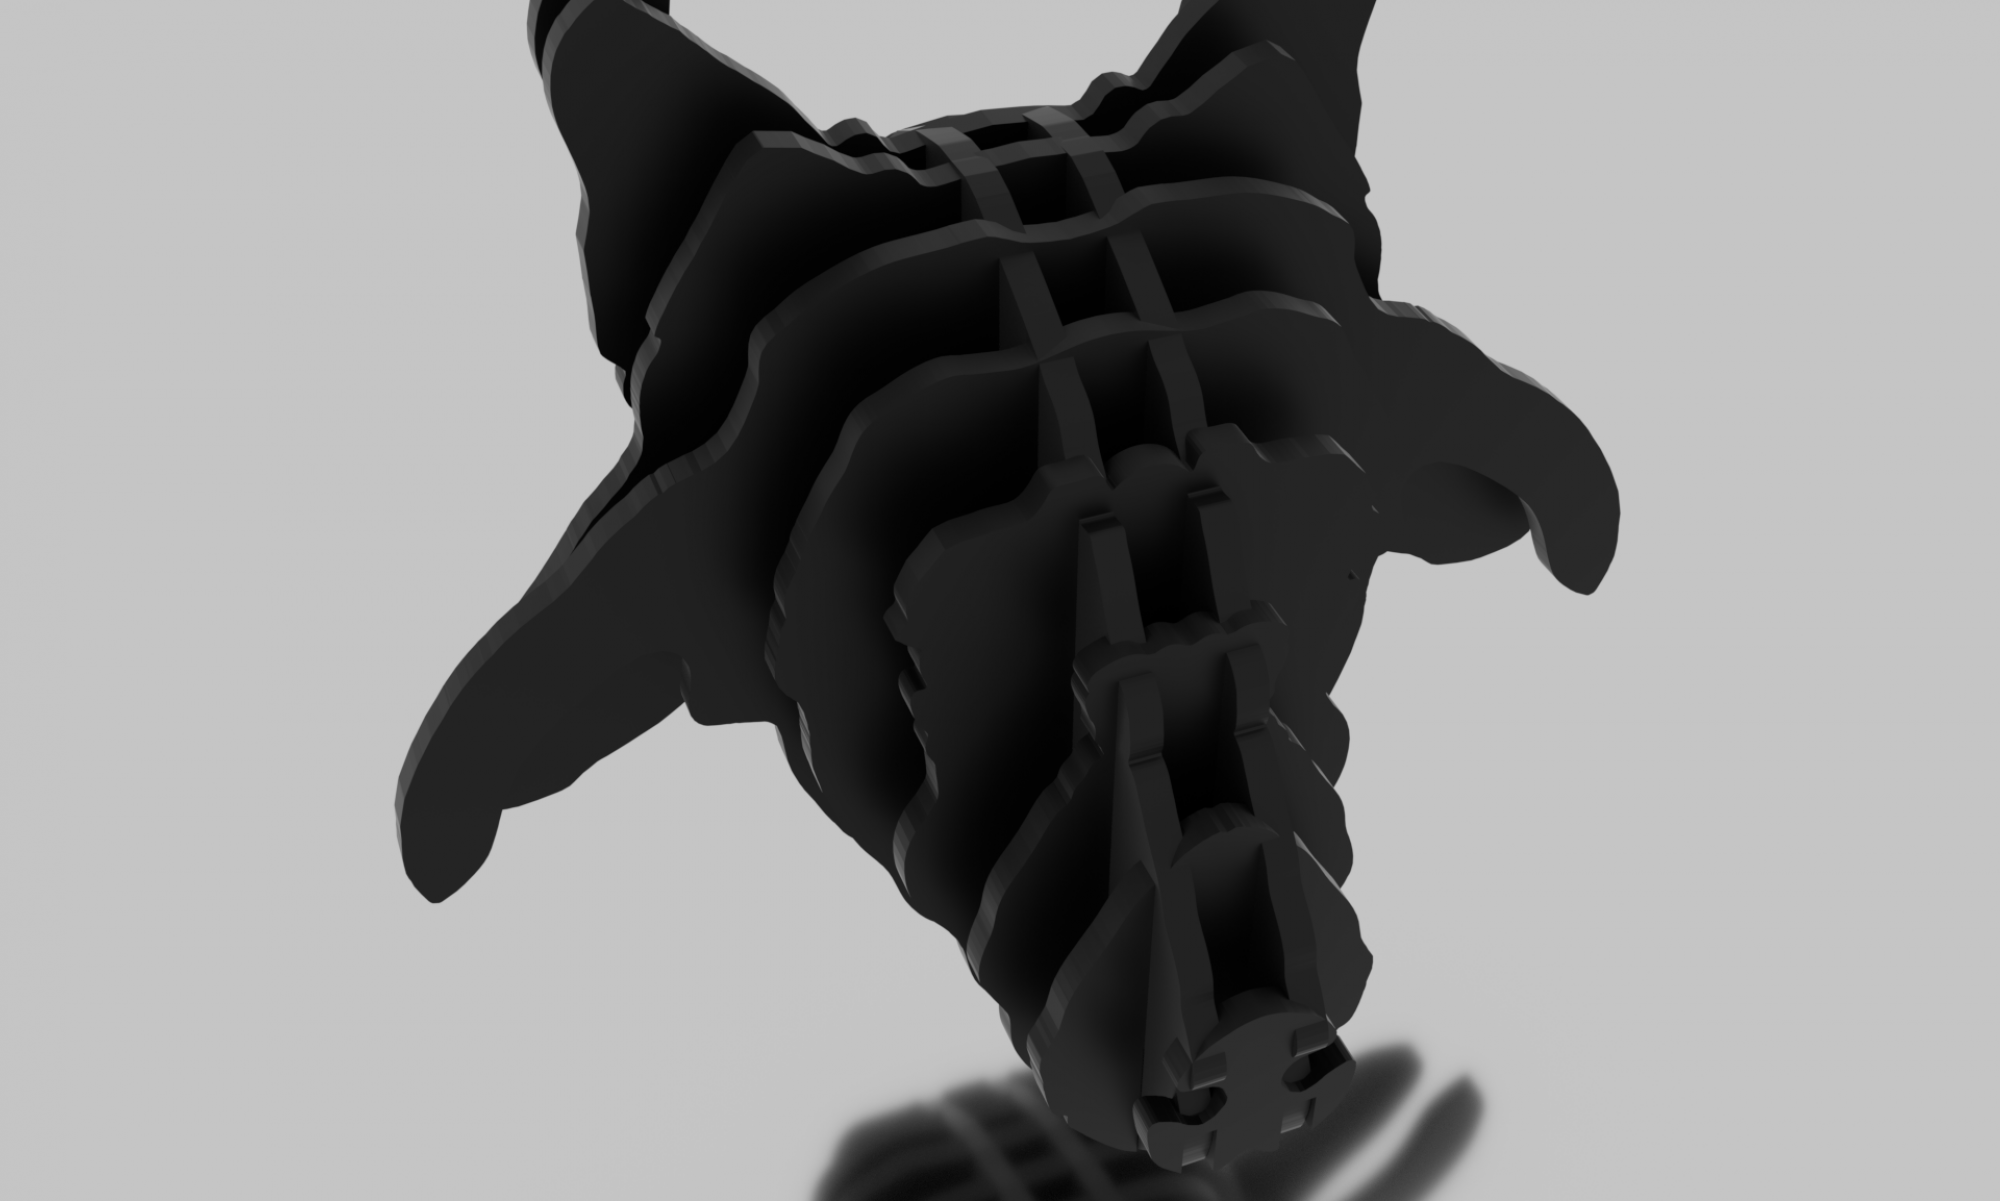
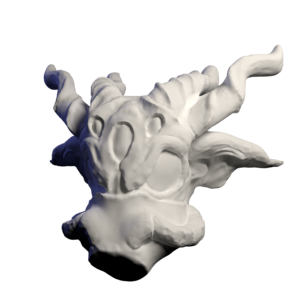
Next, make a sketch. Start with paper and pencil. It’s the easiest thing to use. If you want to step it up a notch and you can use some modeling software, do that. I used Blender to sketch the ideal mask: many eyes, many horns, impossible to fulfill.
Model of Mask
Now, slice apart your shoes. I started at the base and removed the sole from the leather. Next, take apart each panel and cut it to match its counterpart on the other shoe. I used two pairs of shoes for maximum material.
Next, map out the mask with the shoe parts. I started with the face and used the most interesting parts of the shoes to create the snout and eye sockets of the mask. The parts of the shoes should inform how the mask gets assembled. Trying to force the shoes to conform to the mask will inevitably lead to destroyed parts and extra waste.
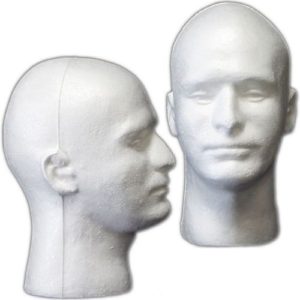
Next, get a Styrofoam head and hope you have a small head. I don’t, so I only used the head as a rough model. It worked well enough and it definitely helps map out the mask. It also assisted in storing and assembling later on.
Cost:
Styrofoam head: $7.00
X-Acto knife: $6.00
Cutting mat: $10.00
After the shoes have been disassembled and a rough map has been made of the mask, it’s time to start gathering the extras. The horns, eyes, teeth, and extra details of the mask. I opted for a wooden jaw bone and fiberglass horns as well as plastic eyes. While fiberglass horns do look cool, they are a pain to make and real horns are probably more functional and easier to get.
Cost:
Ski mask for eyes: $15.00
Wood for jaw bone: $2.50
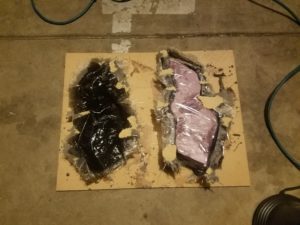
If you still want to make fiberglass horns, make sure you have a respirator, goggles, and gloves. To begin making fiberglass horns, I used this video and this one. As suggested in the second one, I used insulation foam and a hacksaw to create a plug. As I don’t have a spare car battery to make a hot saw, I used a propane torch after cutting the foam with a hacksaw to seal it. Next, I taped the plugs to a board and started layering the fiberglass and resin.
In order to make the resin black, I used black 100% strength acrylic paint. Other pigments may work as well. I tried oil paint but it didn’t mix with the resin and came out uneven.
Cost:
Resin and fiberglass: $50.00
Foam: $30.00
Respirator: $40.00
Googles: $25.00
Black paint: $7.00
Fiberglass horns after finished drying
Make sure you do all this in a well-ventilated area, preferably outside. Additionally, the fiberglass resin needs to be mixed and stored at room temperature so working outside in the cold may cause the resin to solidify prematurely or cause the fiberglass to crack while drying.
Now that all the parts have been assembled, its time to fully assemble the mask. I started by stitching the panel that goes around the back of the shoes together and the same parts from the other shoe around the eyes. Next, I drilled holes into the horns and glued strips of leather to the base of the horns to create a fluid transition from the leather mask to the horns. I then attached the tongues of the shoes to the base of the horn and the forehead of the mask.
Make sure that the thread you are using is sufficiently strong to hold the leather together. I glued the pieces with Bish glue then punched holes with a large tack before stitching the pieces together. I also tried to add two lines of stitching to each seam for added strength. In addition, to the thread being functional, it can also be decorative. I used a waxed beige thread to add accents to certain parts of the mask.
After adding the horns, I added more leather between the tongues on the horns so they would rest evenly on the head. I then attached the front of one shoe into the snout of the mask.
For the ‘filter’ of the mask, I used the heel of one of the shoes. The rubber of the sole was hard to work with and required a lot of sawing and sanding to look right. It was then screwed onto one side of the mask.
Next, it was onto the eyes. I split the ski mask in half and traced the eye holes onto the halves. Using a drill press, I added the stitching holes and stitched them in.
Lastly, I added the jaw bones I had laser cut earlier. These, I created using similar techniques to this trophy head
Problems
As originally intended, there would have been lights in the eye sockets as well as behind the horns. Maybe, a speaker would have been added to the front. Unfortunately, my head as was too big to fit all that and my head.
I also ran into problems with the symmetry of the mask. The parts were hard to work with as most of the leather had an insulation component which made hole punching an inexact science.
Lastly, there was the problem of cost. the whole things cost around $200 dollars including the tools I had to get. For a project of this size, the cost could have been reduced if there were some patterns to follow.
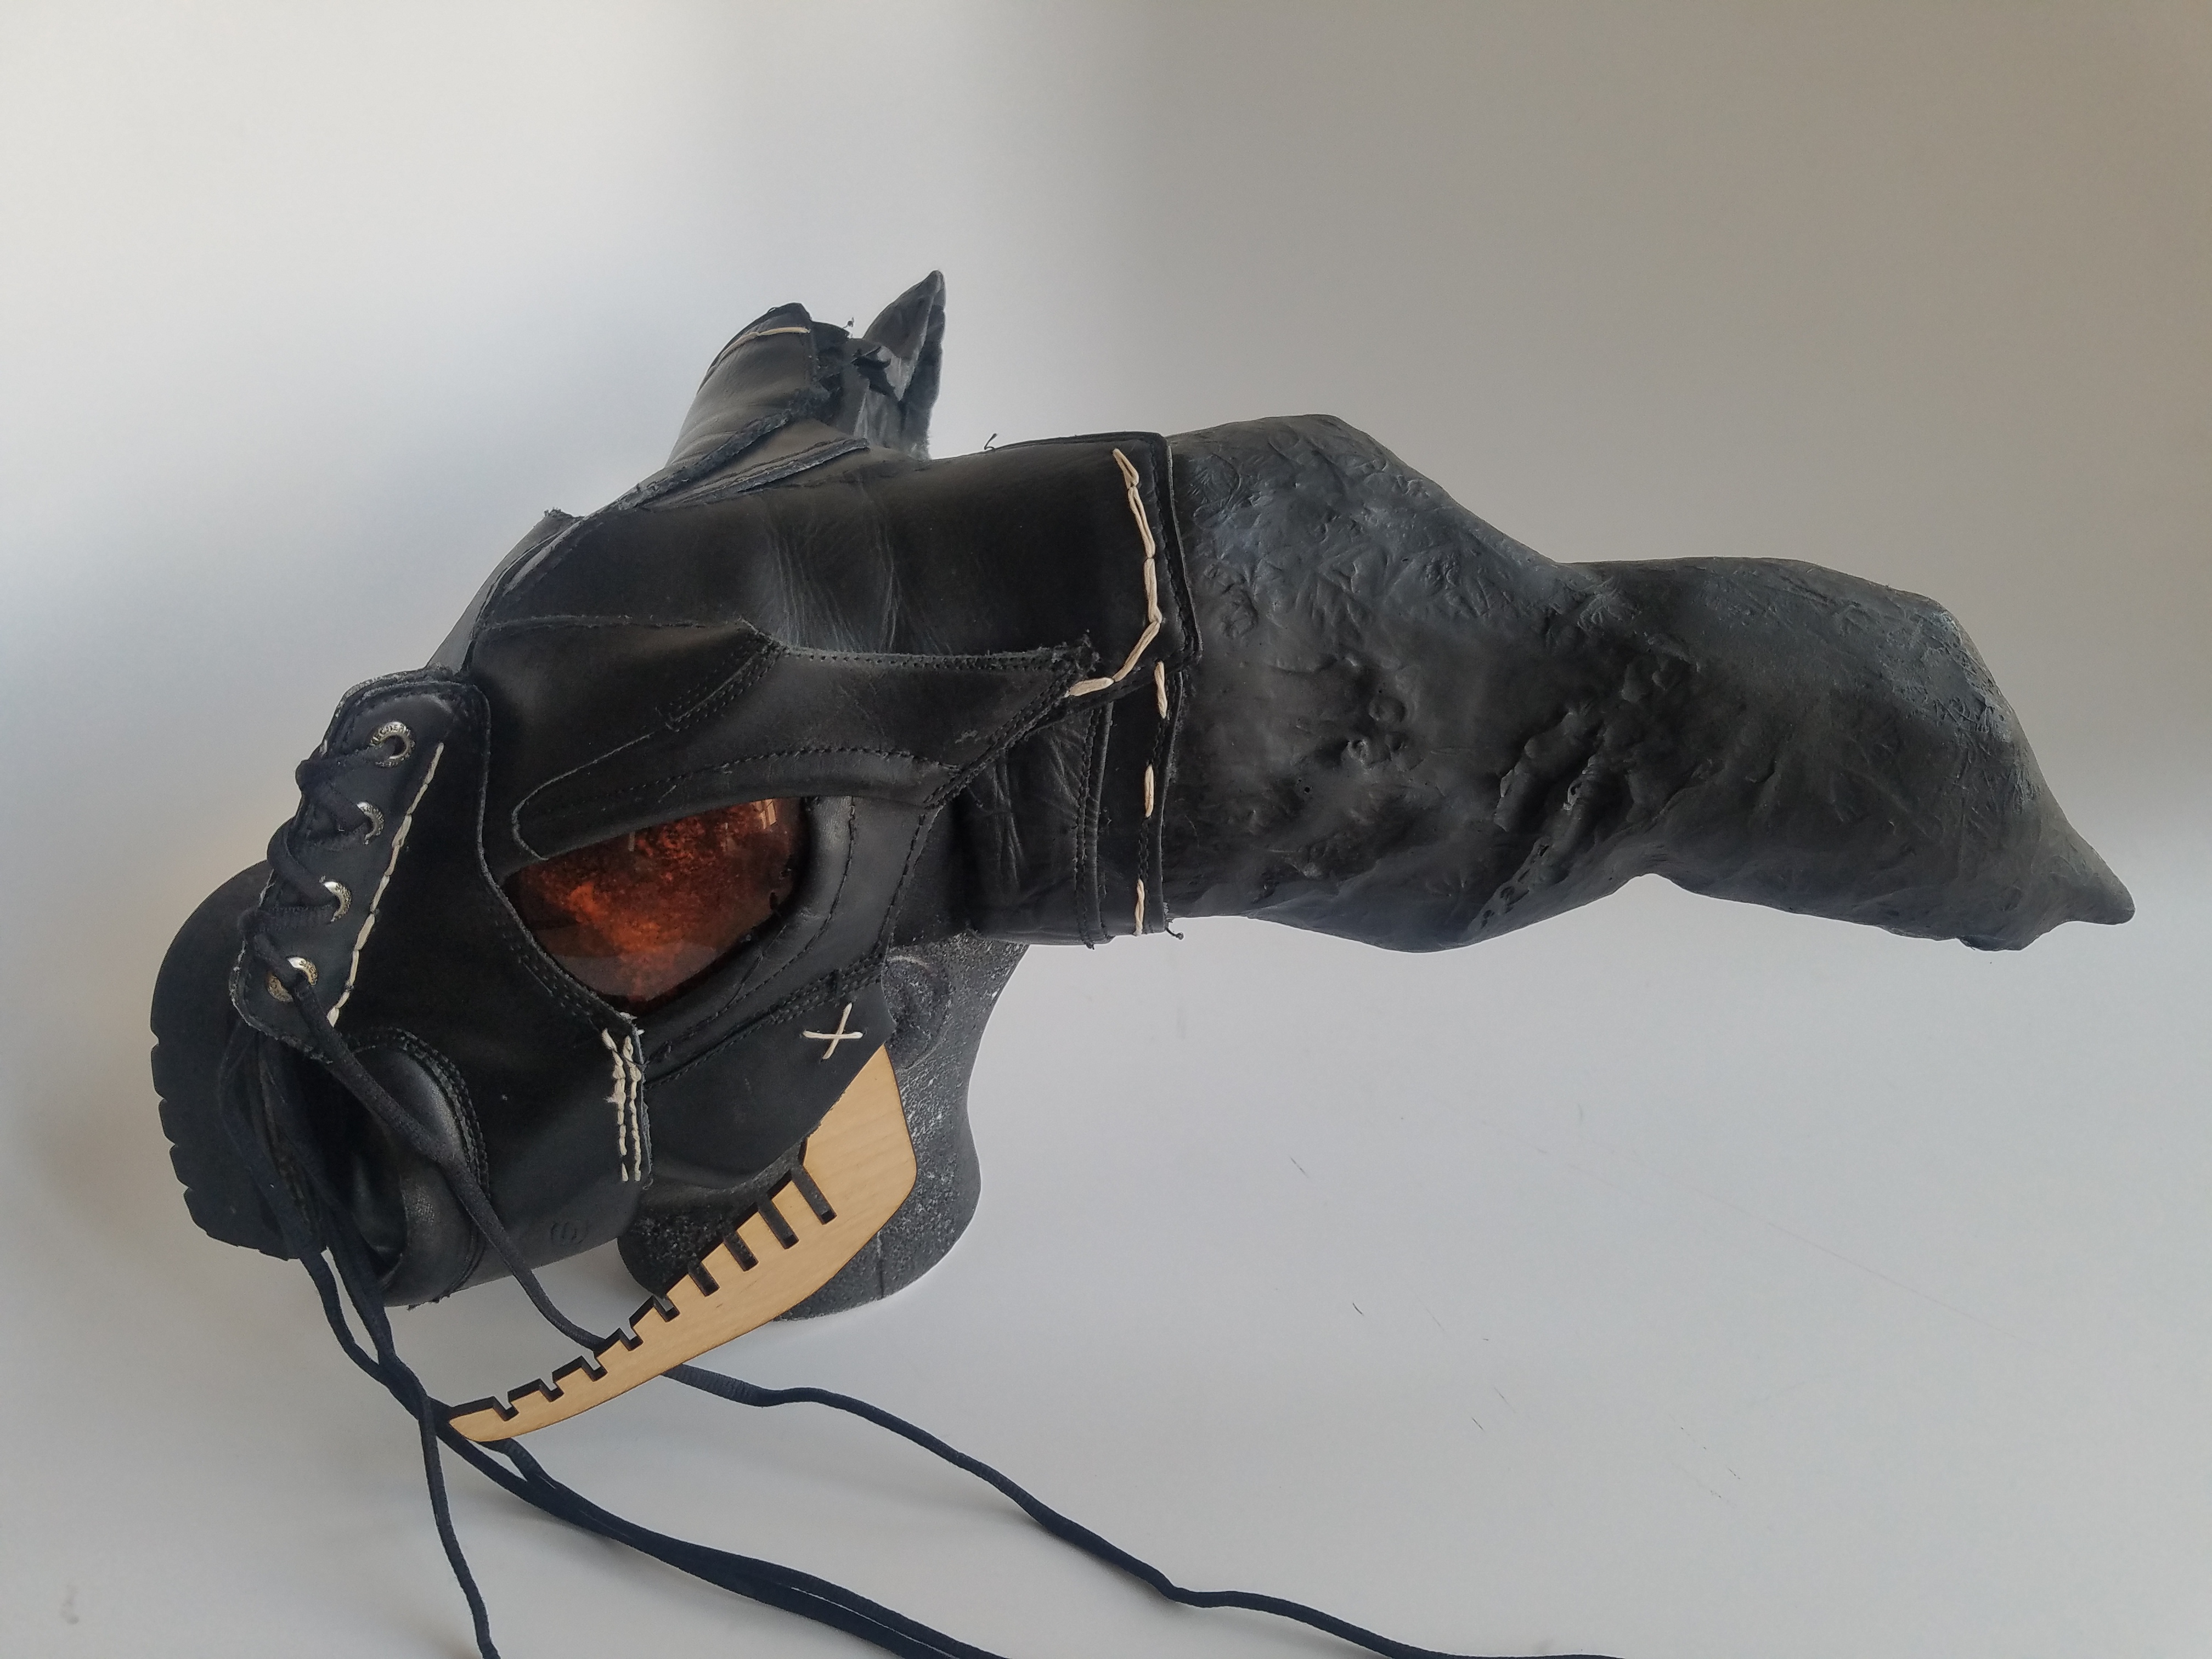
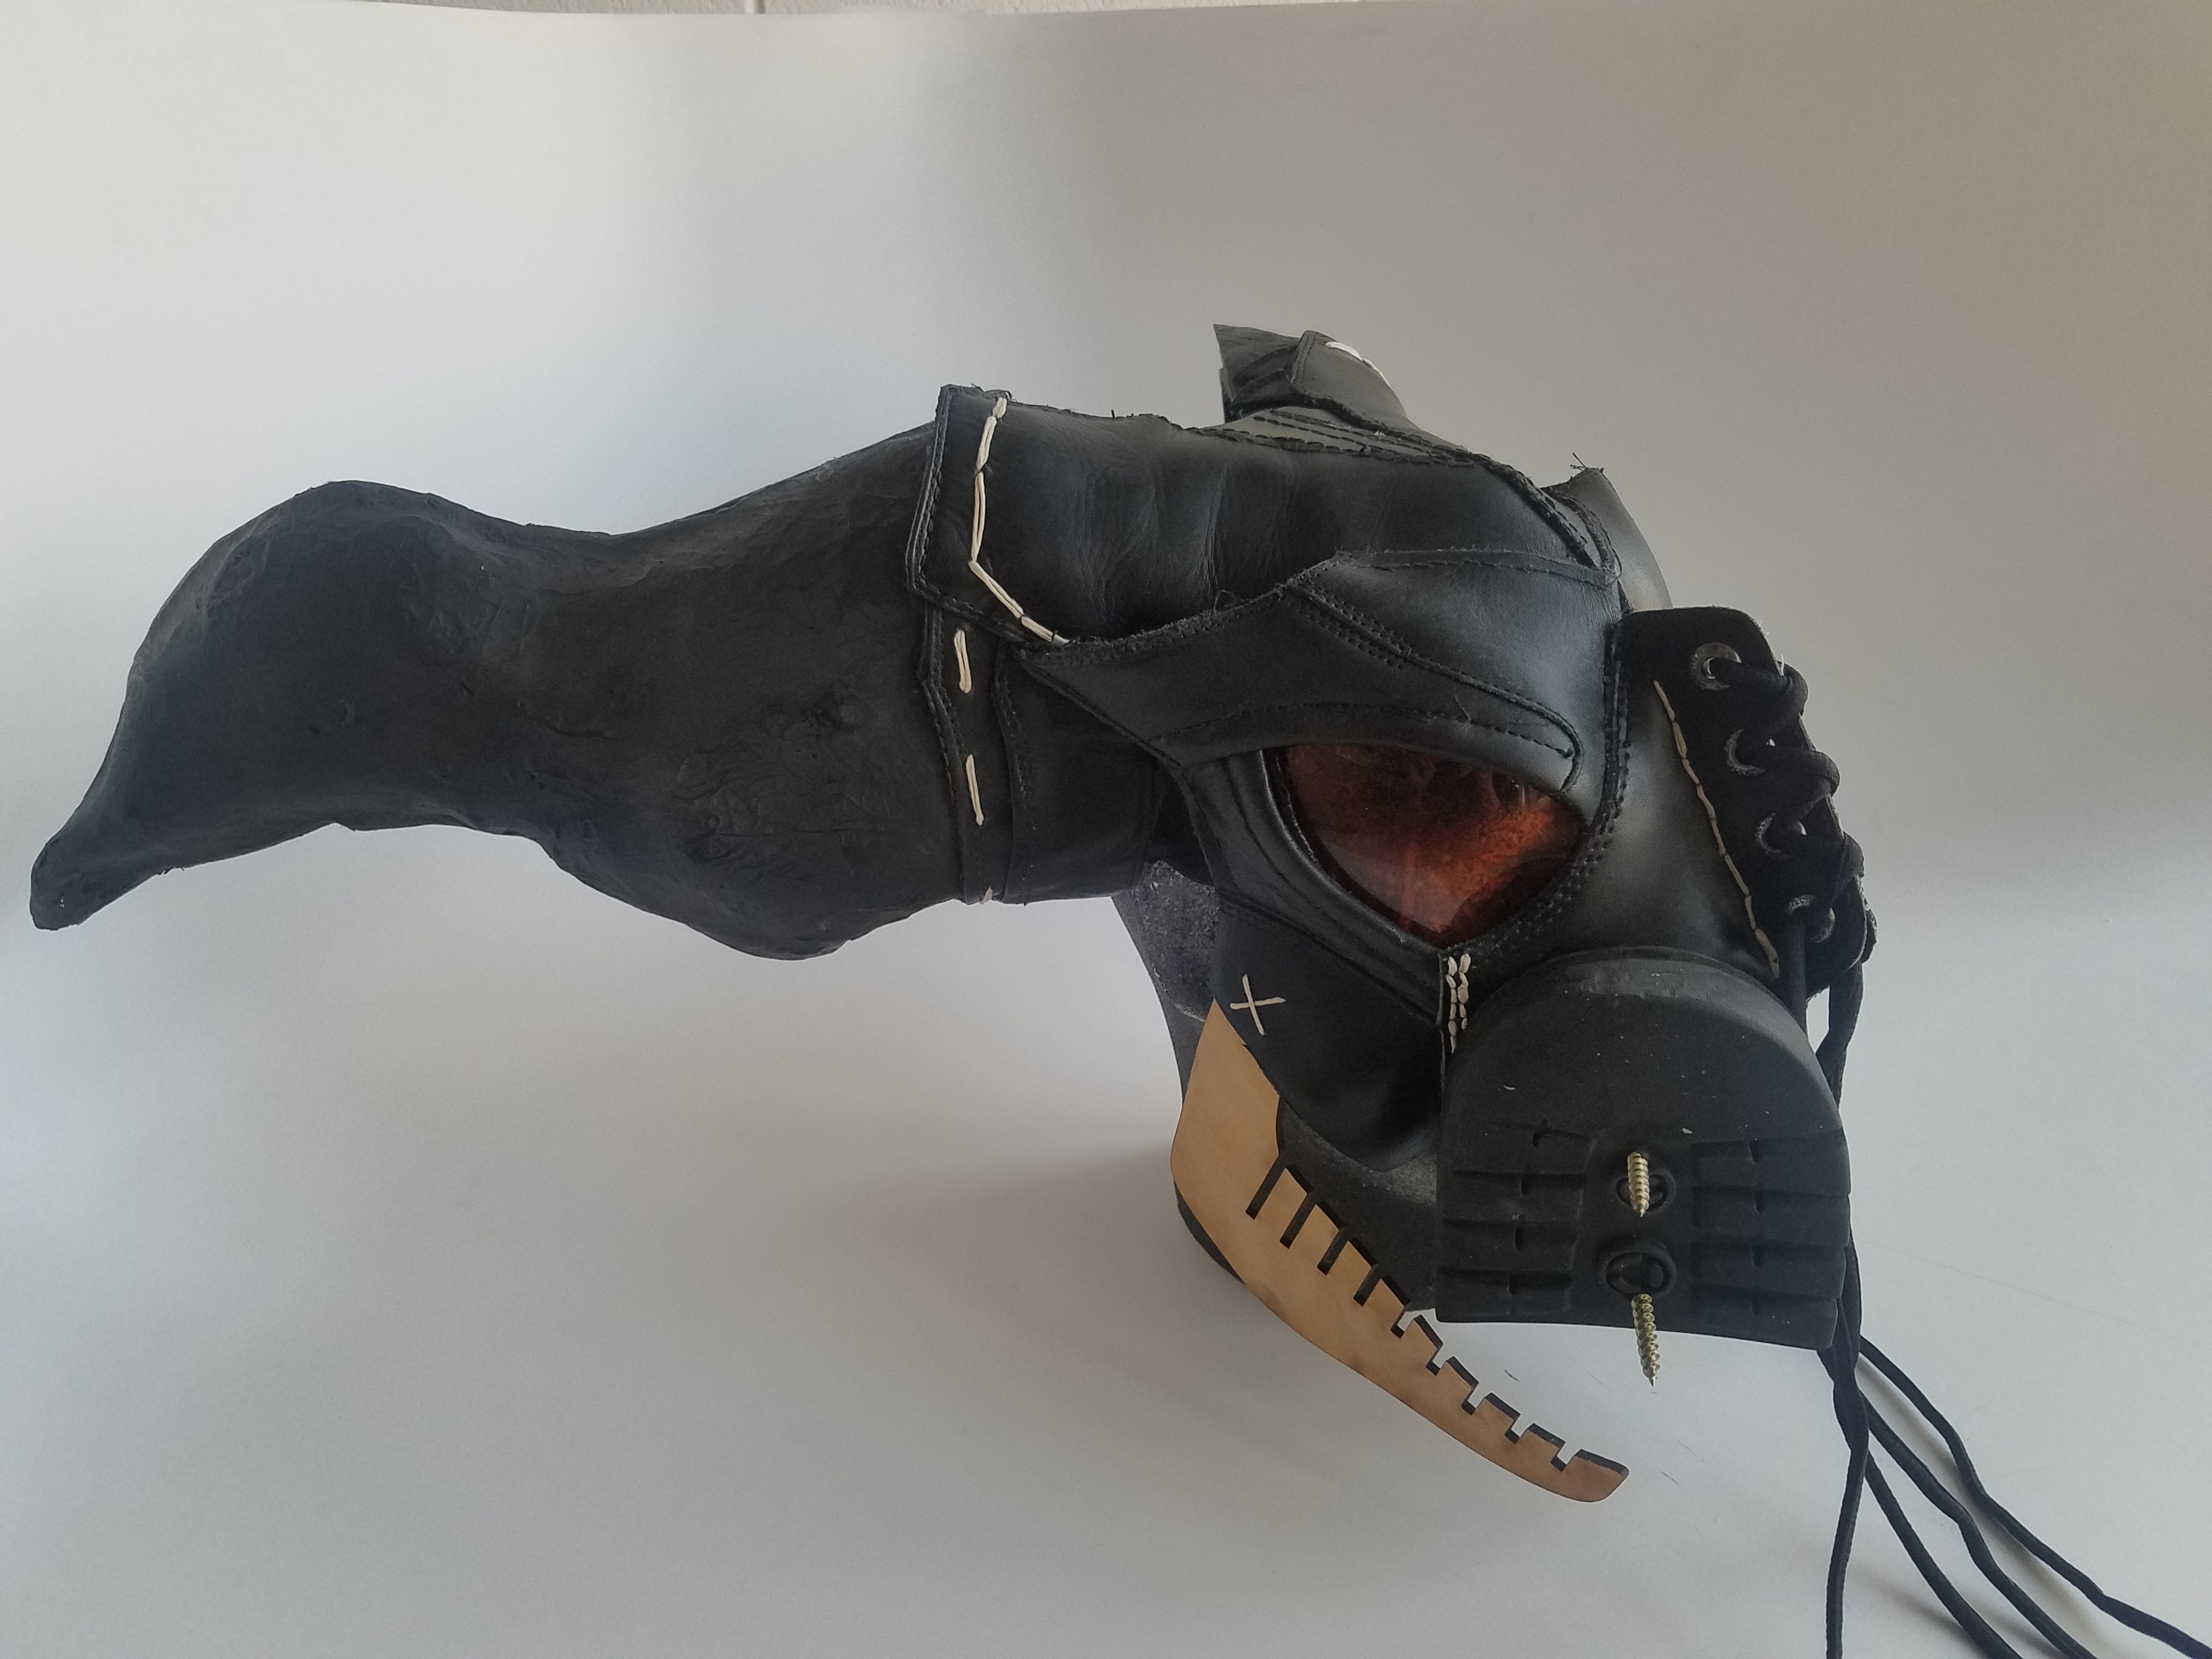
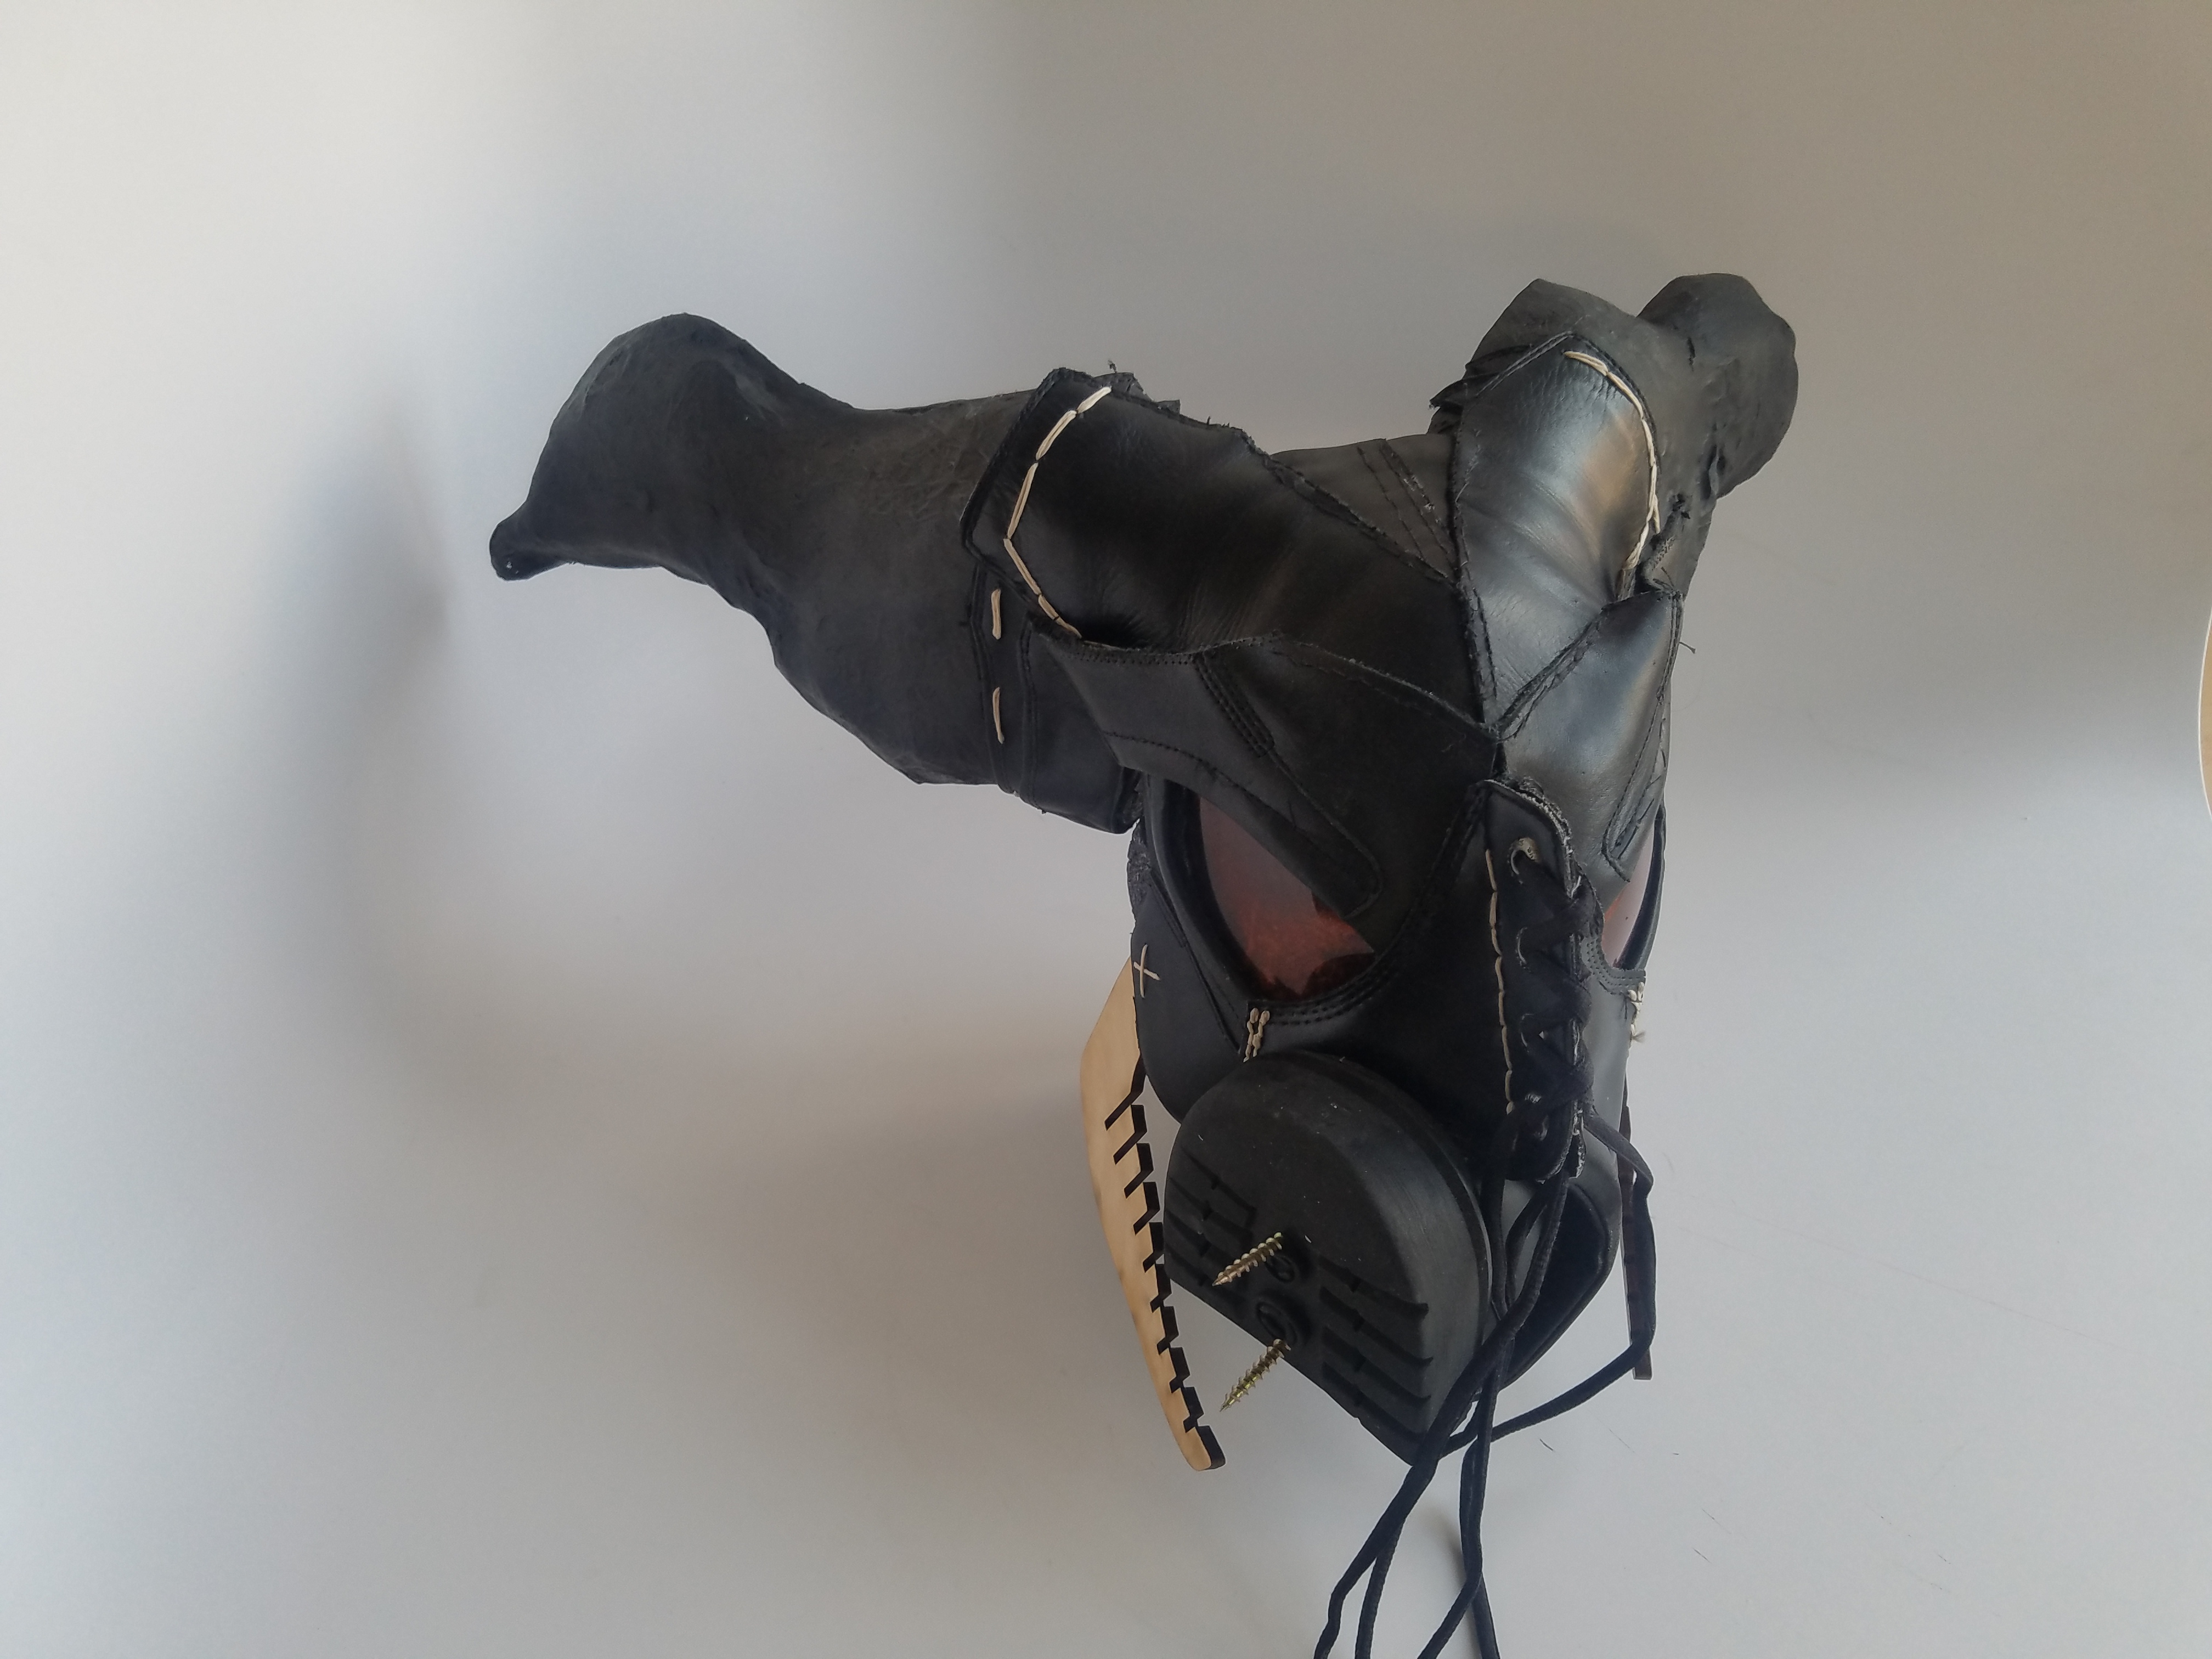
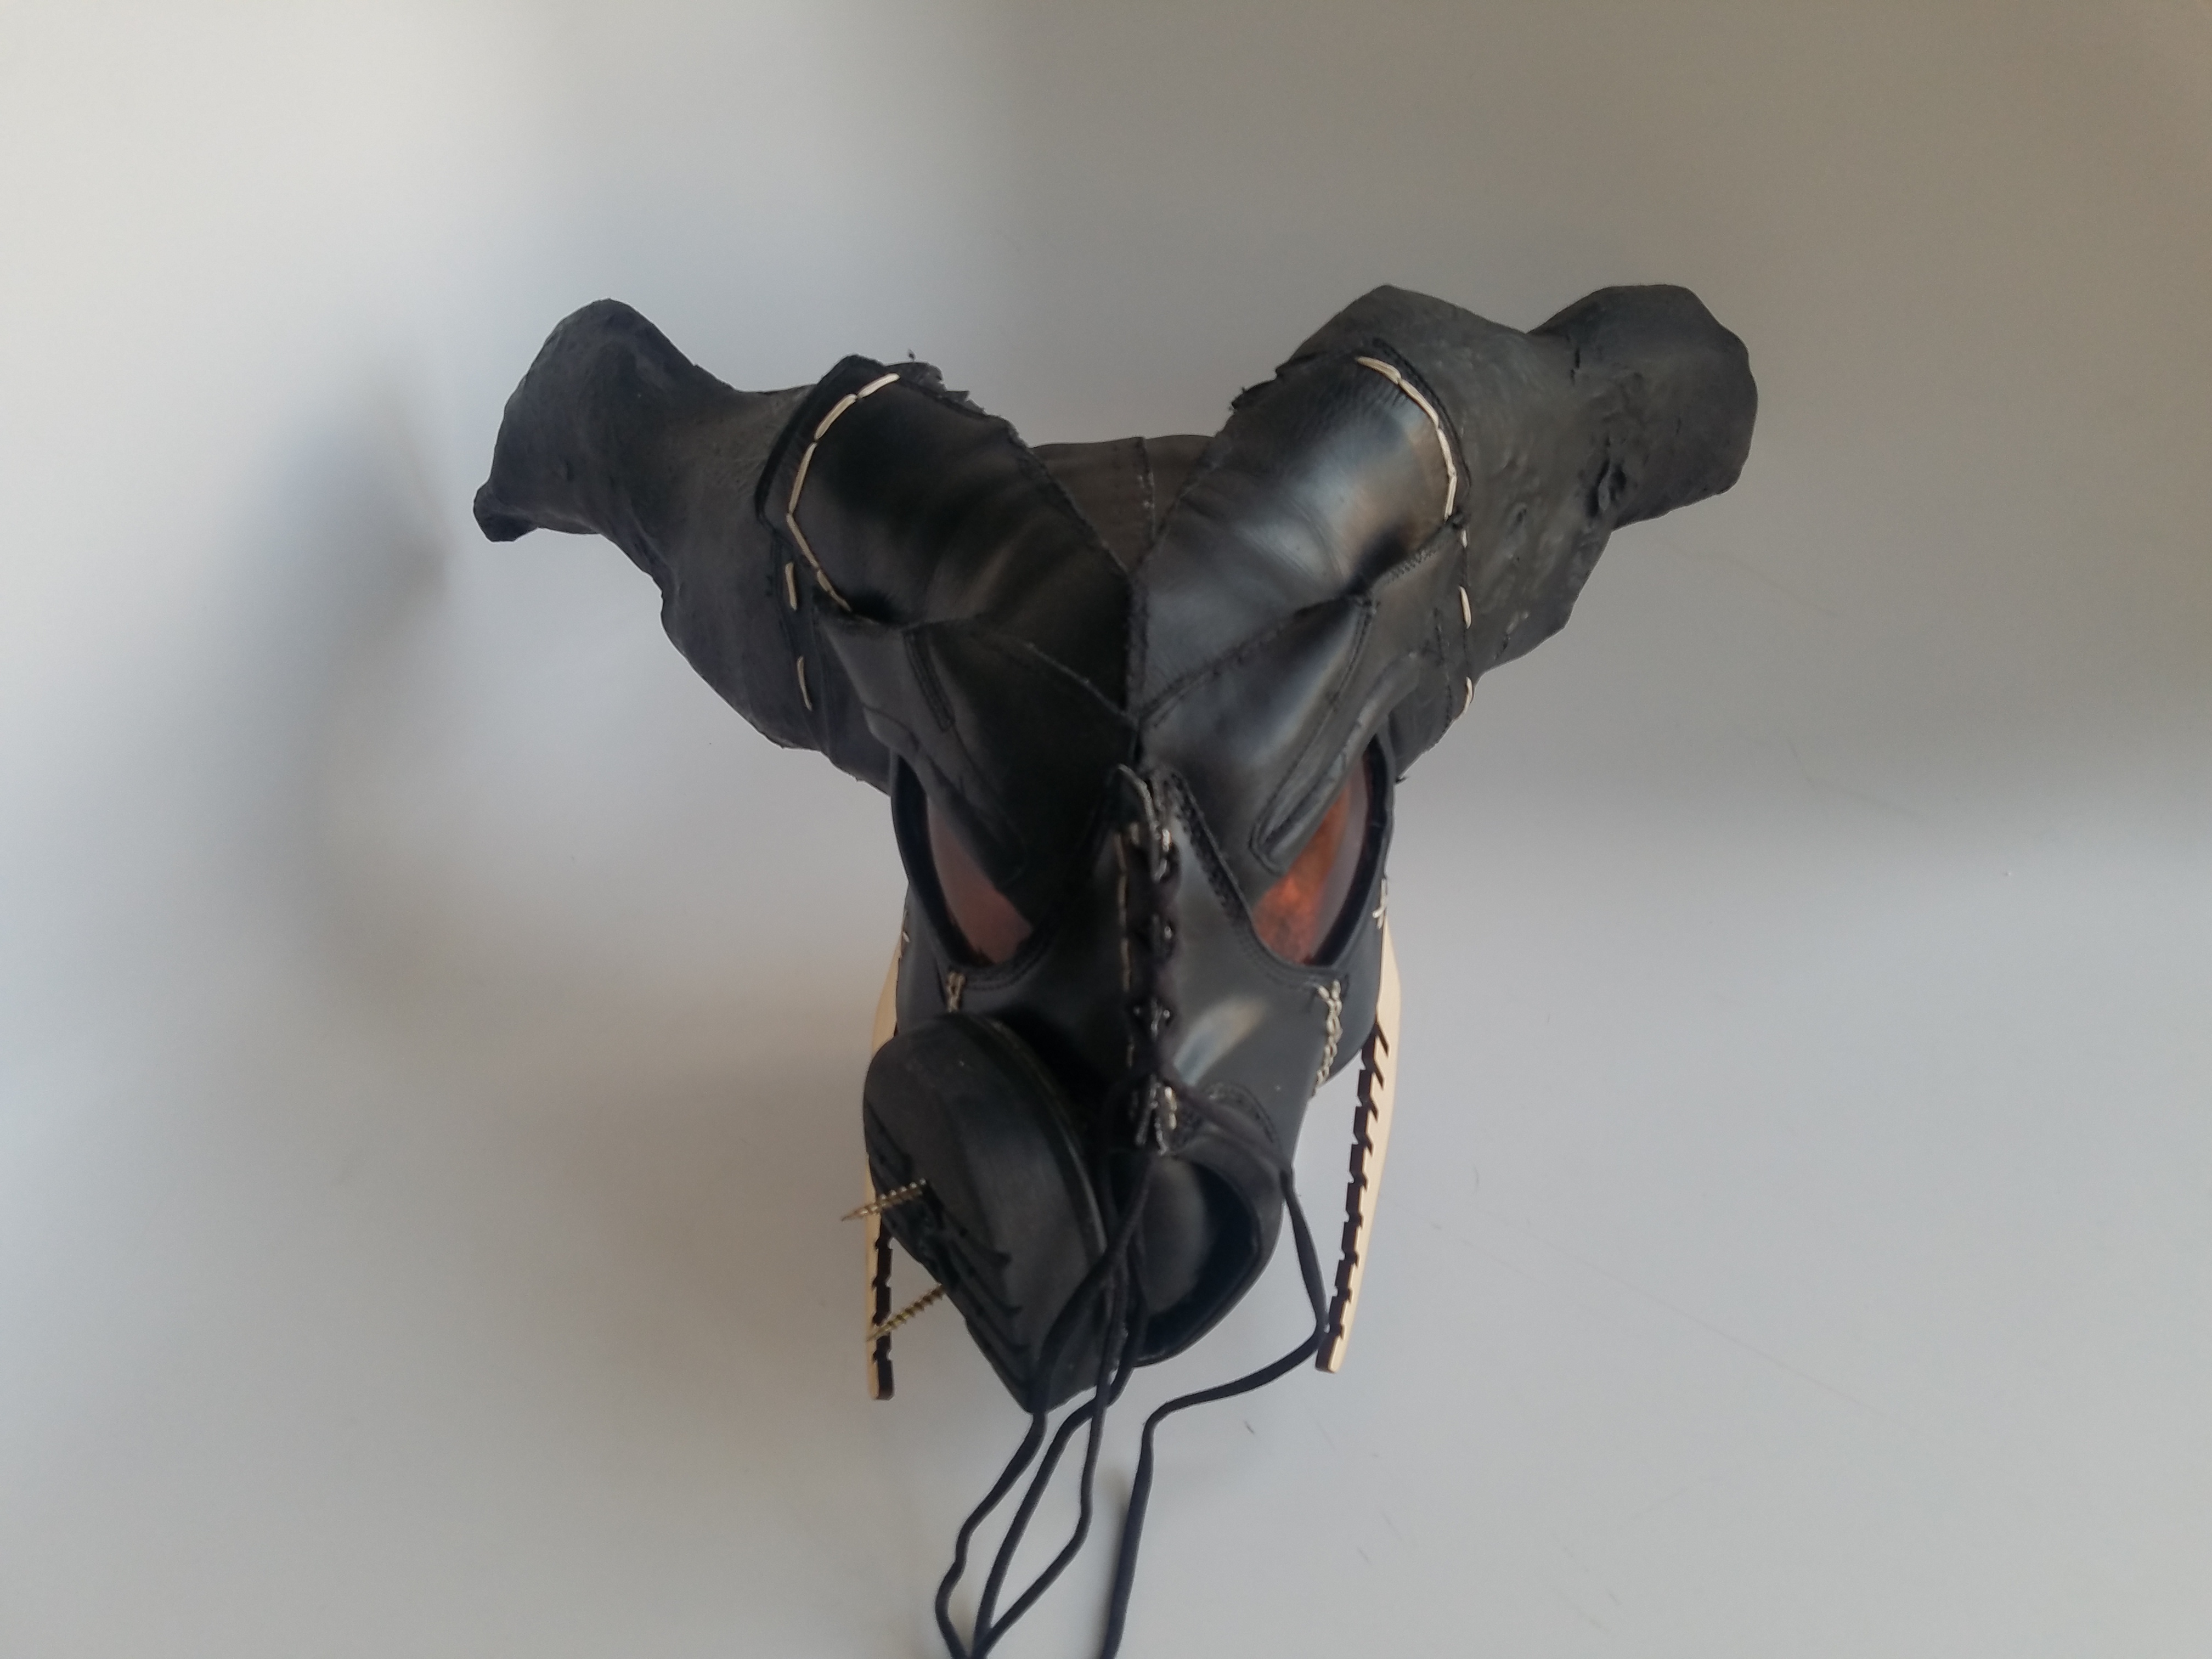
Final
Name: Sold Soles
Tagline: For when old soles.
Artist’s Statement: This piece is inspired by the work of Freehand Profits as well as my eternal love for Lovecraft. Most parts of the mask are made from old and recycled objects. It speaks to our consumerist culture that demonizes the waste as a byproduct of society as opposed to materials to be utilized.
The finished product. Or at least as far as I was able to work on it without tearing out my hair in frustration at the run around between Google’s documentation and what developers were saying on Stack exchange.
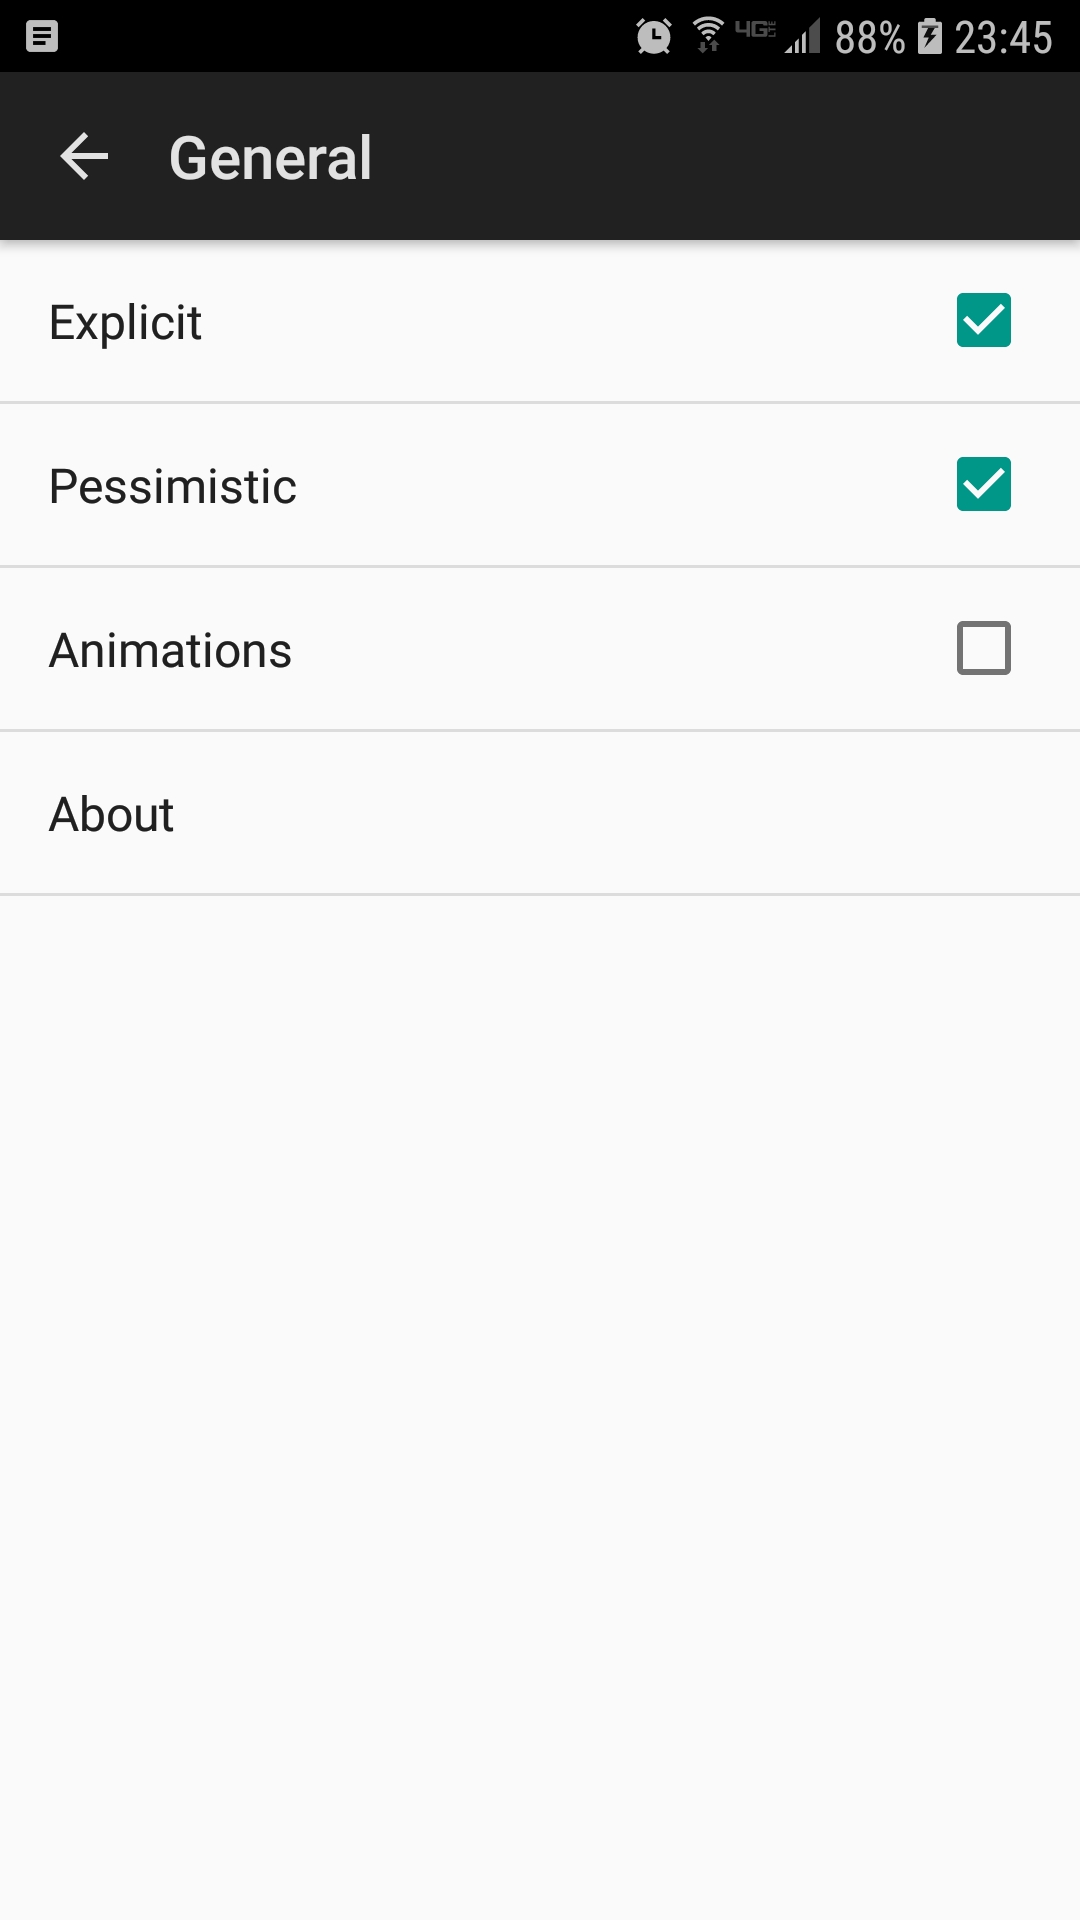
My app turned out fine except for the inability to retrieve the SharedPreferences. I added a second Settings Activity from the built-in menu assuming that it would have nice documentation and pointers on how to get it to work. There was some. Unfortunately, it mostly said that it should automatically store all values. Somewhere between that and retrieving them, something broke.
I searched across the Internet for someone to point out how it all could be assembled, but everyone seemed to be asking some slightly different question with slightly different answers in response. So, like a good programmer, I tested them all. Nothing seemed to work. And now I’m left in amazement that Google didn’t have some foresight that people might not have hubris and use their pre-constructed Activities.
The final look of the app was about what I had hoped for in the beginning. Nice minimalistic. Now if only the damn thing worked.
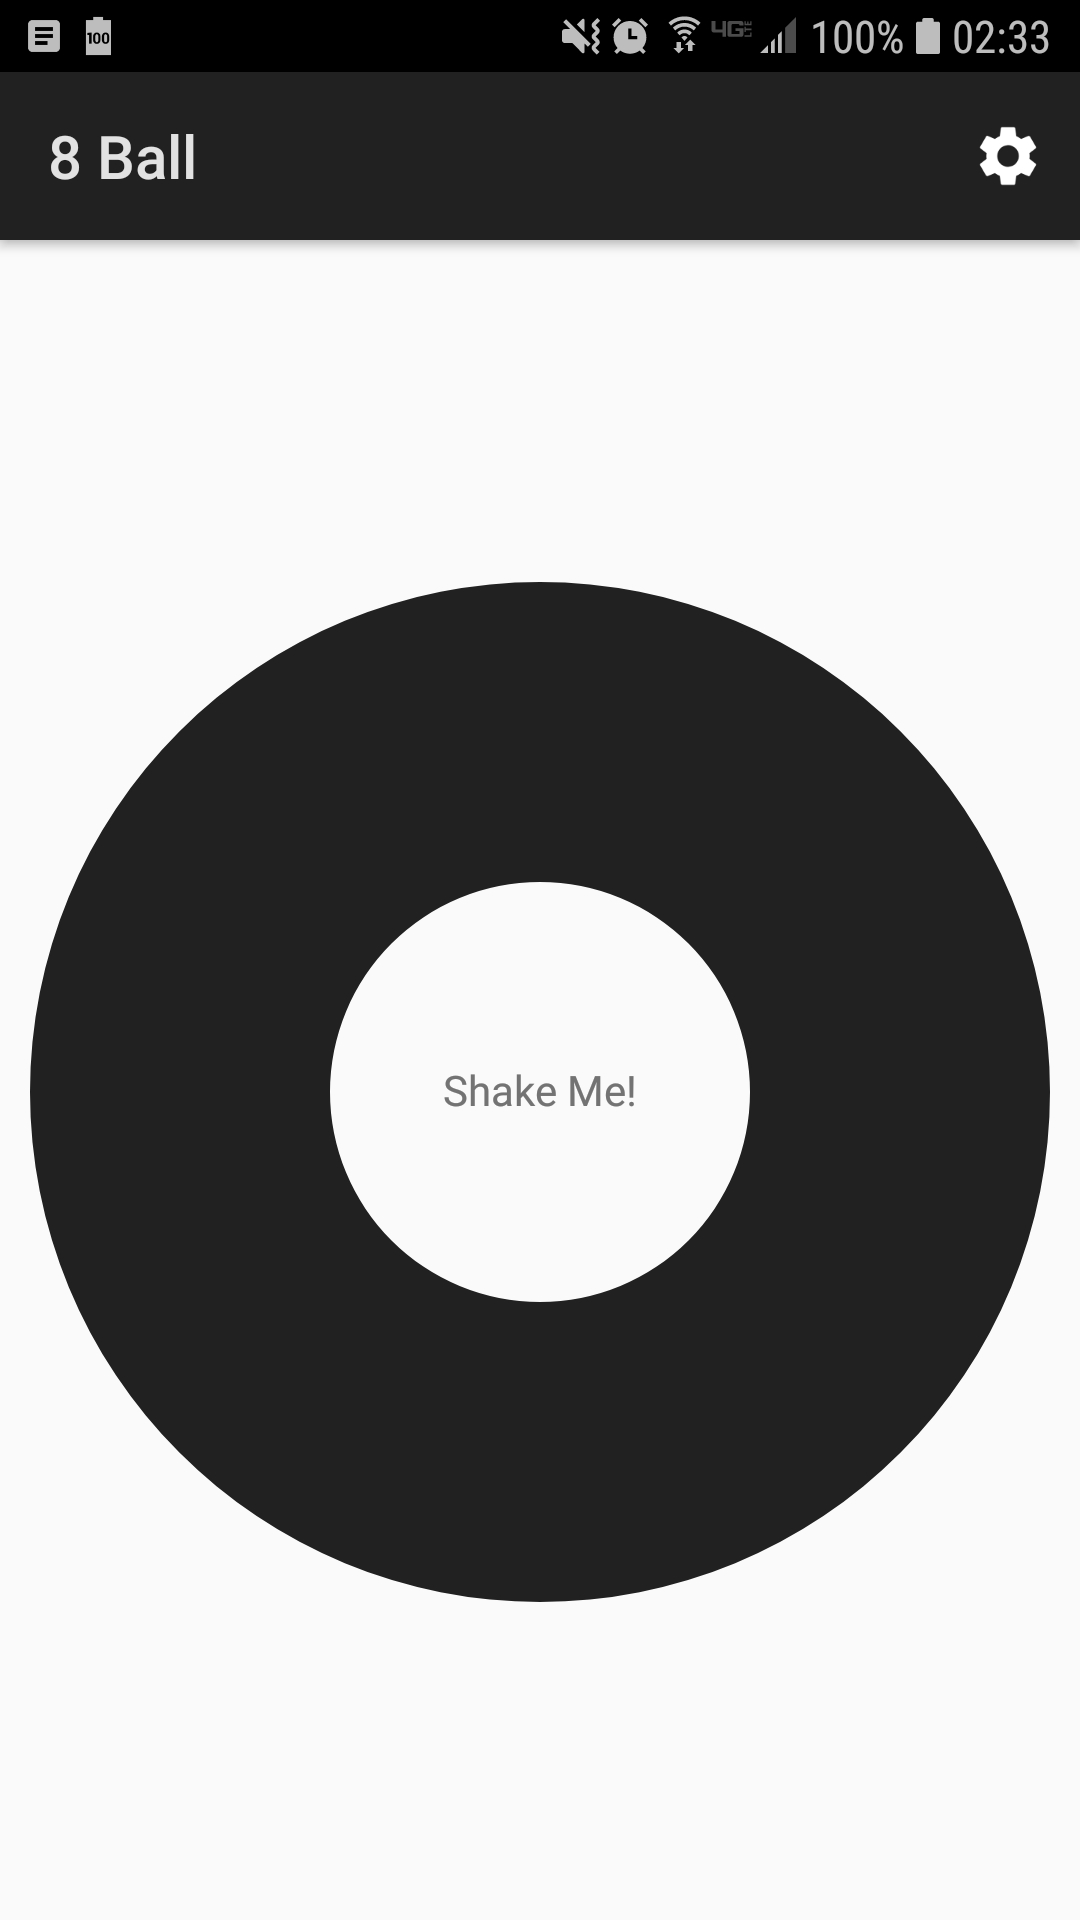
The final project turned out about as well as I hoped for. The sound cuts out and the timer stops when the app is closed. The colors I was also able to change to white on black which makes the app less inviting. I was also able to make the sound smooth even when all sliders were in use.
The coding is a bit unconventional. Instead of using the buffer from the audio engine built into swift, I created timer to add a new version of the audio clip after 4 seconds which will create a memory leak due to the clip being a tenth of a second longer than the timer. Originally, I stopped the audio player and restarted it each cycle but the delay of stopping and starting made the playback choppy.
The oscillation is also hacked together. The audio engine should be set up with an oscillator node but due to it complexity I created a timer that changes based on the volume and, using a sine wave, updates the volume every .1 seconds.
Going forward with the app, I would like to make the sound modulation better as the current sound becomes a whine when put up to higher frequencies. I would also expand the button area to encompass more of the screen. I would also like to add multiple frequencies that the user can choose from instead of modulating a single sound. Lastly, the app should tack study time and give a report based on the persons study habits and give advice to study more, study less or invite the user to get a different app if they are using it for sleeping.
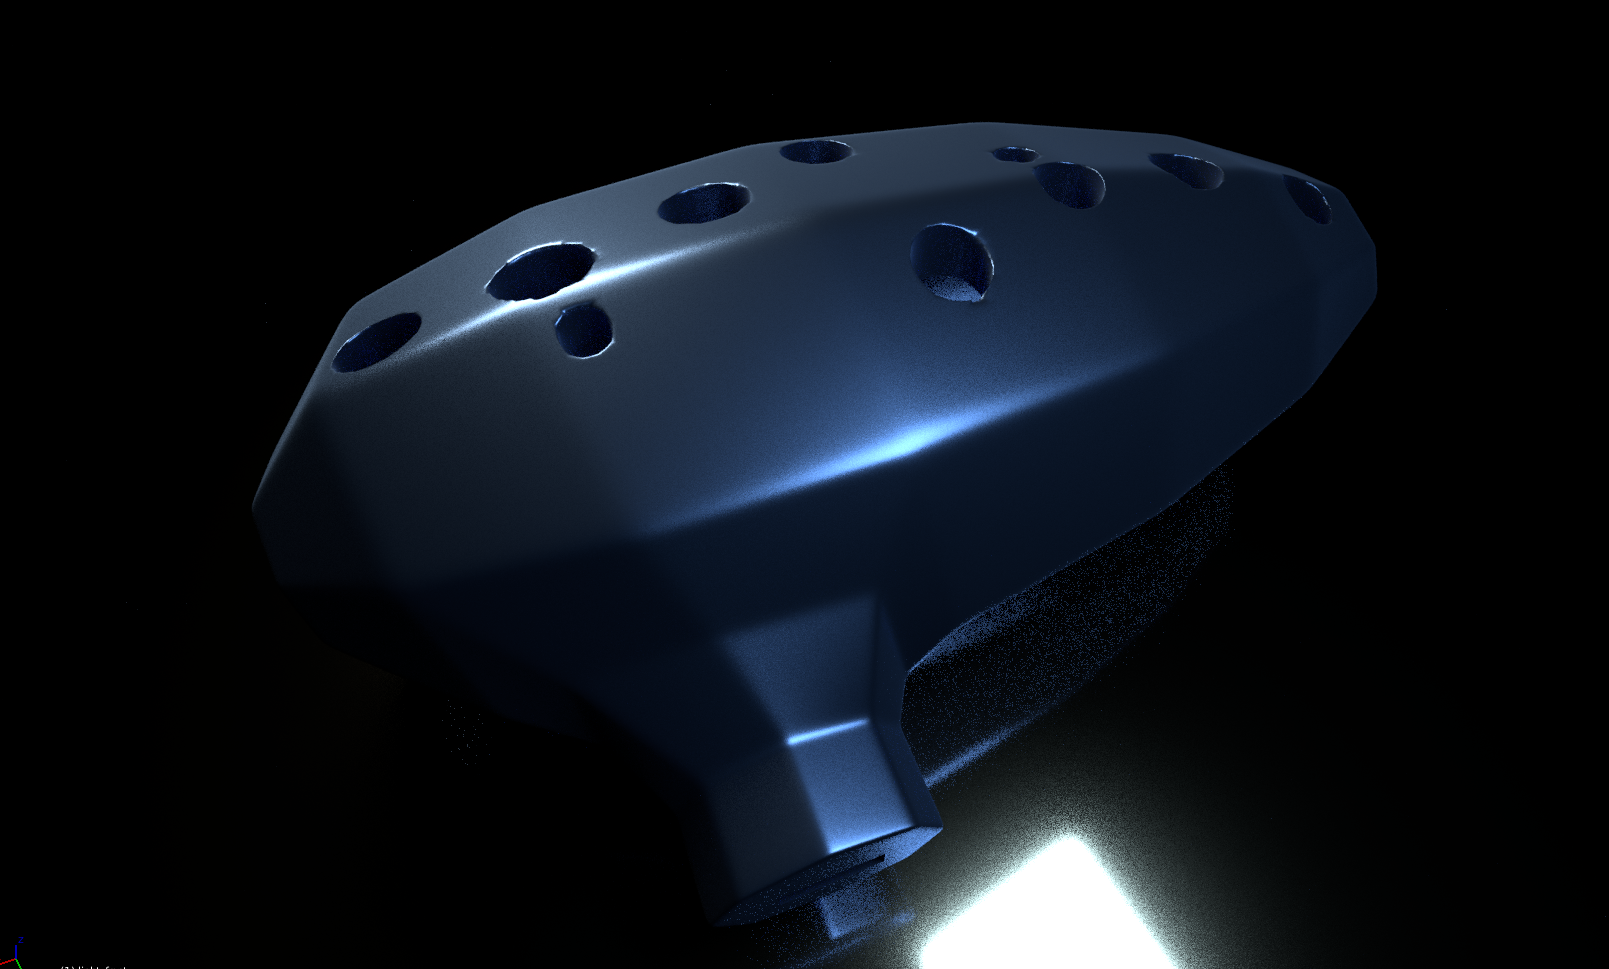
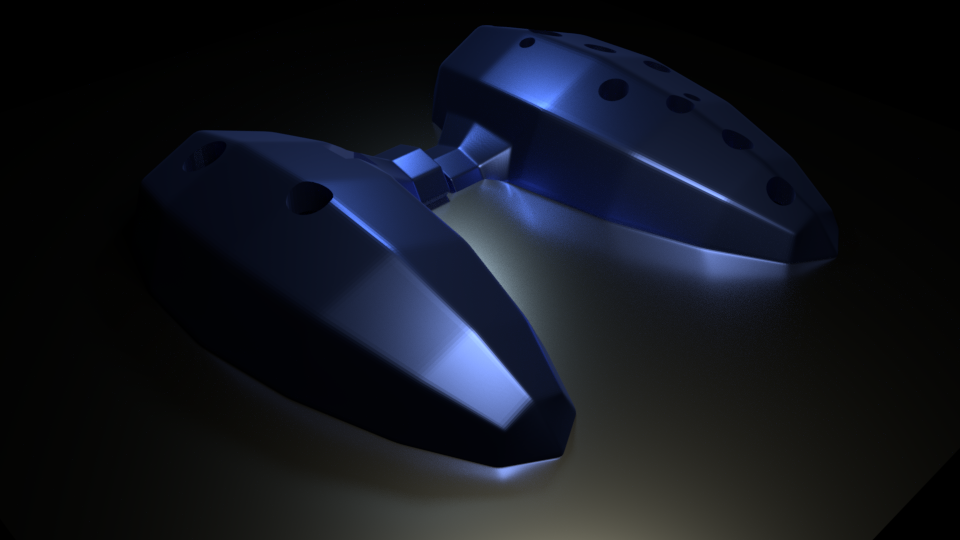
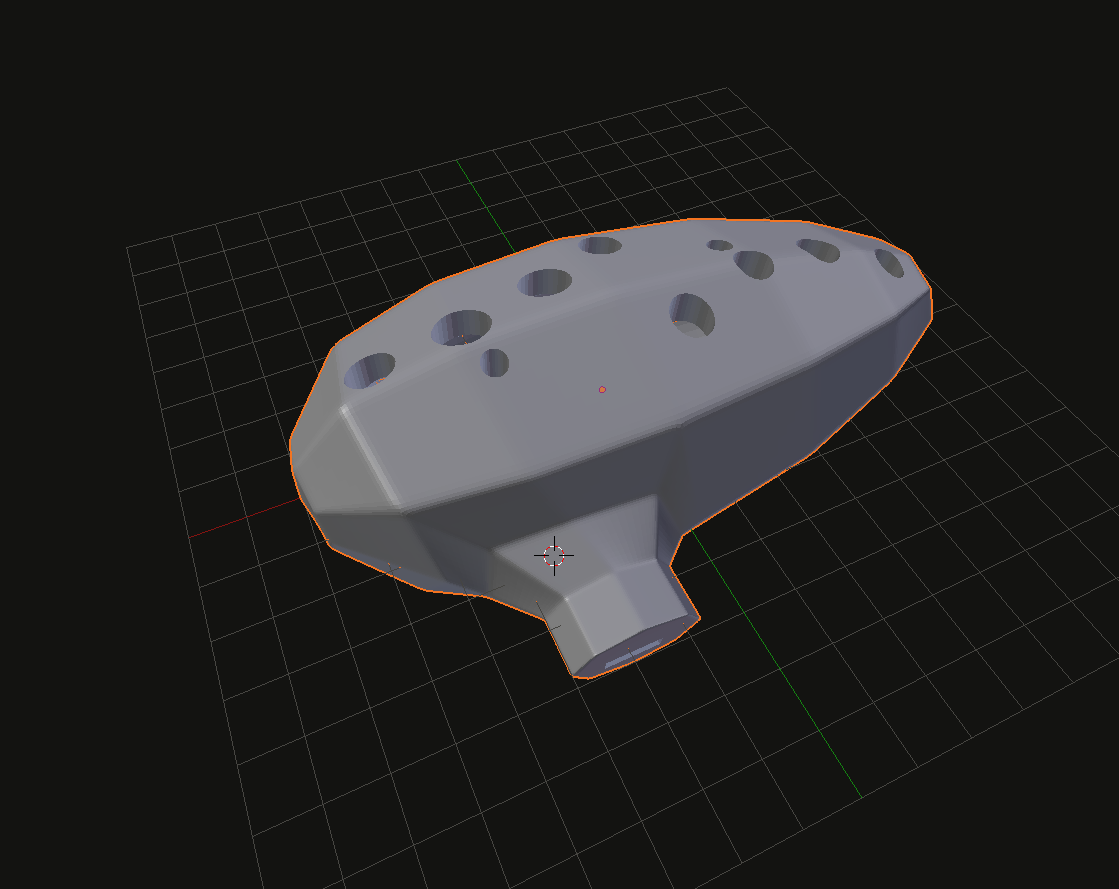
Artist’s Statement: We were inspired by the Ocarina from the Legend of Zelda game, Ocarina of Time. The one we made has twelve holes instead of the game’s one which has 8. We also tried to make the object look like it was sculpted in a 3D Program and left it with a geometric outer form. The geometric outer form provides a more exact shape for 3D printers to use and is a variation on the classic form. We split the model into two in order to print the Ocarina more easily, due to the fact that 3D printers cannot easily print at a 90-degree angle. We liked the idea of creating a usable object instead of an artistic sculpture. The Proto-Ocarina will hopefully be playable; however, it will likely sound like a kazoo because of itsconstruction material and the inaccuracy of the modeling program. The 12-hole ocarinas are designed to work on a pentatonic scale and would sound good no matter what notes are played. Unfortunately, the Proto-Ocarina will likely be off-key.
Model:
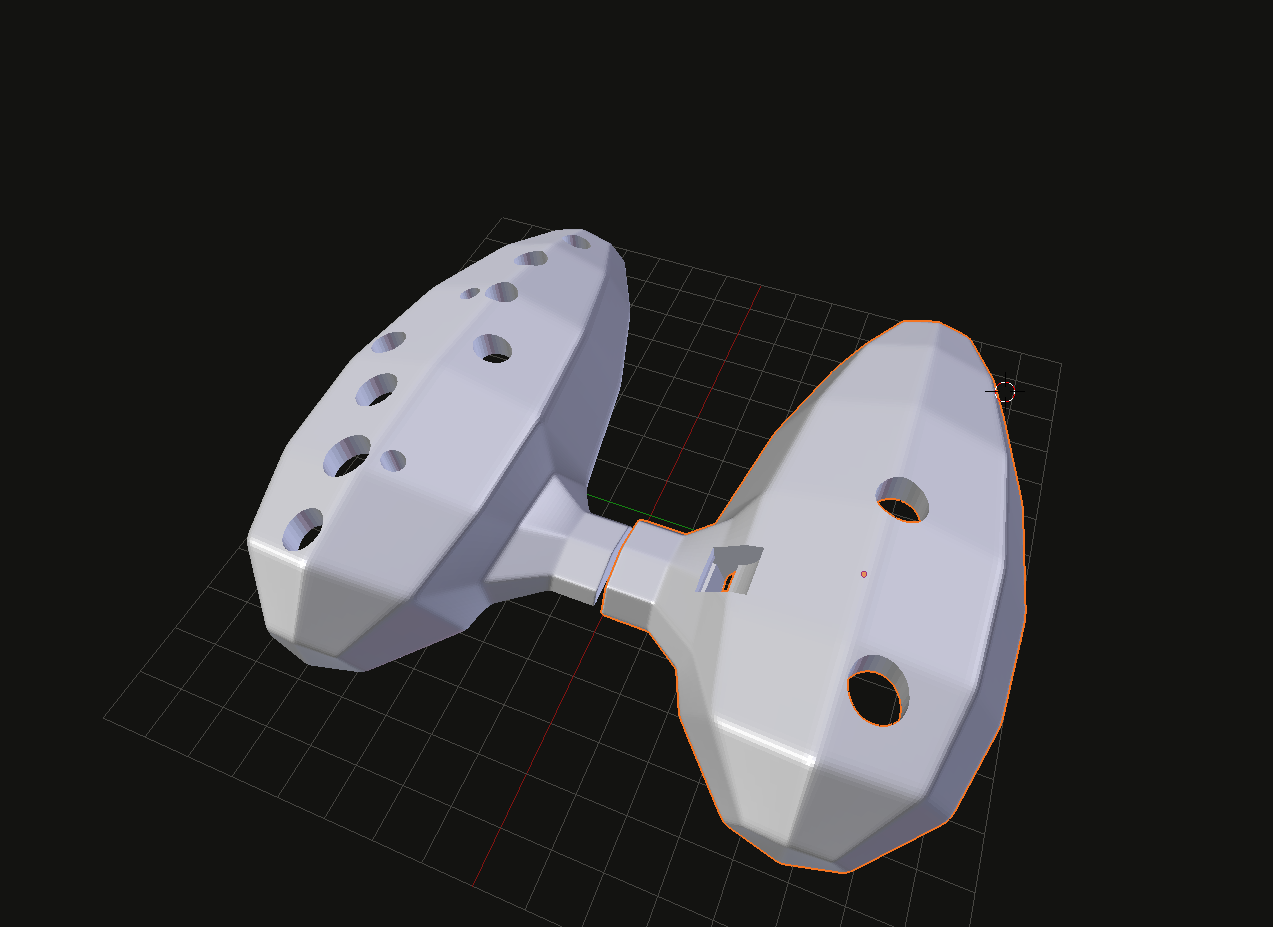
The model was based on a twelve holed Ocarina from Legend of Zelda. The subdivisions were added before the boolean which caused them to be rough on the edges. I tried to add a second smoothing modifier but it caused my computer to tank.
Render post split
Render
Post split
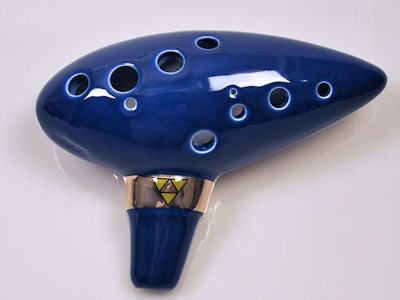
12 holed Ocarina from Zelda
Model
Presentation Sheet:
For the presentation sheet, we took the styles from the Zelda website and attempted our hand at tacky 90’s web posters. (No .gifs or dancing babies included.)