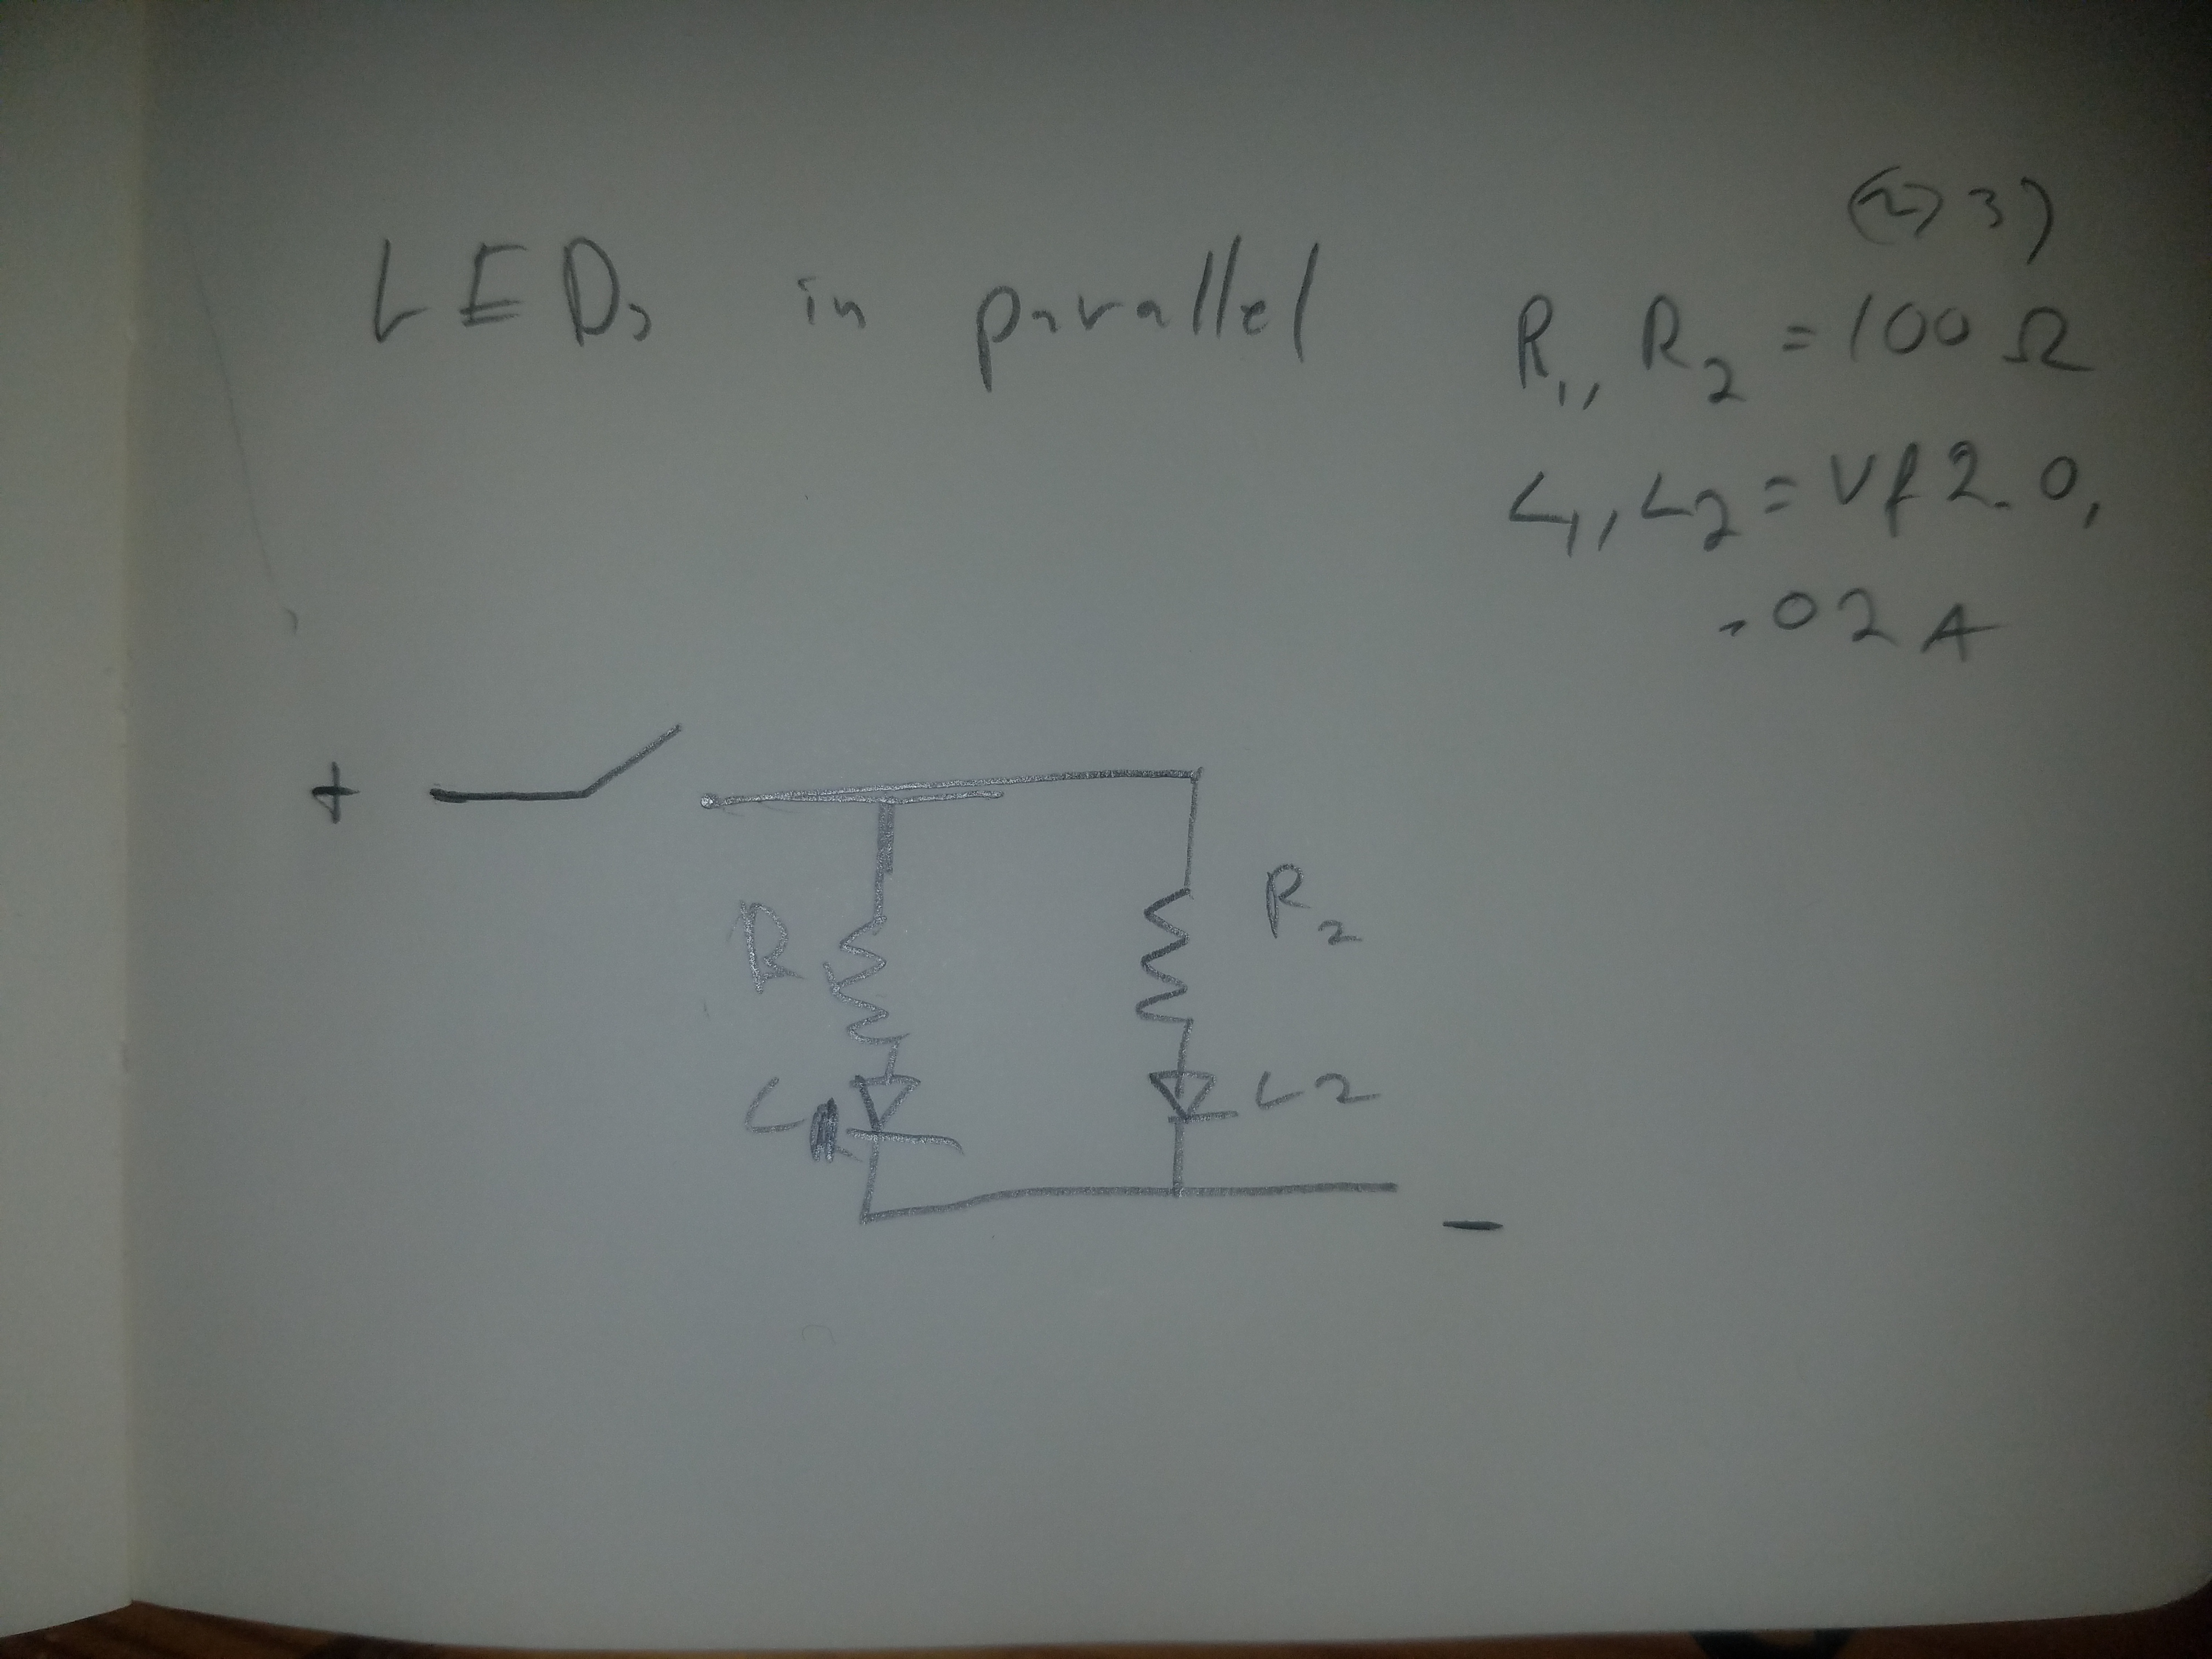
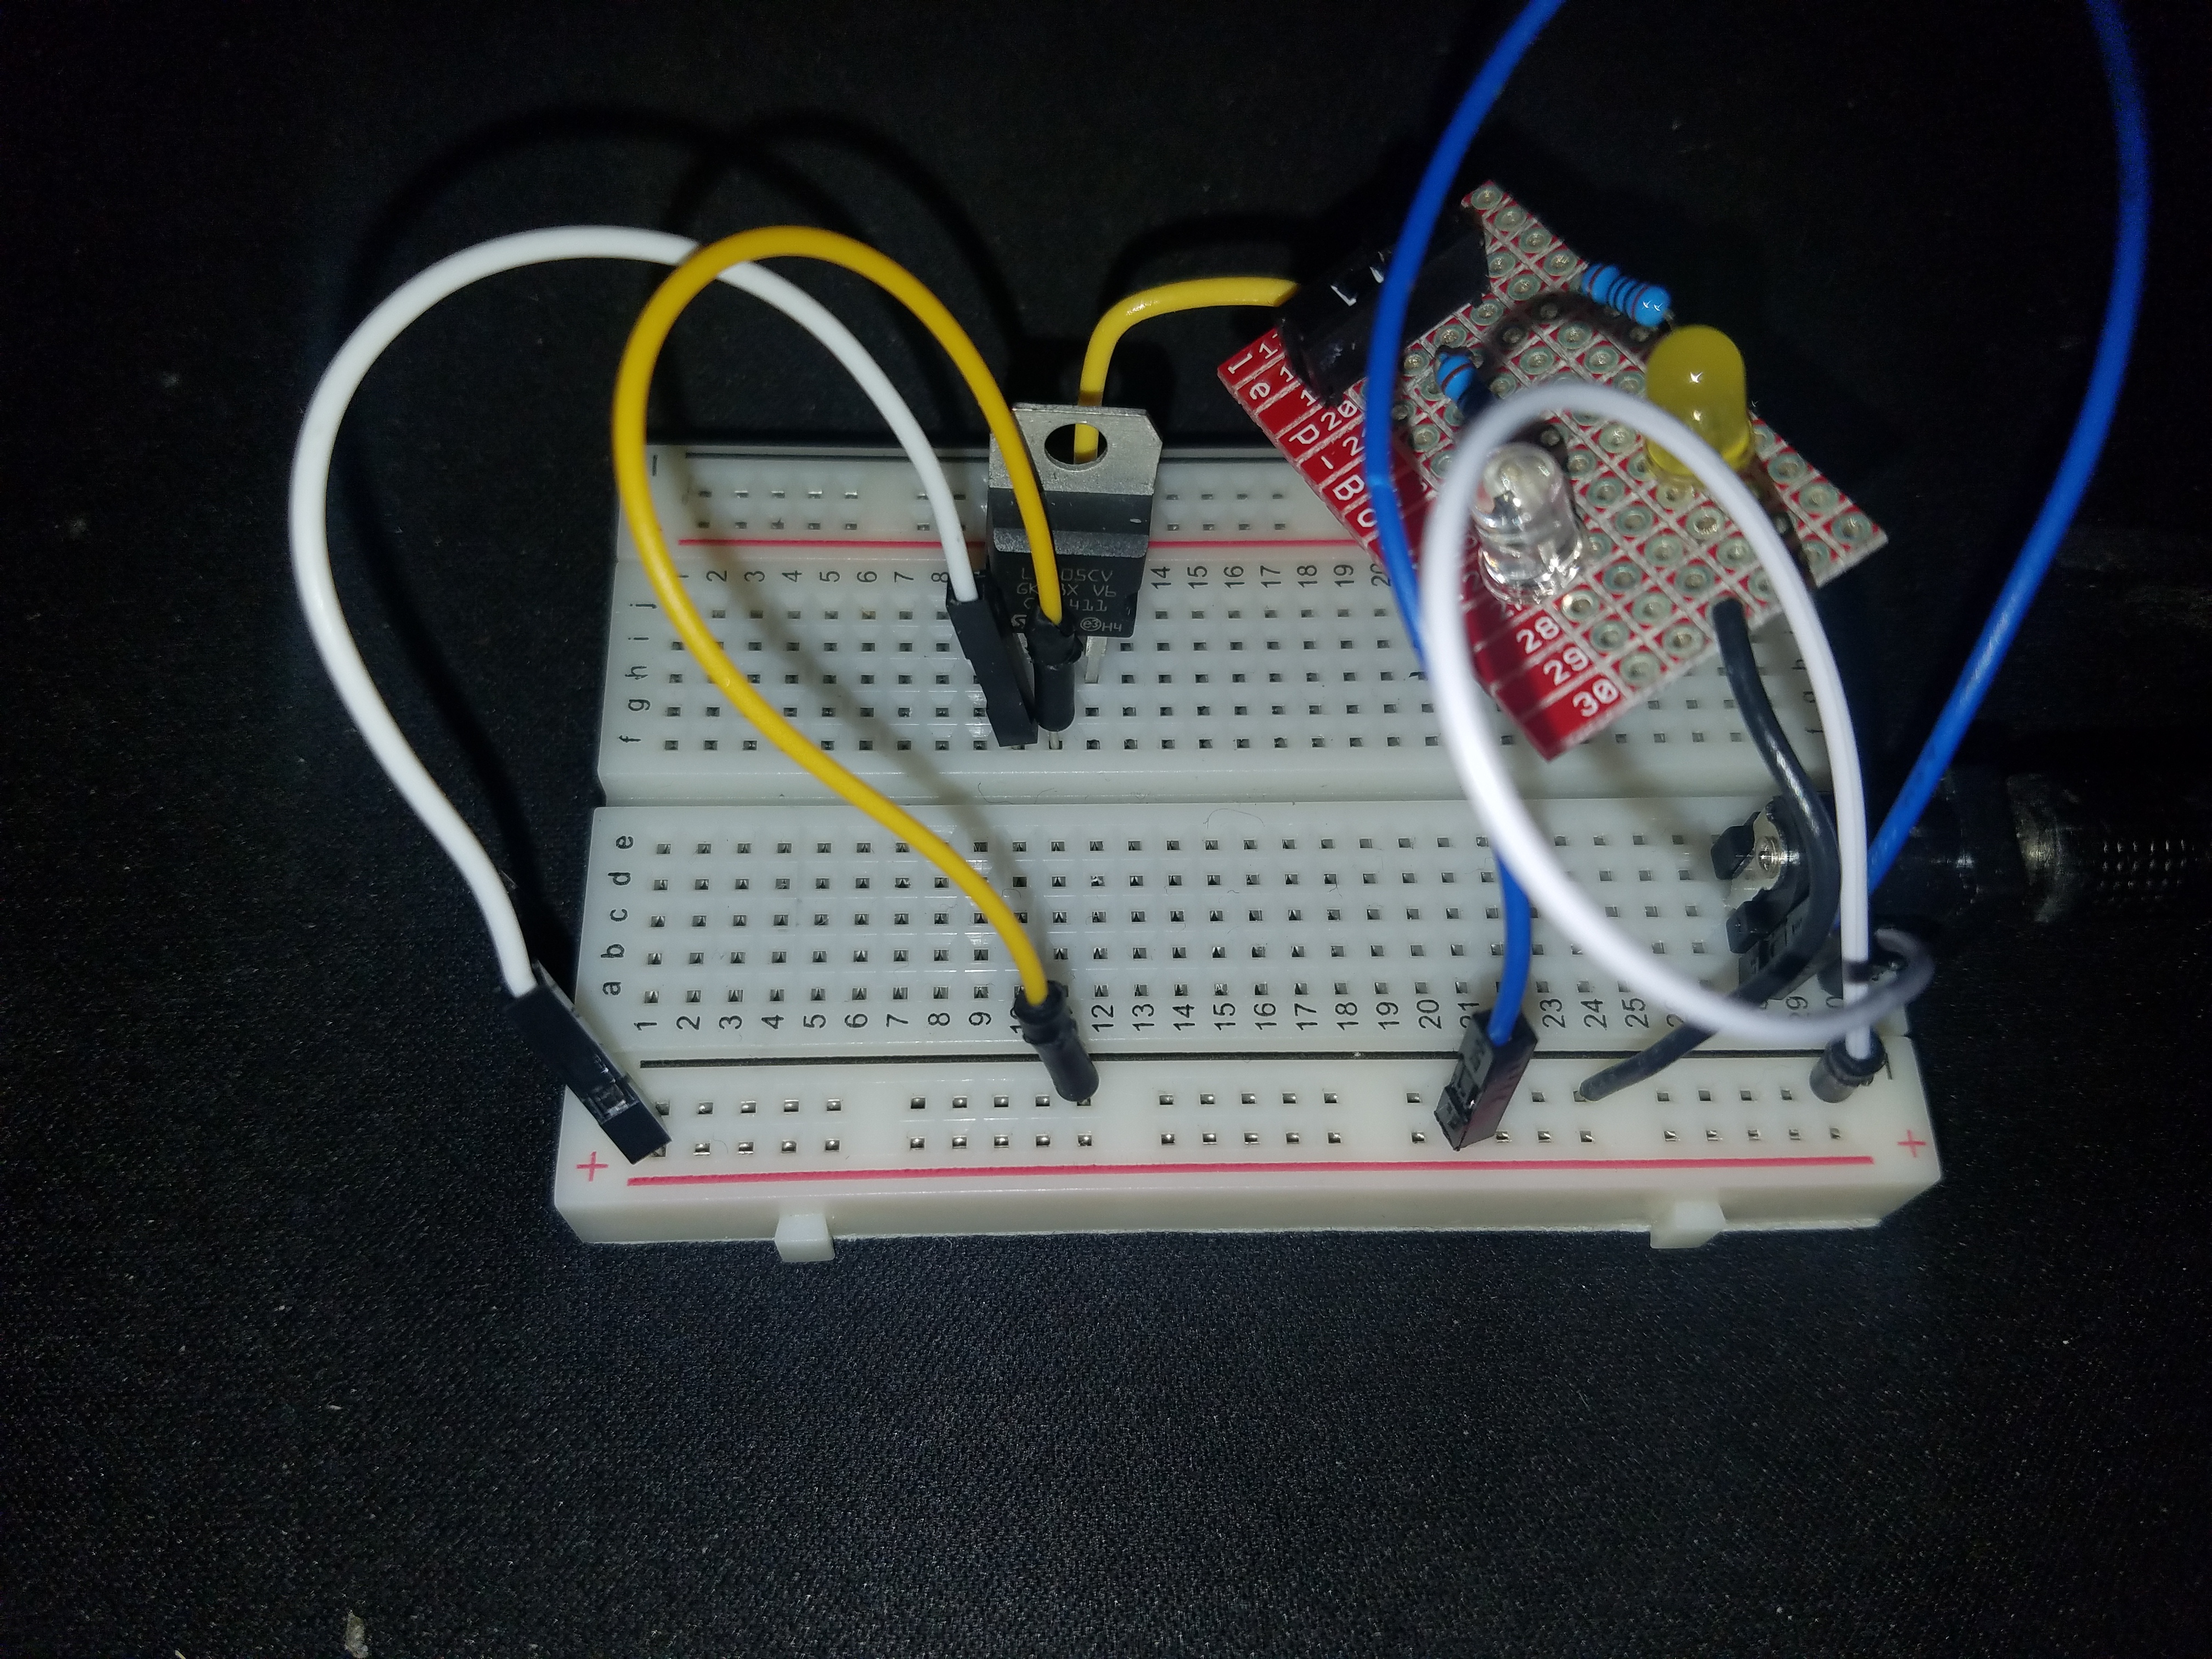
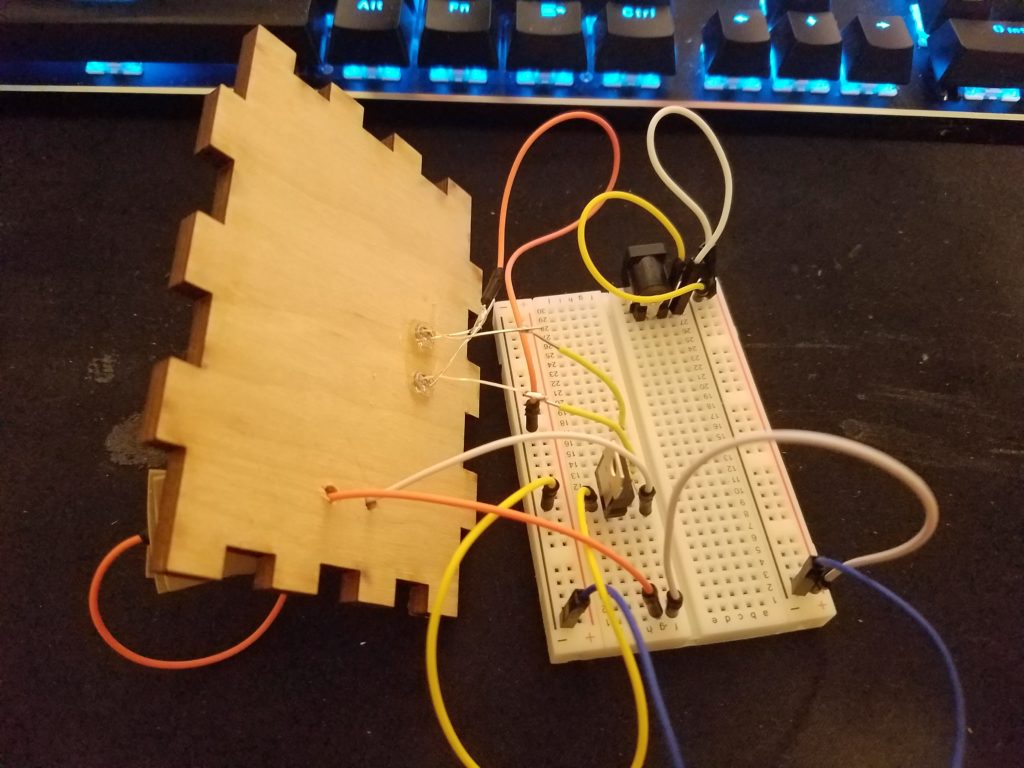
For this excercise, we created single parts of a circuits. For mine, I made 2 LEDs in parallel. This was harder as there were several wires that needed to be soldered together.
Schematic of LEDs in Parallel
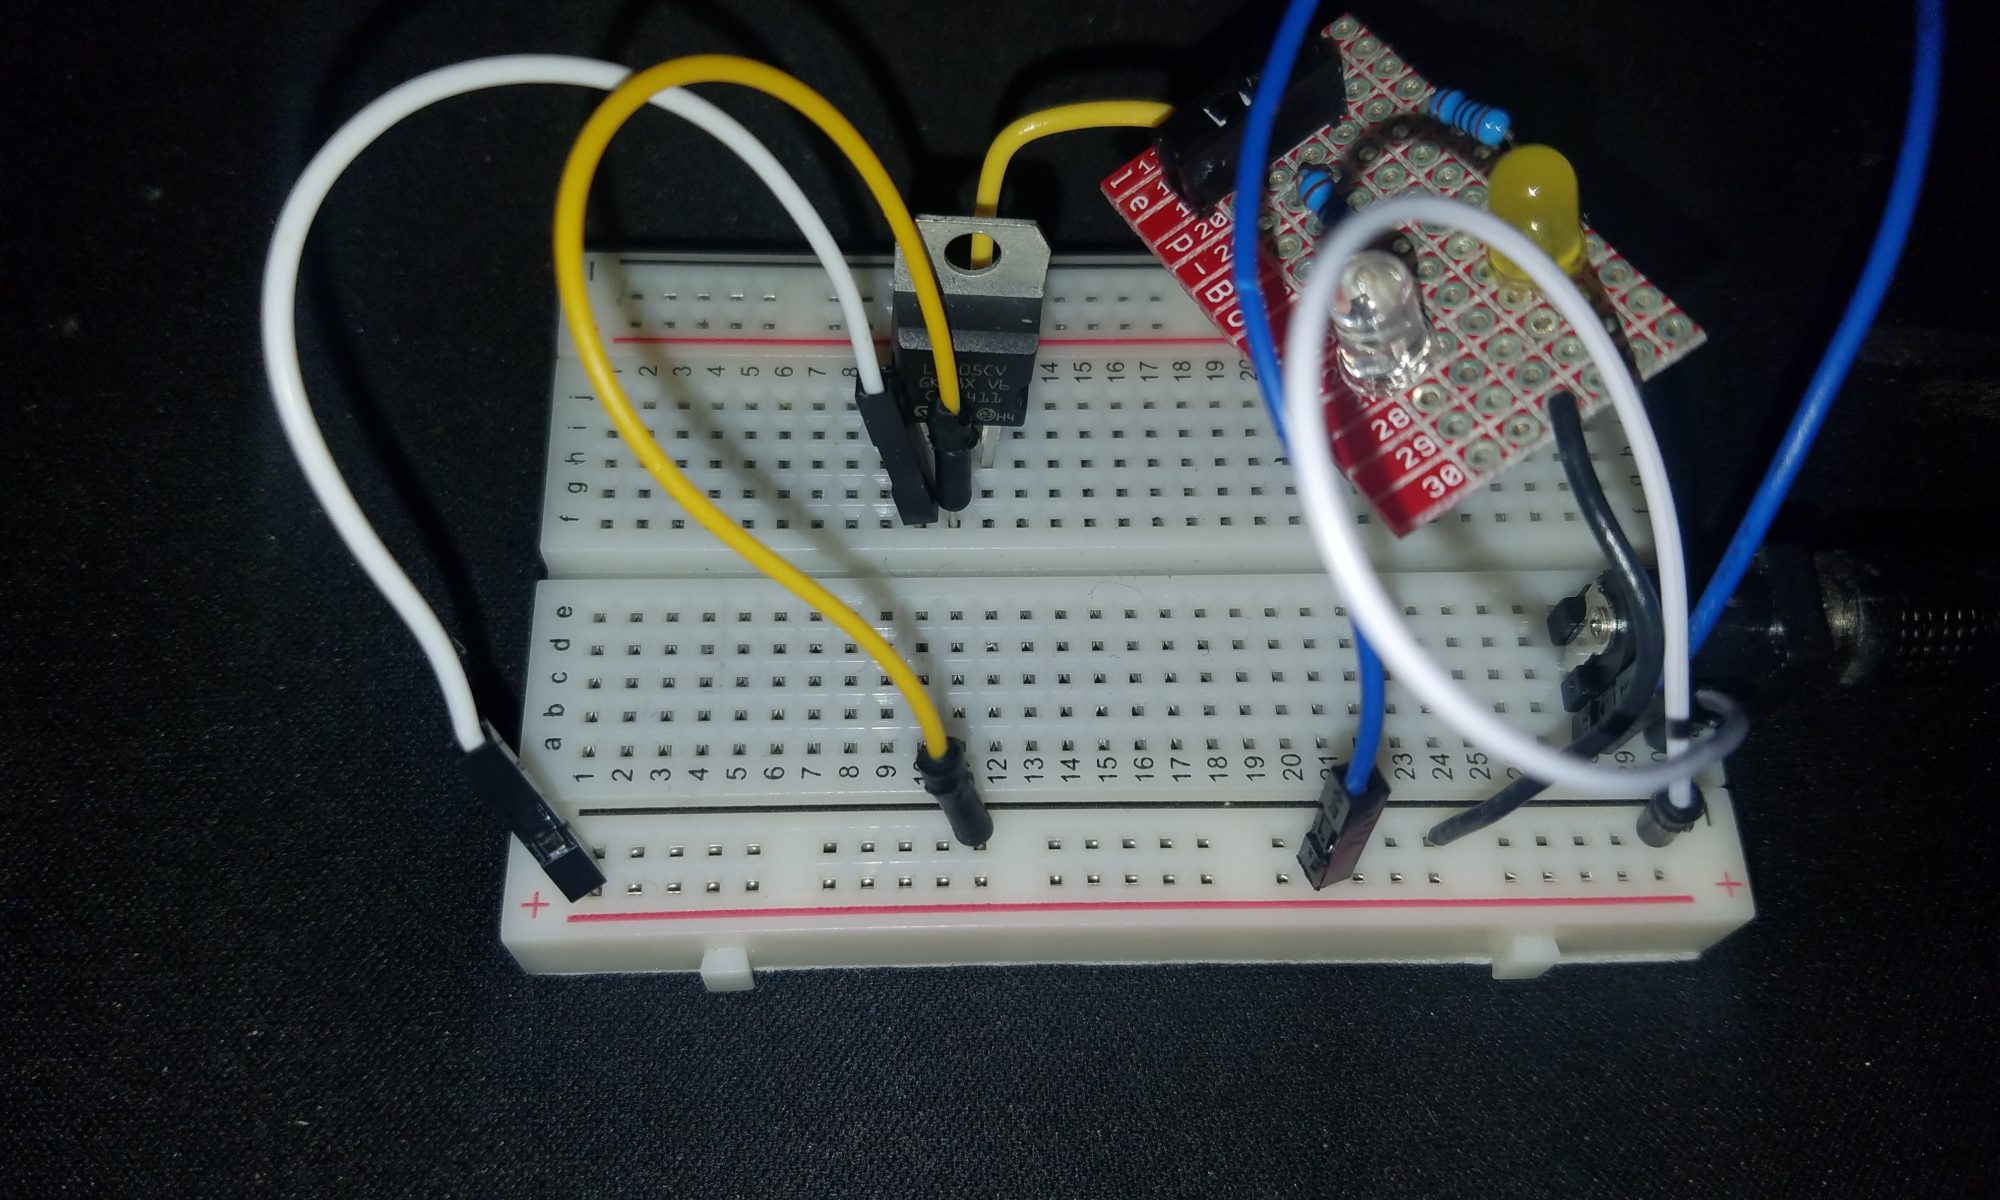
After calculating the resistance I set up the switch, resistors, and LEDs. Luckily both green and yellow LEDs have the same forward voltage so there was no need for extra calculations.
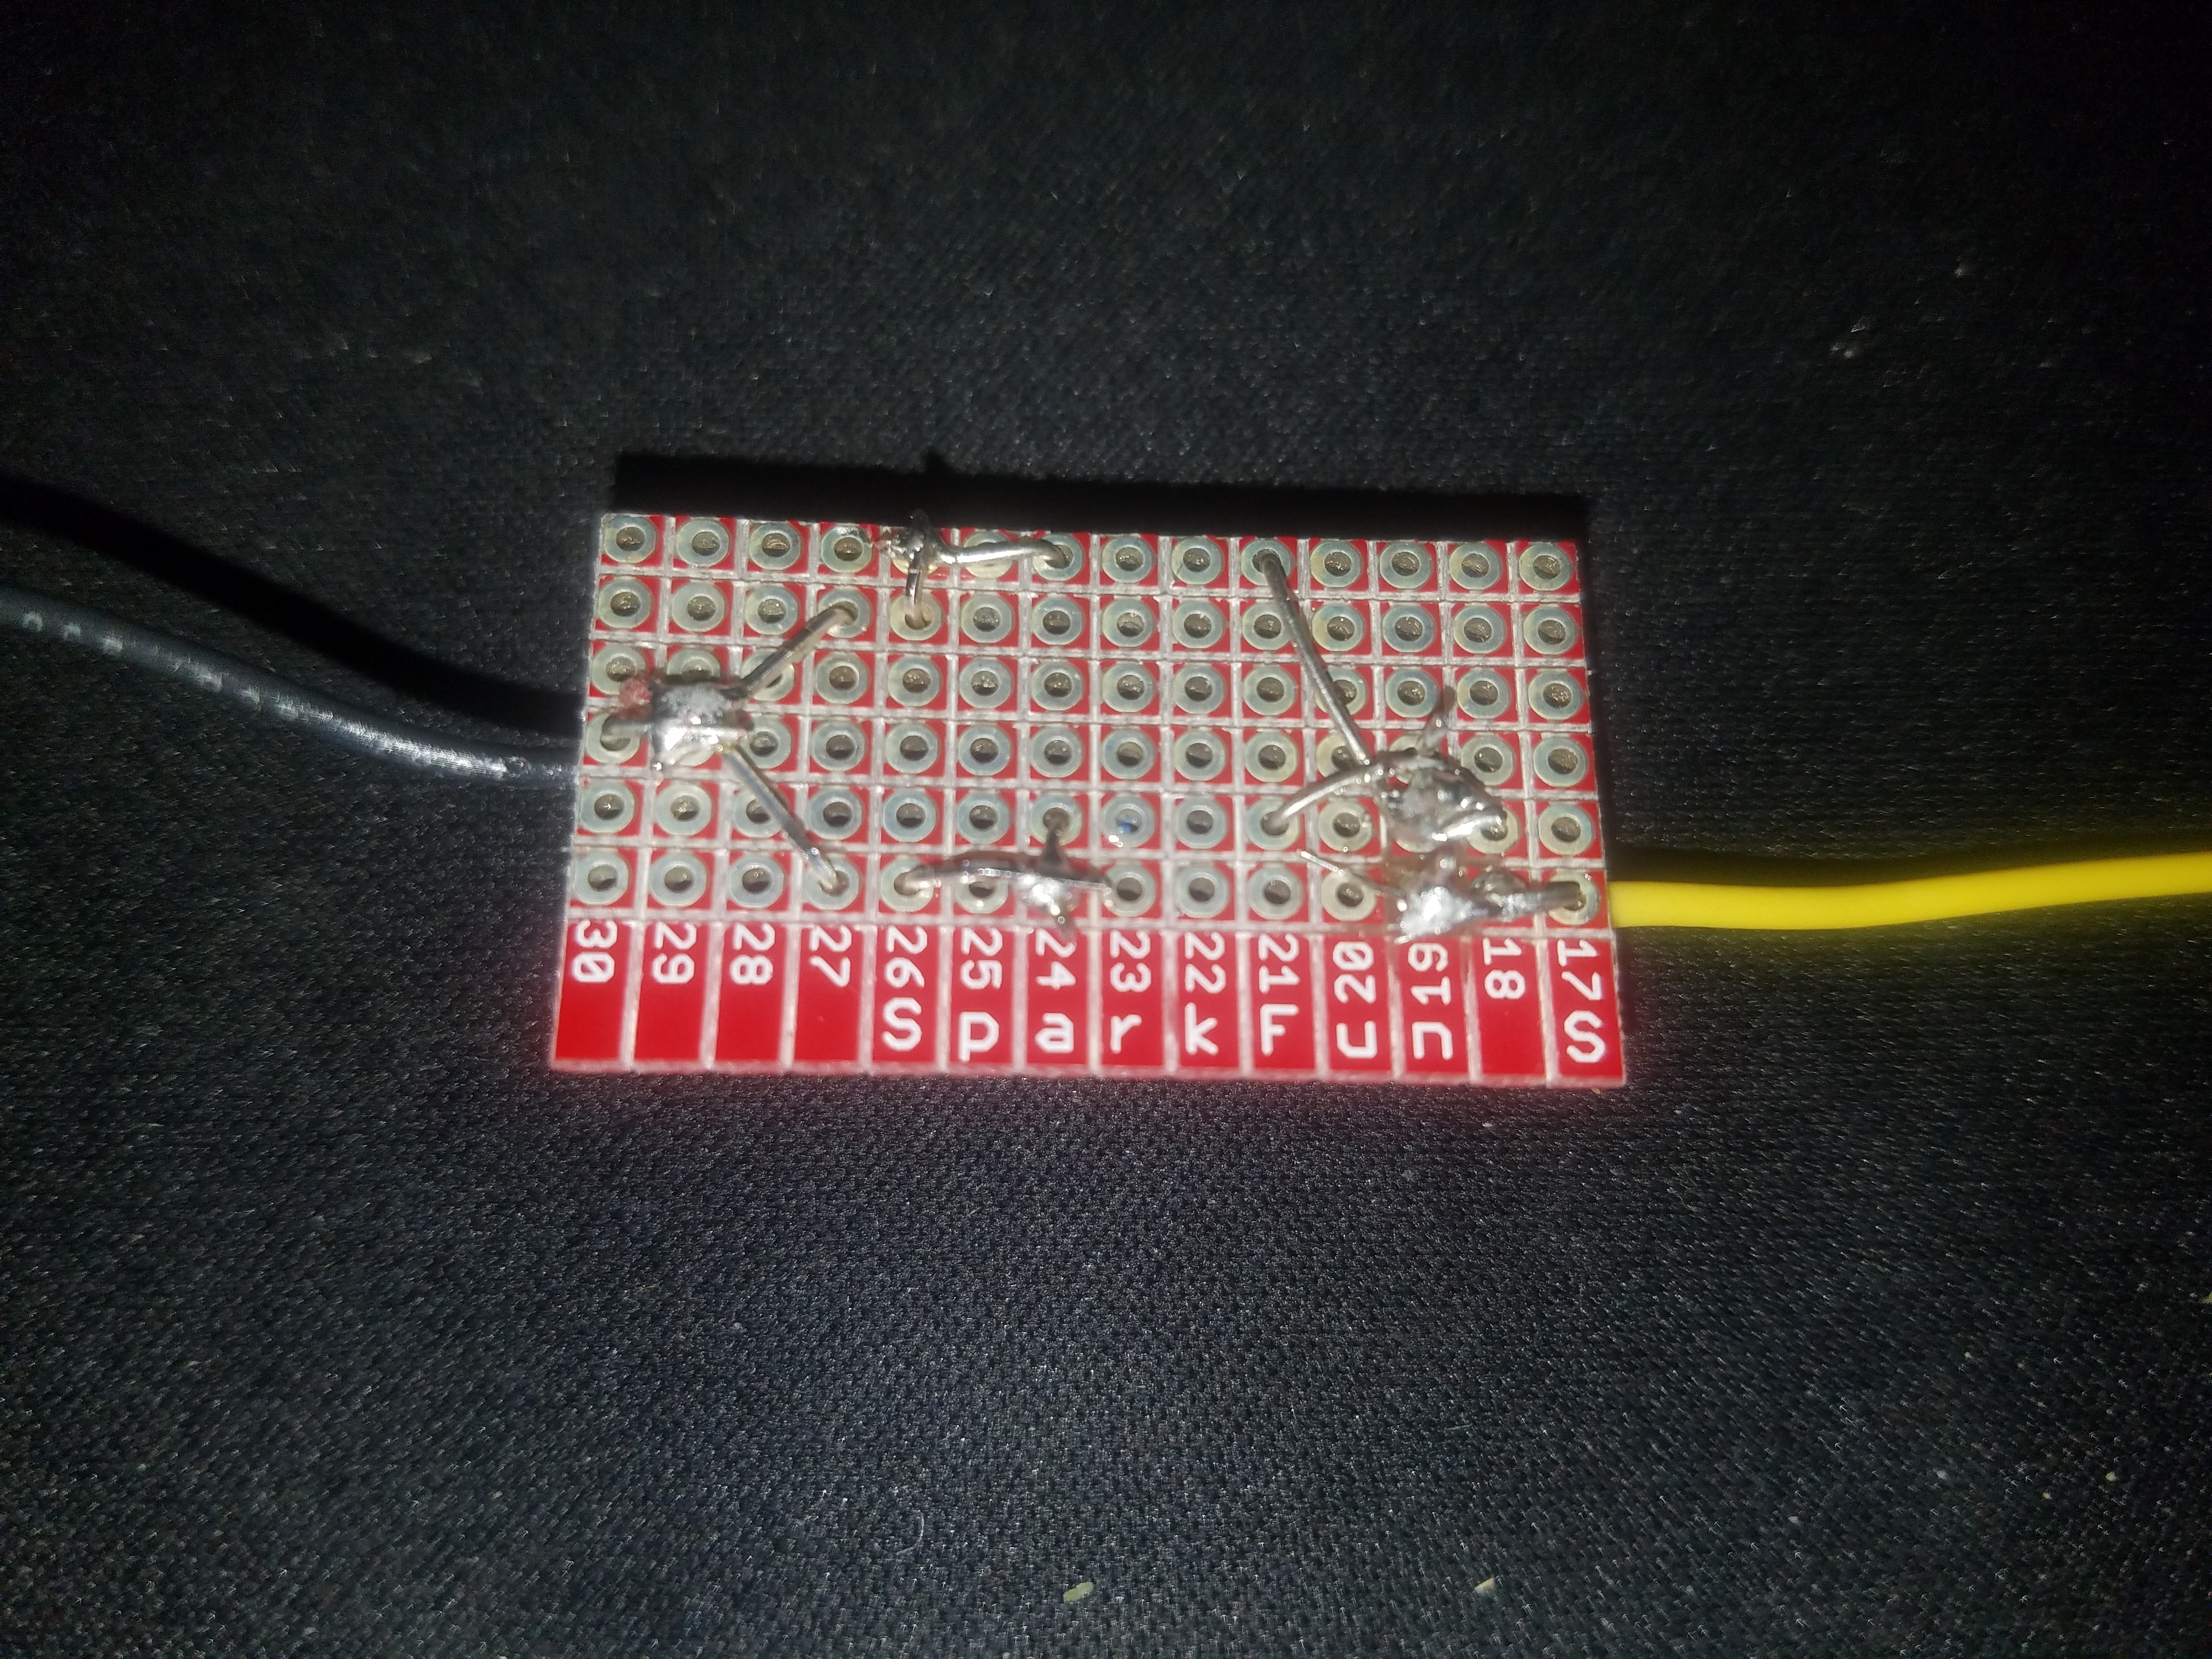
Finished breakout board
As you can see below, the soldering for the breakout board was more difficult than expected. The 100% tin solder also did not ease the process.
Back of breakout boardBreakout board attached to breadboardDemo of breakout board
Part 2: Digital I/O
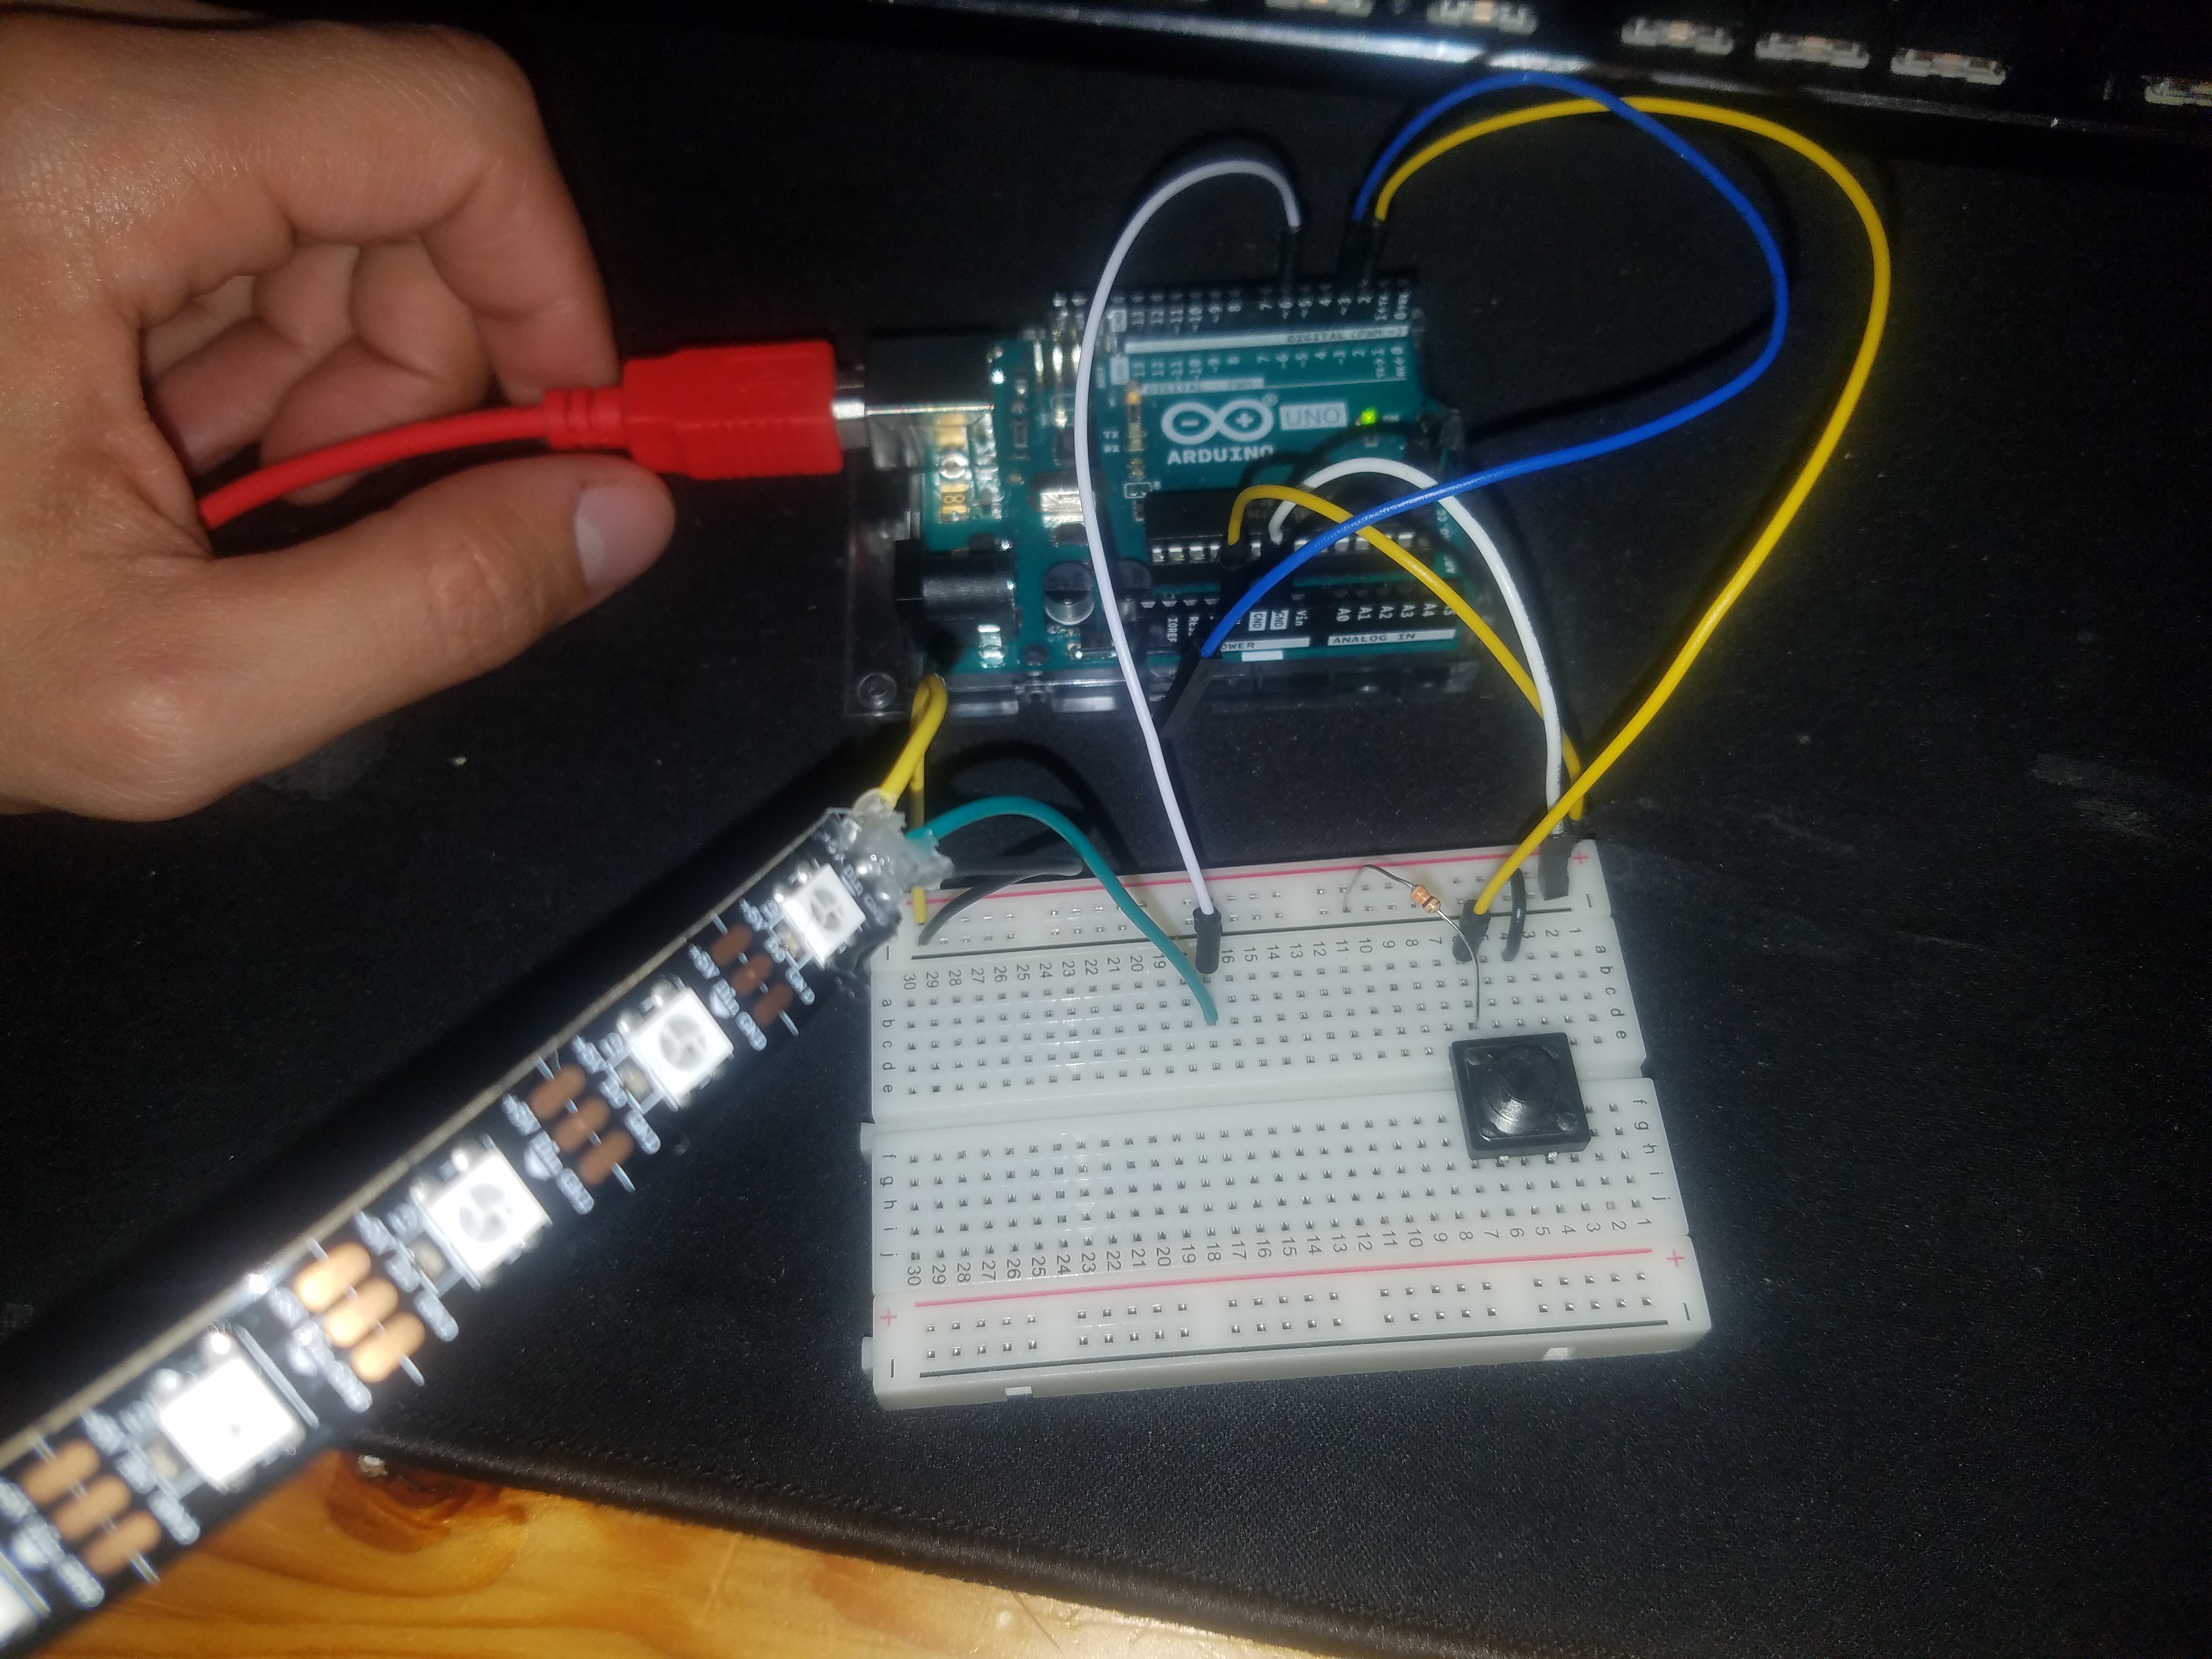
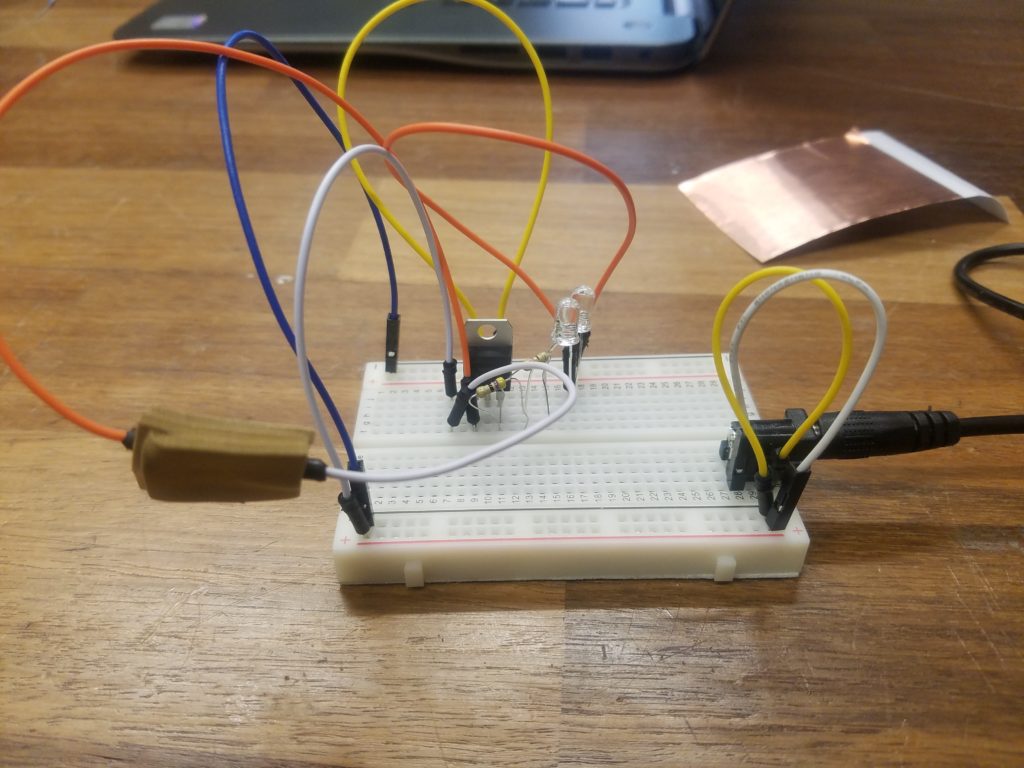
The next part incorporated the Arduino. For this we needed two inputs in the form of switches and an LED strip.
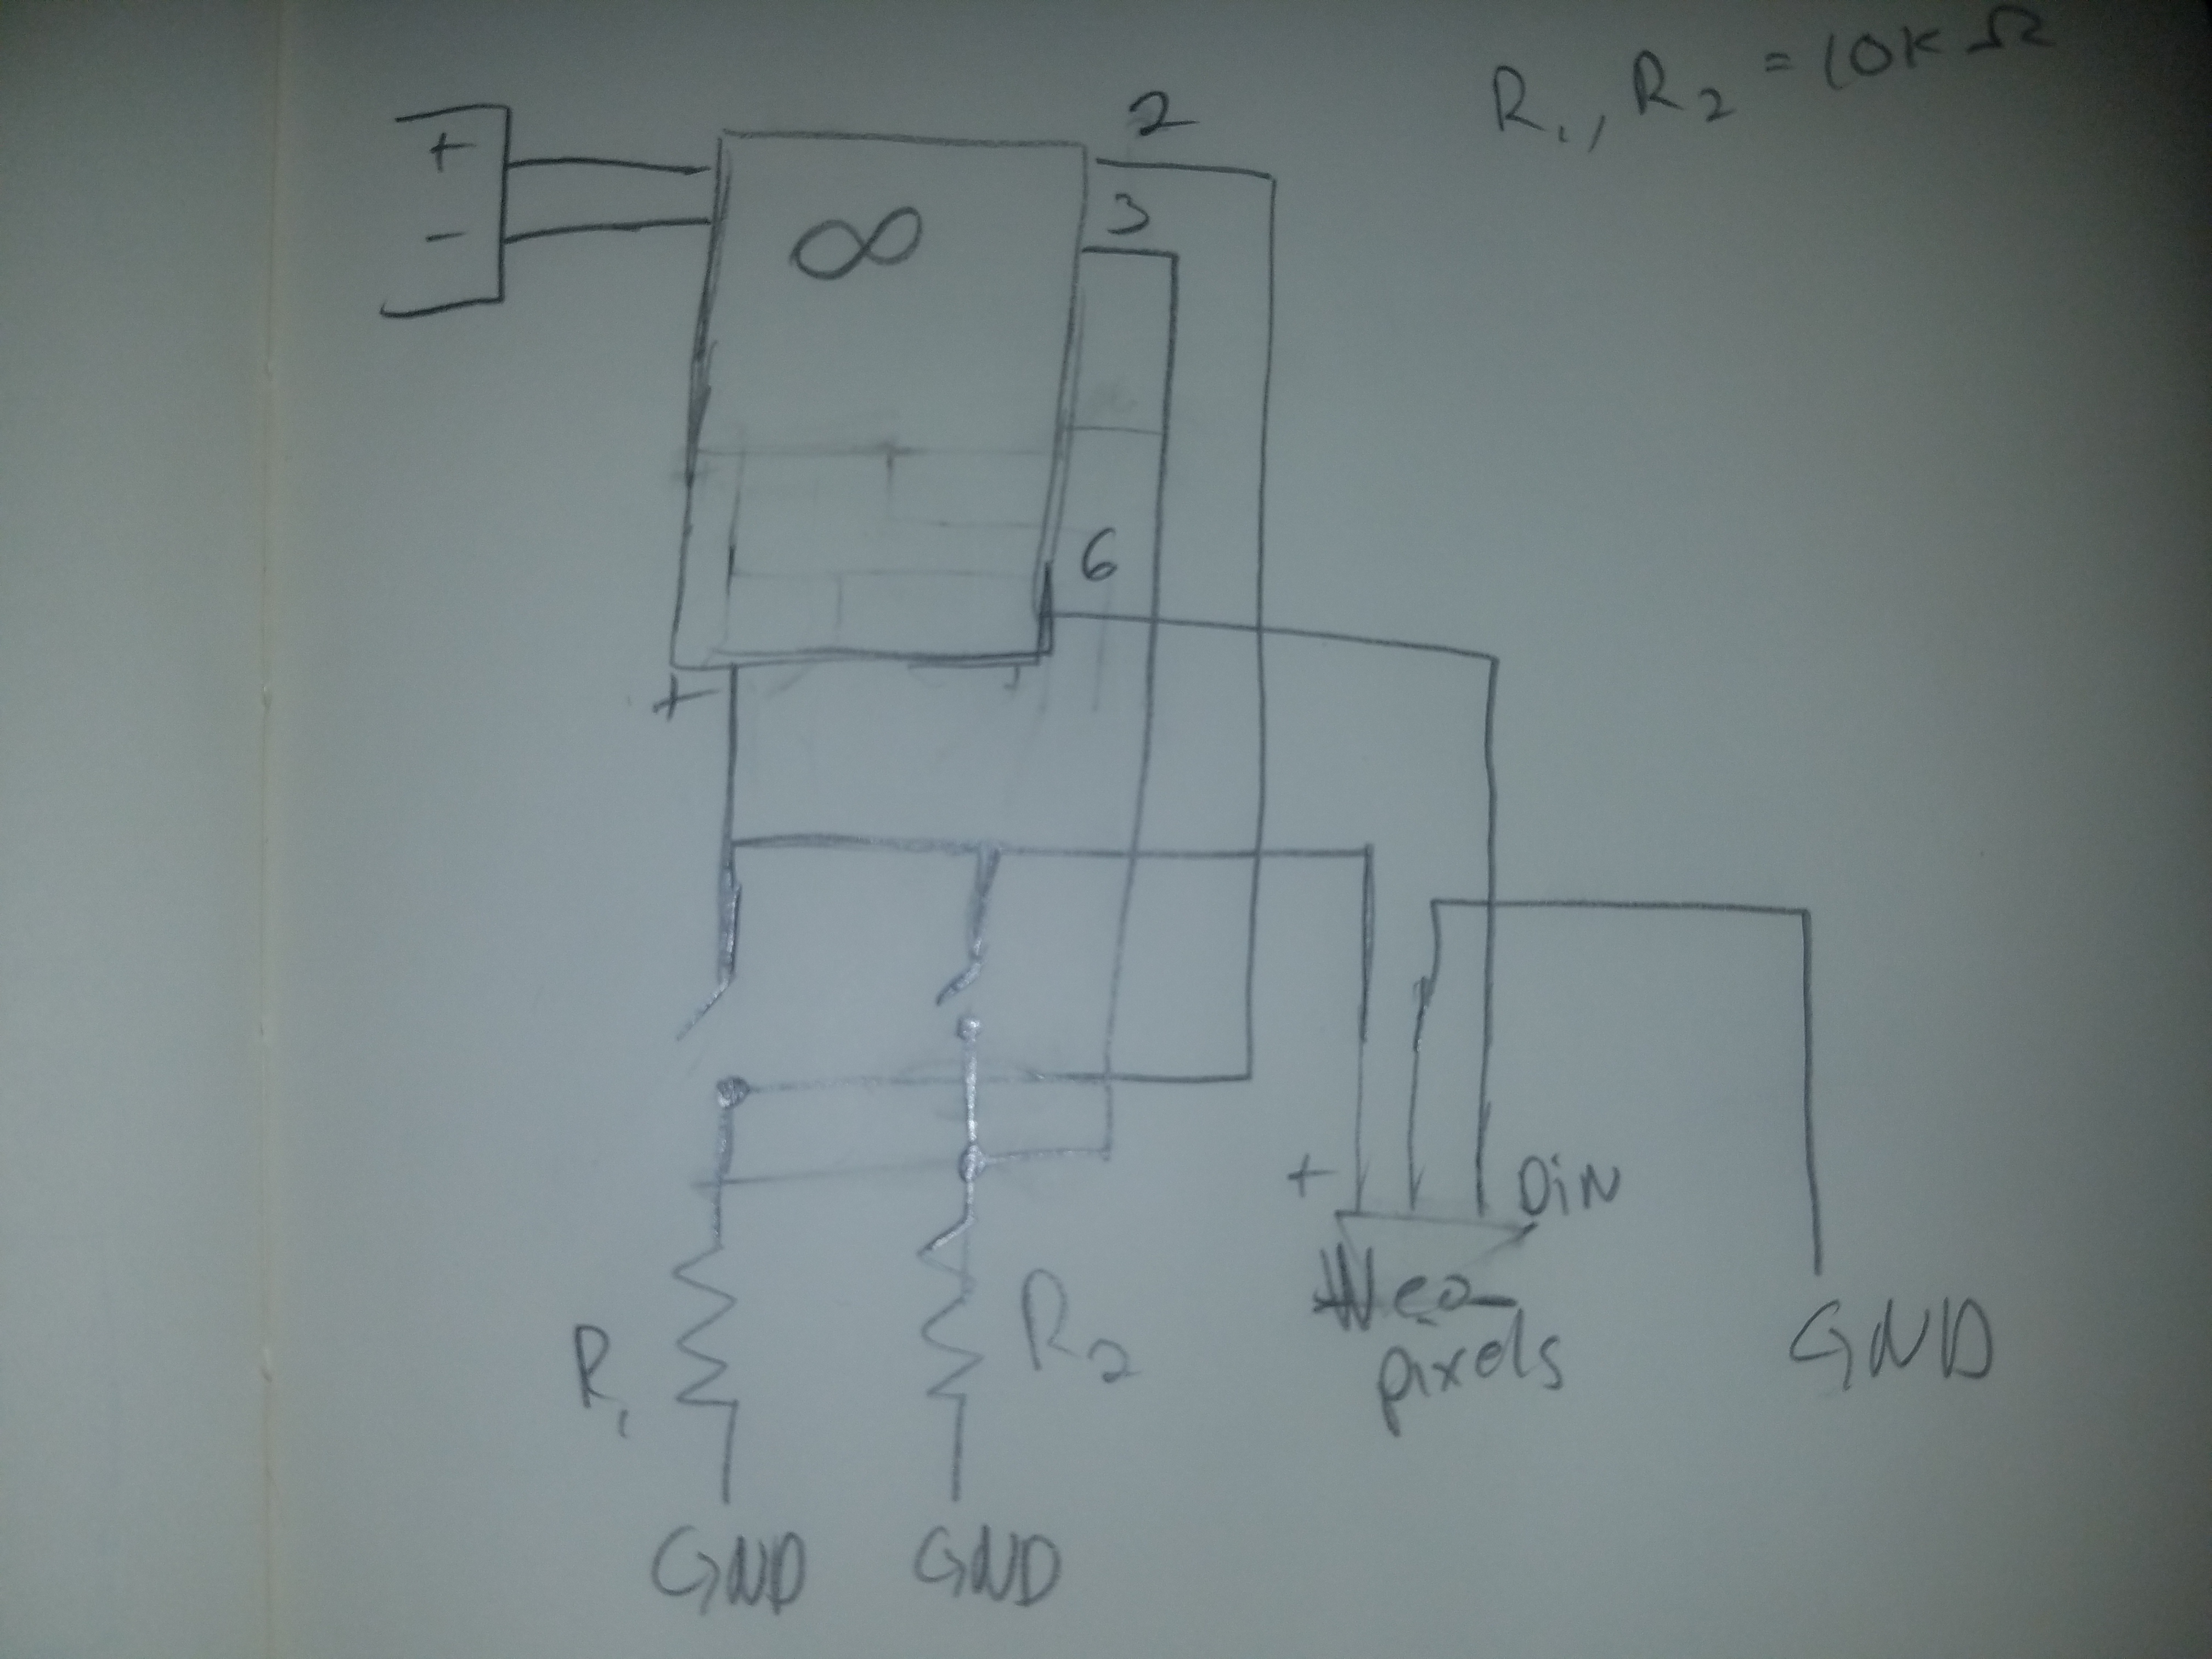
Schematic
This schematic was particular annoying because, while I understood how it worked, I was not sure how to flatten it onto paper.
The schematic is conveniently simple with both switches and the LED strip being powered from the Arduino. Unfortunately, when I was making it I misplaced my resistors so the inputs would sometimes misfire.
Finish product
For the logic I added four states made the LED light up in sequence with a correseponding color: white for both, red for one and green for the other. There was no output when neither switch was pressed.
Check-ins after events to see if user accomplished the event
Track Data
Store data
Tools needed
Illustrator
AdobeXD
React Native
Things needed to implement features
Request app permissions
Set default apps
Store data
Load data
I have decided to use AdobeXD for the prototyping and Adobe Illustrator for any necessary graphics. I think this should only take a few hours at most.
For the actual programming, I am planning on using React Native. This may present some problems with accessing and writing data, as well as data tracking but this should possible given Facebook’s usage of React Native and it’s wide sweeping tracking. I have some previous experience with JavaScript so hopefully, React is not too hard to learn. Additionally, this will require learning Expo, which should not take as long.
The individual features for the minimally viable product should not take as long as there will be minimal data processing.
Data Tracking
Data tracking and getting running apps looks fairly easy from this StackOverflow post. However, I would have to either run the app at all times in the background or extract all the data from one of Google’s apps that track it which may be easier.
Event creating and puching to Google calendars
As I have an Android, I will be using Google calendar for this first iteration and may add more calendars as necessary. The Google Calendar API is fairly easy to use but most phone’s also have an internal calendar, though it appears to be written similarly to Google Calendar API.
Data Storage
This may not be as necessary on the first iteration as there will not be as much data processing when displaying the user’s data usage and how accurately they stuck to their calendar. It will be more important when the data is then used to improve the user’s habits as processing the data on each start up may be more than the phone can handle.
For this lab, we created a few basic electronic circuits from breadboards, jumper wires, LEDs, resistors, voltage regulators, and a power supply. The objective was to create two circuits: one of LEDs in series and one of LEDs in parallel.
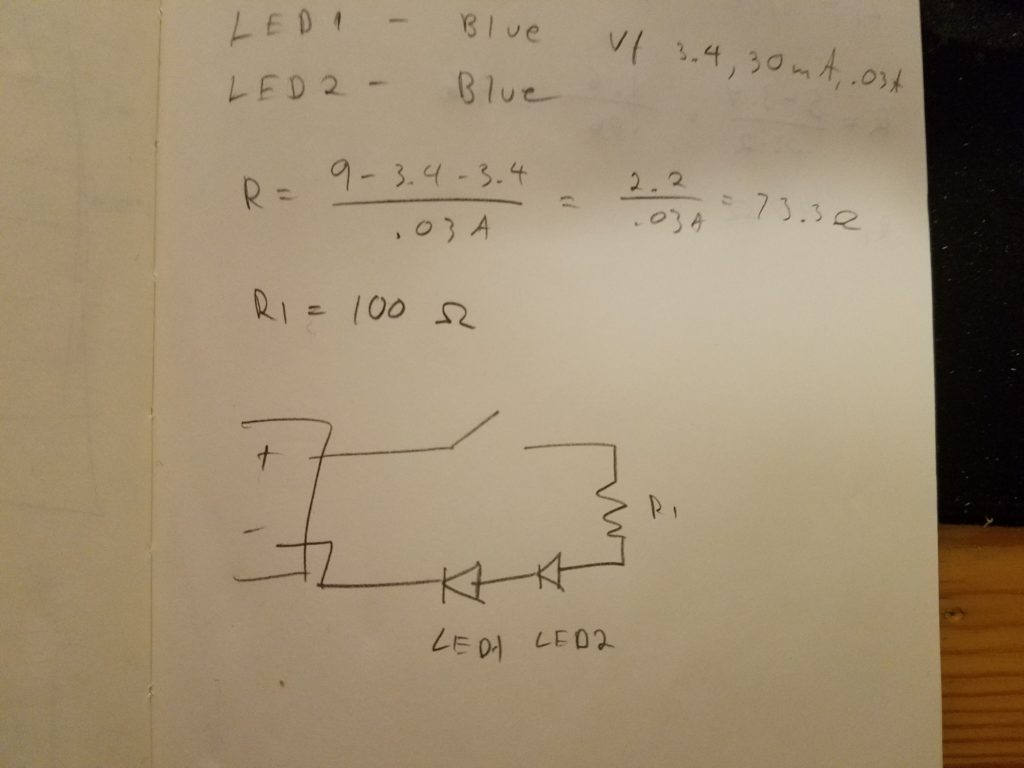
LEDs in Series
For my LEDs in series, I choose blue LEDs which have a draw of 3.4V and .03A. Two of these in series would require more power than a voltage regulator woulod proveide at 5V so I wen without it.
Schematic of LEDs in paralell with calculations of resistors
I used a 100Ω resistor which was slightly more than necessary but the piece worked charmingly.
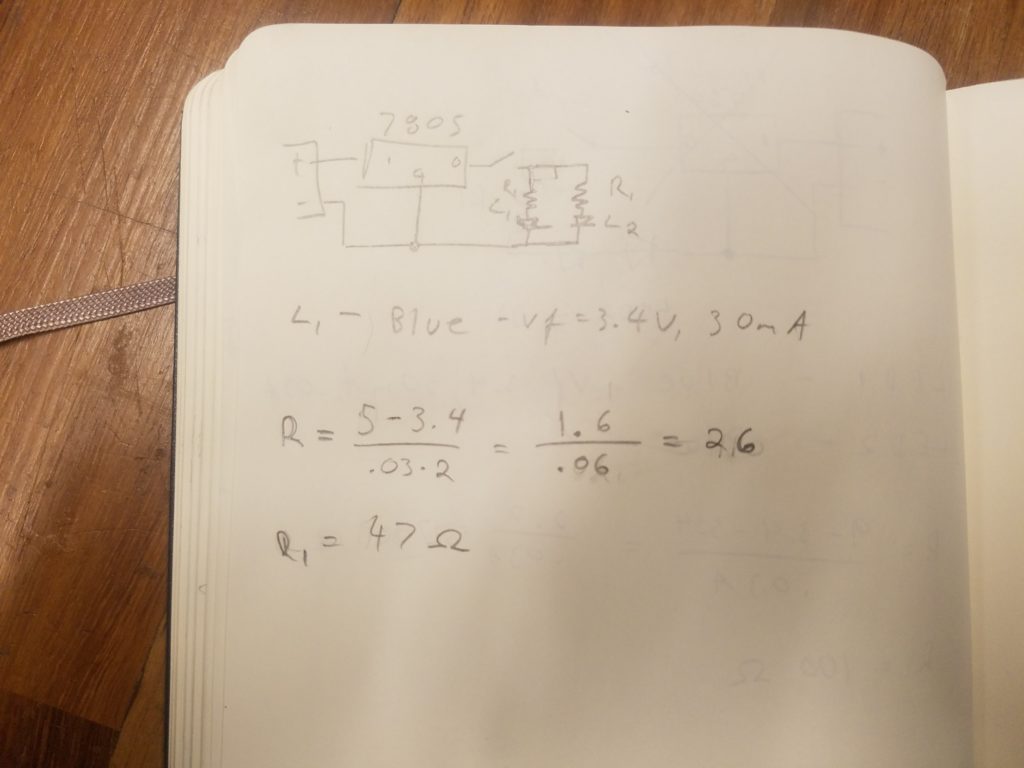
LEDs in Parallel
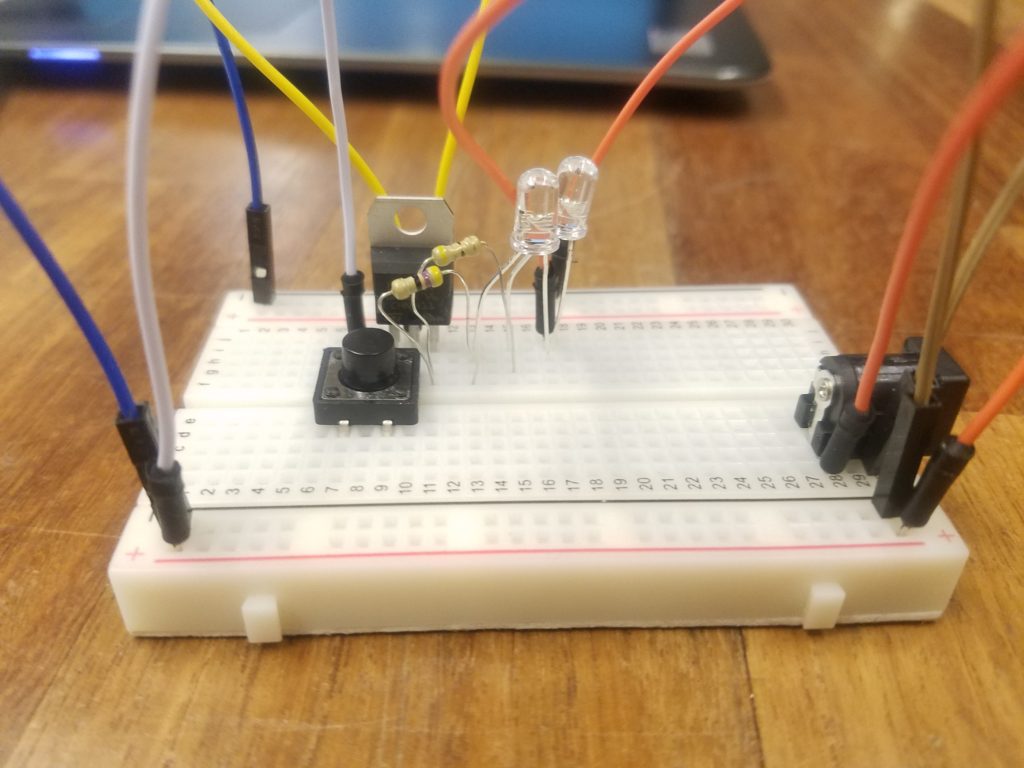
For the LEDs in parallel, I was able to use the voltage regulator with two 47Ω resistors which were slightly more than what was needed. Again, I used the blue LEDs.
Schematic with calculationsFinal circuitDemonstration of final product
Custom Switch
For the custom switch, I used three pieces of foam. The top and bottom had copper pieces attached to them with the wires on top of that. The middle one had a hole in the center so when the switch was pressed the two copper sheets touched and completed the circuit.
Originally, I had added the wires under the copper so the switch would have a definite off position but the glue on the copper tape prevented a current.
Final product.Demonstration of final product
Creative Enclosure
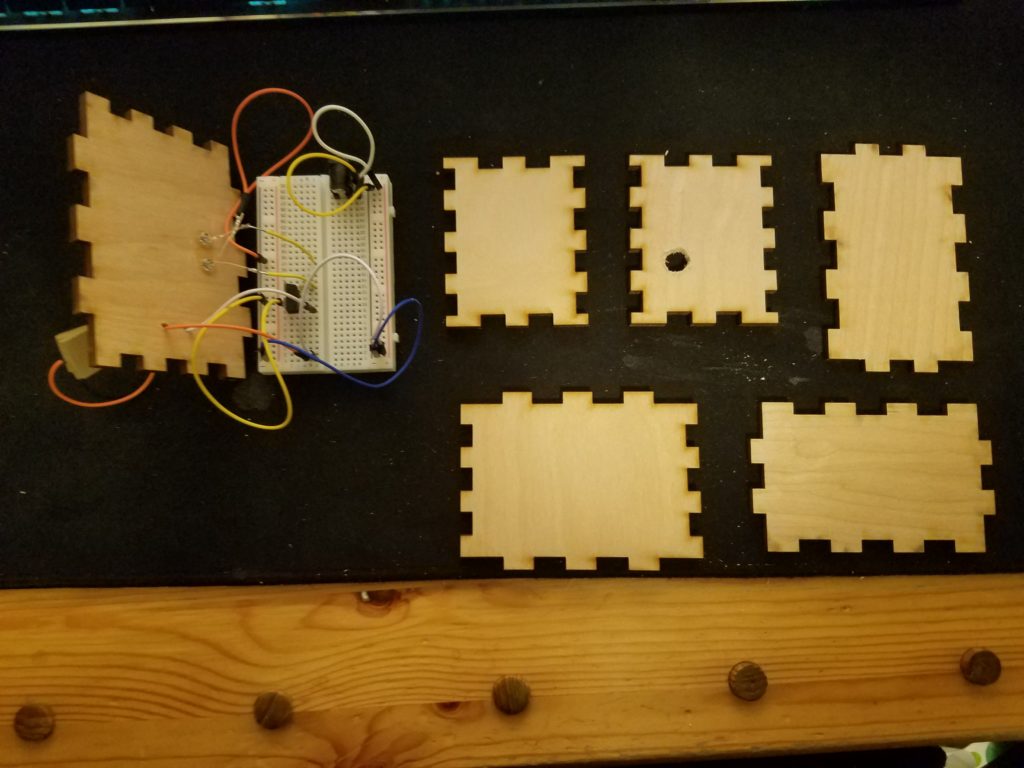
For the creative enclosure, I laser cut a box and then added holes for the LEDs, switch wires, and power supply using a drill press. I then soldered the LEDs together to a wire. I also added wires to the power side of the LEDs so they could reach the board when it is fully assembled.
Pieces of the board after gluing the LEDs to the topClose up of bread board and top of boxDemonstration of finished product
Most of my projects in college have been dark and sometimes surrealist pieces leaning toward satire and novelty rather than commercial marketability. Pieces such as my Bus Water Bottle Top and my Walpurgisnacht could have been taken in more utilitarian directions but instead were made surreal or dark. This mask also falls into the domain of Satanism.
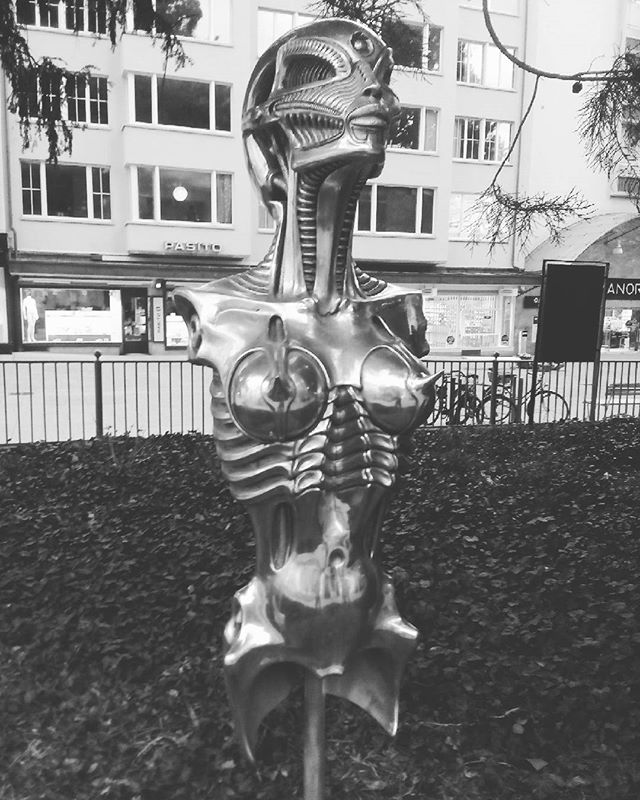
Most of my projects have had been influenced by surrealists and occultists. This started earlier with my love of HR Giger‘s works, as well as the works of Polish artist Zdzisław Beksiński. I think this stemmed out of my dislike for easily accepted things because of their tendency to become commercial products. I have always abhorred the commercialization of society and the tendency to forget the impact of one’s own consumerism.
However, as a designer, my projects have been more refined and less emotionally raw than their source material. So I started to look for precedents for my domains of interest.
Precedents
HR Giger
HR Giger’s art works include several sculptures and two bars that he designed. The first bar, located in Chur, Switzerland I visited while I was in Europe.
Sculpture in Chur, Switzerland near the bar
The second one is in Guyere of the cheese fame. Both of the bars interested me because of their “biomechanical” nature and dark themes in physical form. I would like my capstone project to include some intersection of the occult and fabrication.
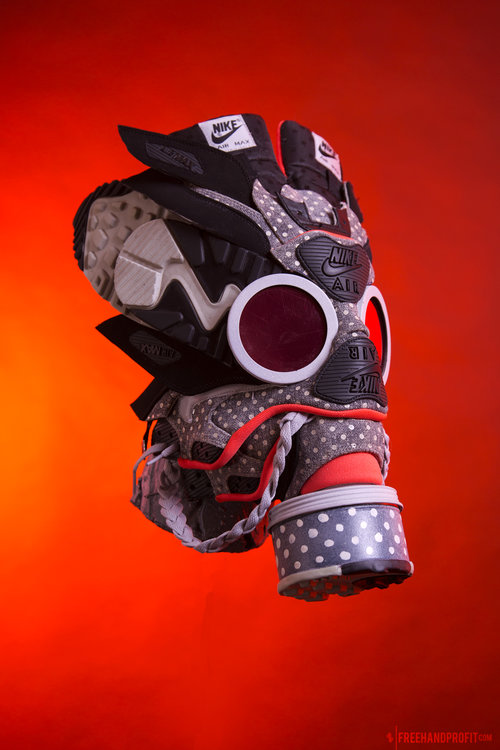
Freehand Profits
While I’m not as influenced by this artist, the mask I made was heavily influenced by the use of shoes as well as the “gas mask” aspects of it. His masks are usually made from brand name sneakers and are made in collaboration with the companies. While being a shill is the last thing I want to do, the corporate tie-ins I would like to emulate but in a sardonic manner befitting our post-Andy Warhol art world.
In celebration of Air Max Day 2017, the 142nd & 143rd sneaker masks created by Freehand Profit. Made from Air Max 90s and Air Max 1s. Find out more about the work on FREEHANDPROFIT.com.
Felix Colgrave
This animator does some wildly strange animations that often have dark themes such as Pigpen and Double King. His most known piece is rather tame comparatively.
My research questions should somehow incorporate the domains that I’m interested in. I would like to ultimately have my project be some sort of data visualization art piece that is dark and surreal.
How often do people think about the impact that their personal consumerism has on the world?
How much would people change their buying habits if they were more cognizant of their effects?
How edgy can a piece of industrial design be and still be commercially viable?
Could interactive art be used to change buying behaviors?
I want to create an app that helps with planning and time management. I have barely passable time management and it would be a great way to help myself and people that need to improve their time management. Similar to this could be an app that improves habits or breaks them. While this may be easier in the form of a simple reminder, it is not as useful to me. In this app, I hope to combine the functionality of time trackers and to-do list into a single functional app
Time Management App
The objective would be to create an app that works in tandem with a person’s calendars to block out times when tasks can be accomplished and give reminders when a task can be completed. It could also work off of knowledge of a person’s habits, say limit work time based on previous habits or give suggestions to start projects earlier.
My target users would be college kids who are just starting to learn time management skills and want to passively learn how to do it without as much forethought.
Competition
There is serious competition for this, both on the side of task lists/planners and time trackers.
Any.do – To do list with built-in calendar support
Smarter Time – phone usage tracker, can be connected to computers.
RescueTime – phone usage tracker, has computer tie in. Doesn’t work as well
Google Tasks – Simple to do list attached to every Google account.
Fortunately, there seems to be very little competition for an app that does both.
Challenges
I can foresee a few challenges with a project of this scope. Foremost would be a user’s reluctance to give over the necessary information. It will be necessary to build the features in such a way that each part can work without the input of all the others if a user’s doesn’t want to, say, give access to calendars or doesn’t want to input the time they will spend napping.
So you want to make a mask? Well here’s how I did it in a nutshell.
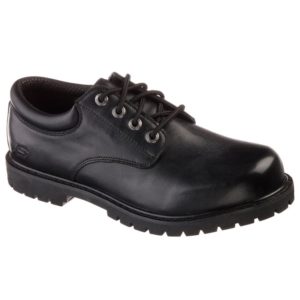
First, get your shoes. New, used, doesn’t matter as long as they are clean and not too complex. I got an old pair of these Sketchers. Don’t worry, if Sketchers aren’t cool now, they weren’t when I made these and I was able to cover most of the branding.
Cost: $15.00
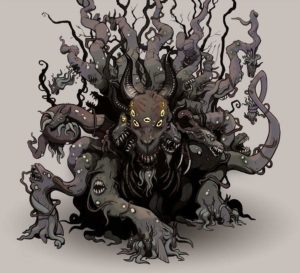
Next, find some inspiration. Have you been playing Behemoth not stop while telling yourself you’re not an edgelord. Maybe, try some Lovecraftian mythos. Too edgy? too bad! I went for Shub-Niggurath, The Black Goat of the Woods with a Thousand Young.
I liked the hircine aspect while not being too intensely Satanic. I also liked the added horns and eyes which could be added in the form of lights.
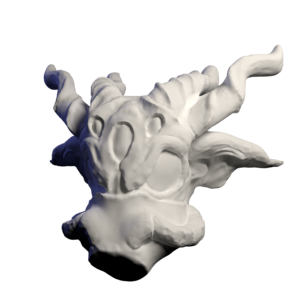
Next, make a sketch. Start with paper and pencil. It’s the easiest thing to use. If you want to step it up a notch and you can use some modeling software, do that. I used Blender to sketch the ideal mask: many eyes, many horns, impossible to fulfill.
Model of Mask
Now, slice apart your shoes. I started at the base and removed the sole from the leather. Next, take apart each panel and cut it to match its counterpart on the other shoe. I used two pairs of shoes for maximum material.
Next, map out the mask with the shoe parts. I started with the face and used the most interesting parts of the shoes to create the snout and eye sockets of the mask. The parts of the shoes should inform how the mask gets assembled. Trying to force the shoes to conform to the mask will inevitably lead to destroyed parts and extra waste.
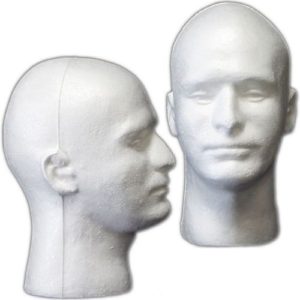
Next, get a Styrofoam head and hope you have a small head. I don’t, so I only used the head as a rough model. It worked well enough and it definitely helps map out the mask. It also assisted in storing and assembling later on.
Cost:
Styrofoam head: $7.00
X-Acto knife: $6.00
Cutting mat: $10.00
After the shoes have been disassembled and a rough map has been made of the mask, it’s time to start gathering the extras. The horns, eyes, teeth, and extra details of the mask. I opted for a wooden jaw bone and fiberglass horns as well as plastic eyes. While fiberglass horns do look cool, they are a pain to make and real horns are probably more functional and easier to get.
Cost:
Ski mask for eyes: $15.00
Wood for jaw bone: $2.50
If you still want to make fiberglass horns, make sure you have a respirator, goggles, and gloves. To begin making fiberglass horns, I used this video and this one. As suggested in the second one, I used insulation foam and a hacksaw to create a plug. As I don’t have a spare car battery to make a hot saw, I used a propane torch after cutting the foam with a hacksaw to seal it. Next, I taped the plugs to a board and started layering the fiberglass and resin.
In order to make the resin black, I used black 100% strength acrylic paint. Other pigments may work as well. I tried oil paint but it didn’t mix with the resin and came out uneven.
Cost:
Resin and fiberglass: $50.00
Foam: $30.00
Respirator: $40.00
Googles: $25.00
Black paint: $7.00
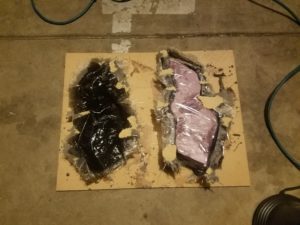
Fiberglass horns after finished drying
Make sure you do all this in a well-ventilated area, preferably outside. Additionally, the fiberglass resin needs to be mixed and stored at room temperature so working outside in the cold may cause the resin to solidify prematurely or cause the fiberglass to crack while drying.
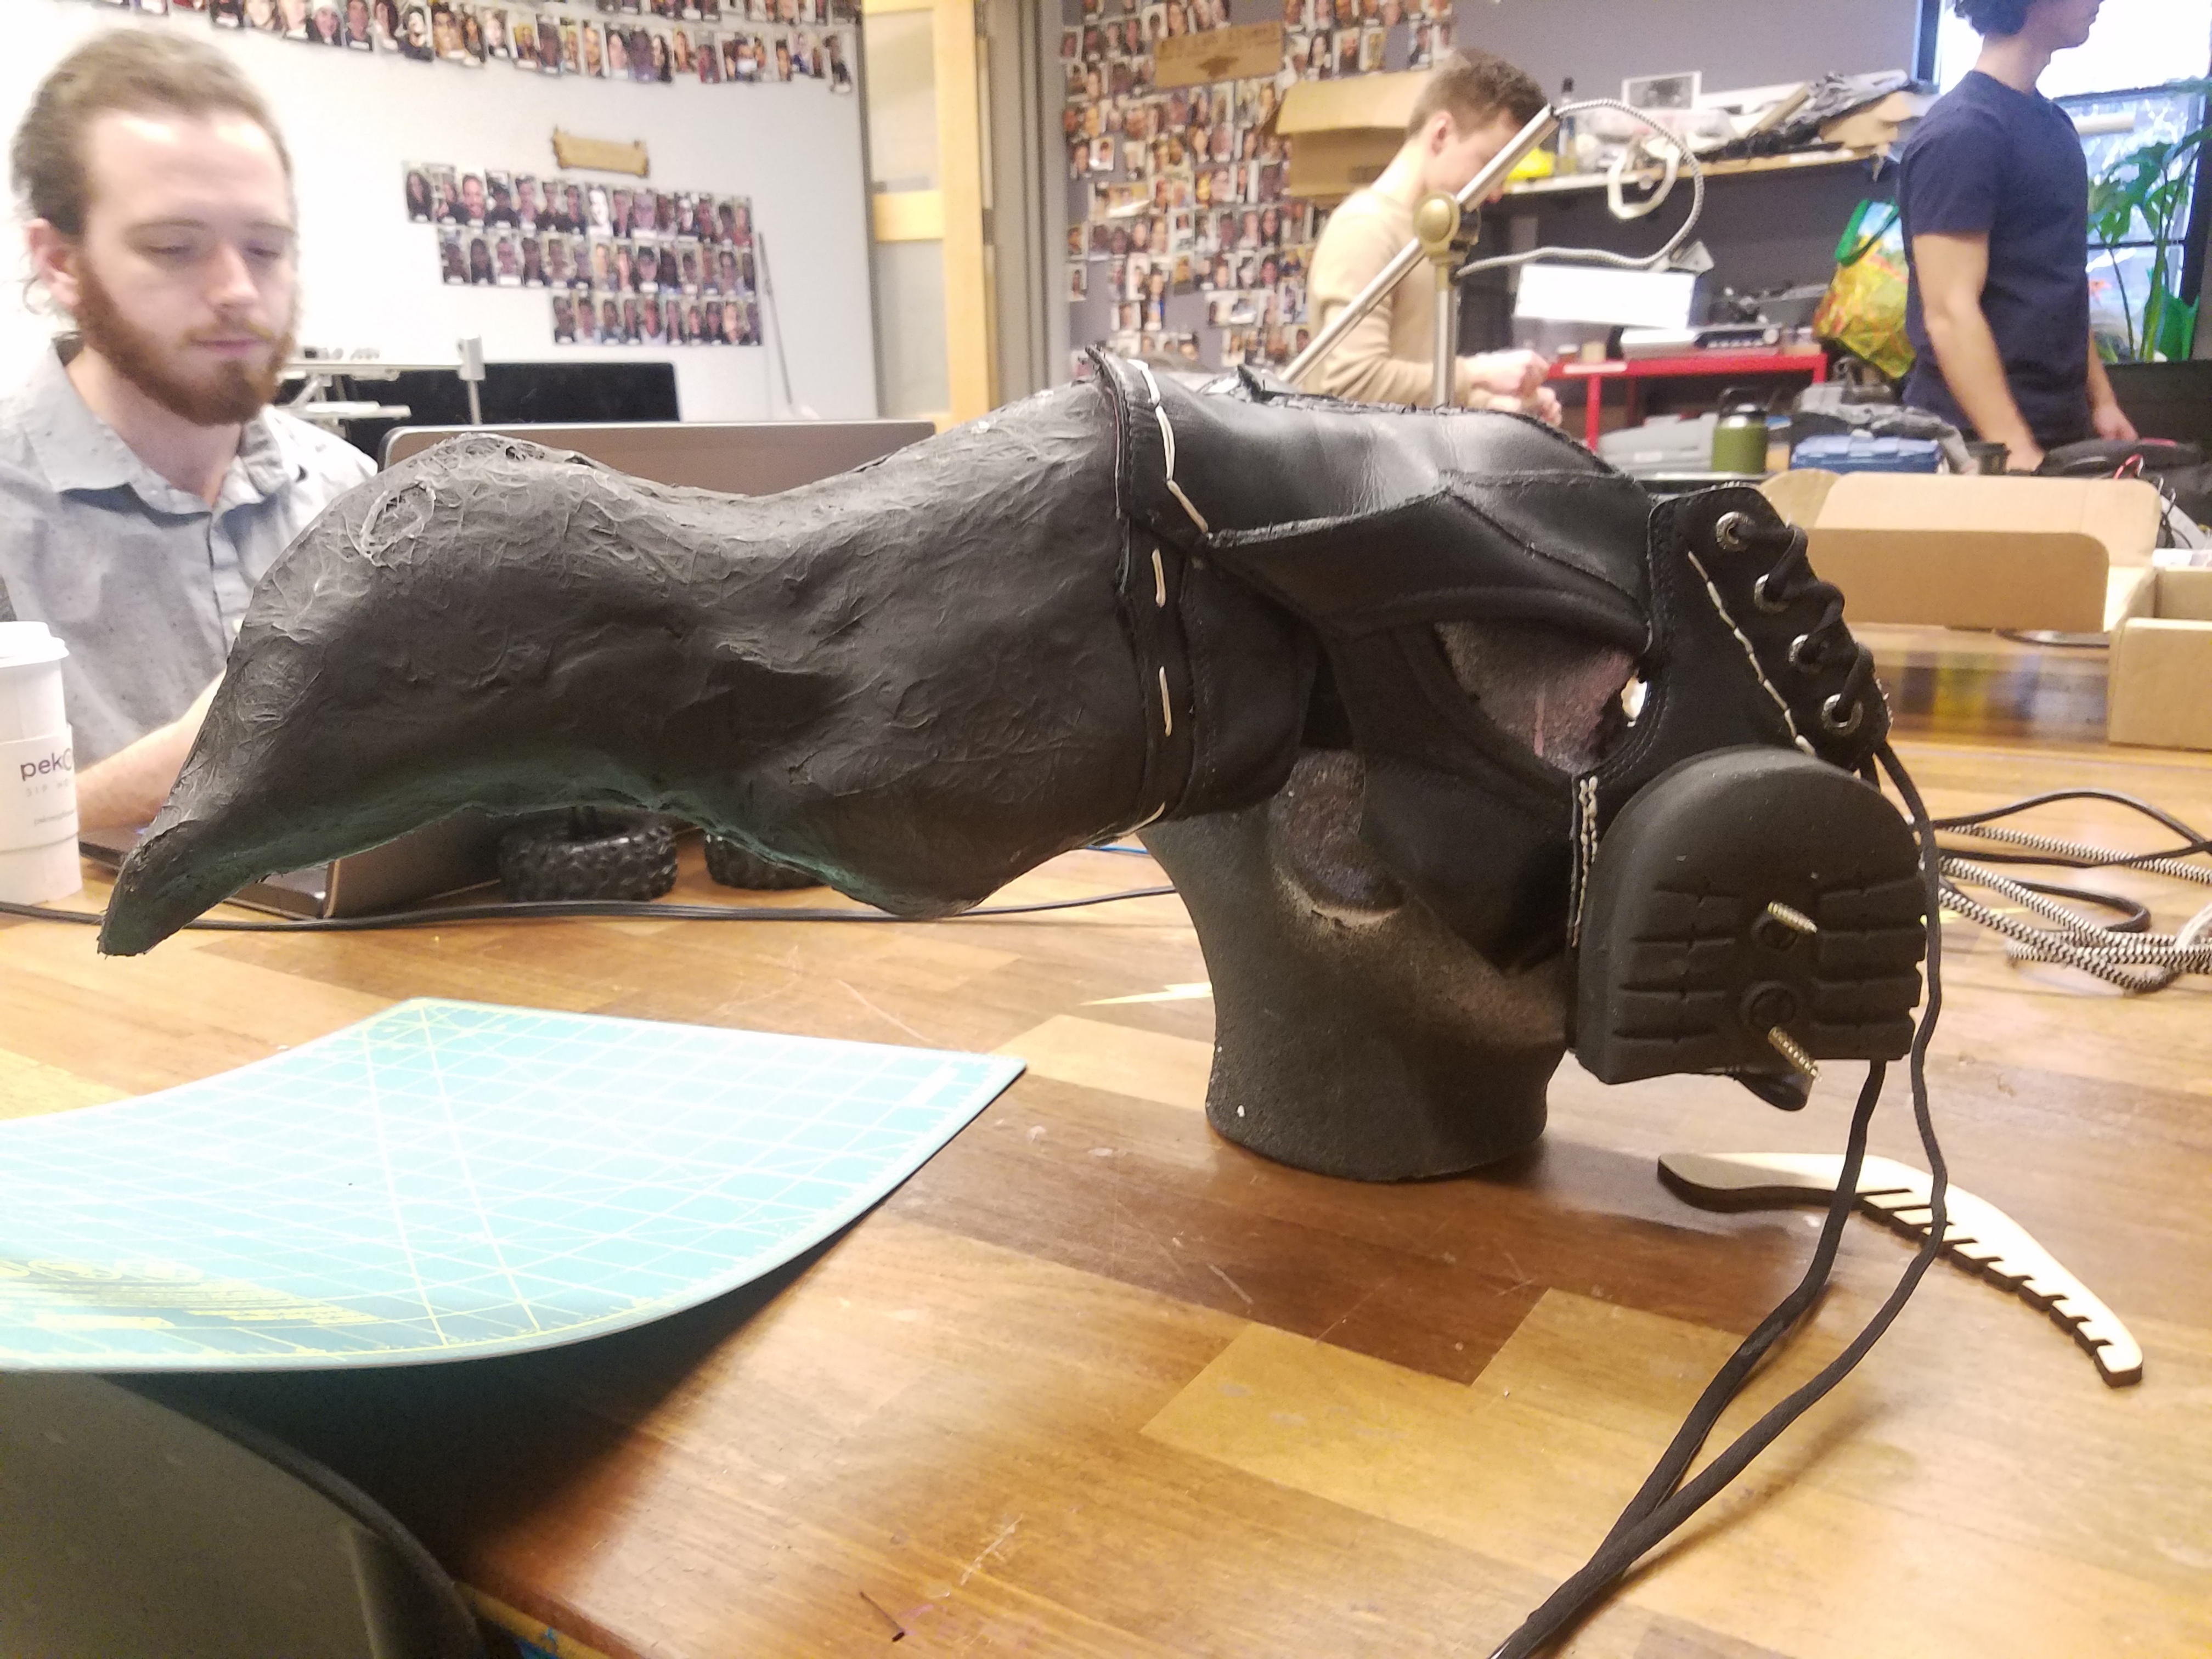
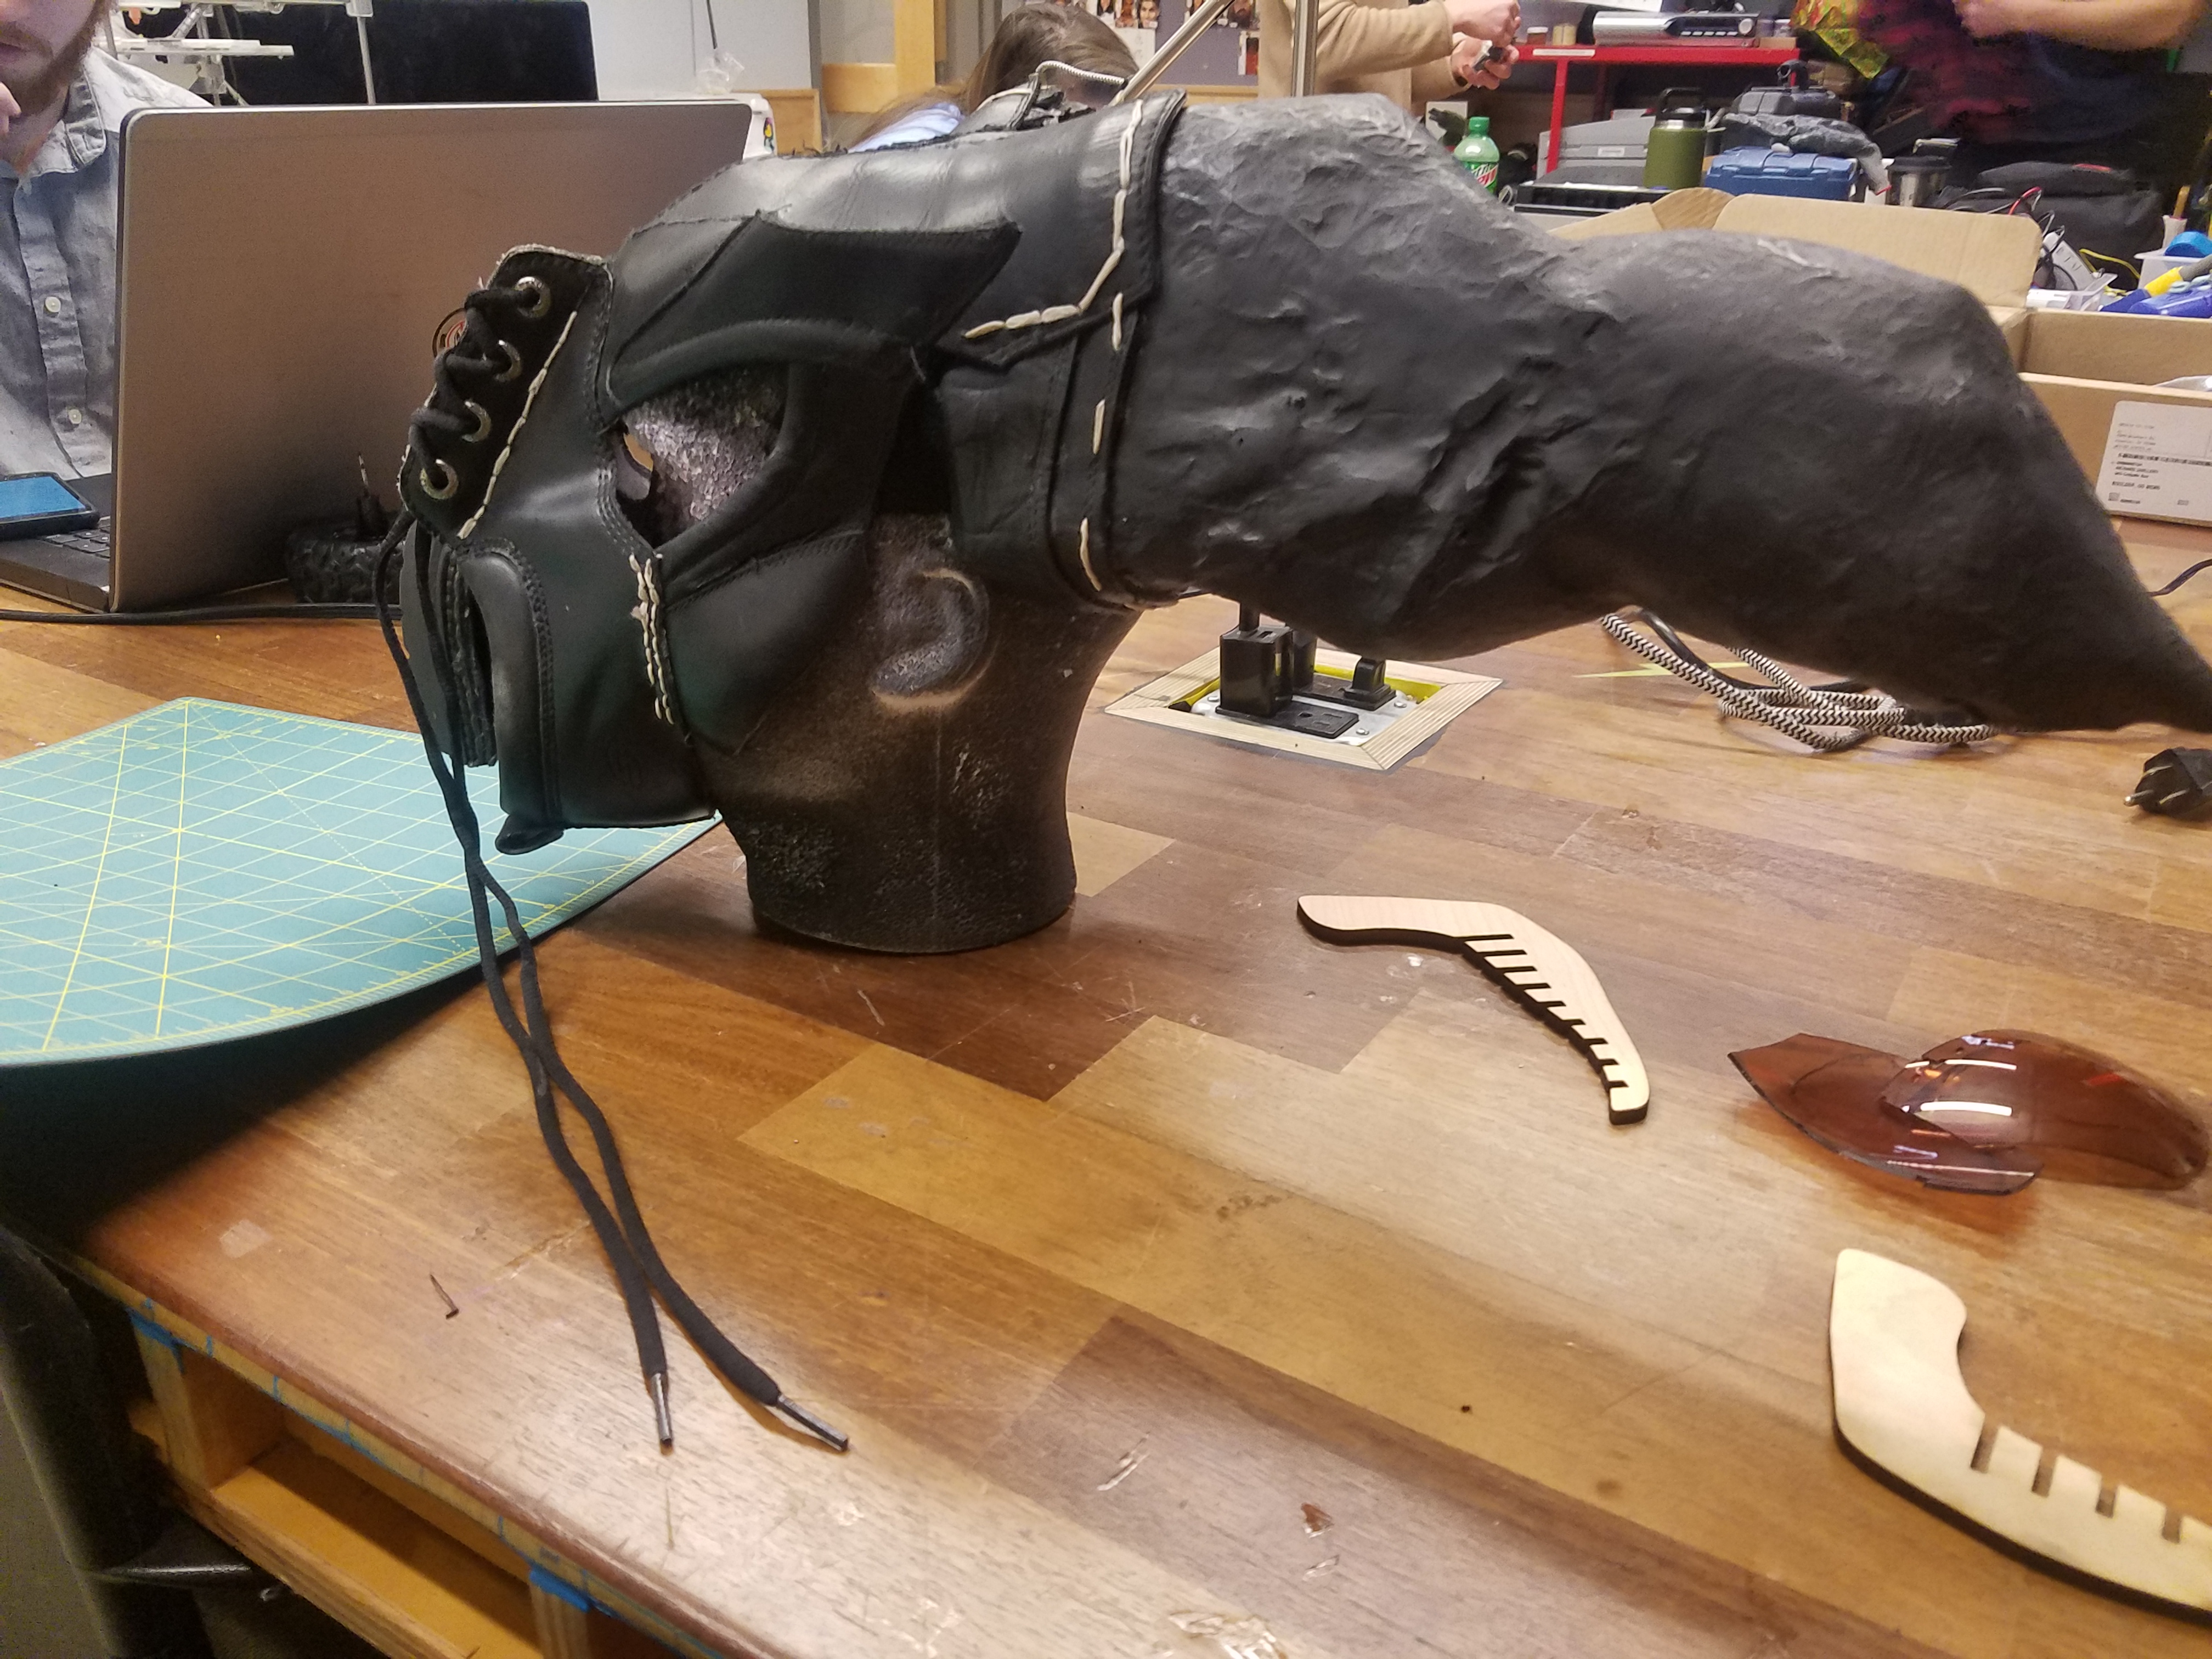
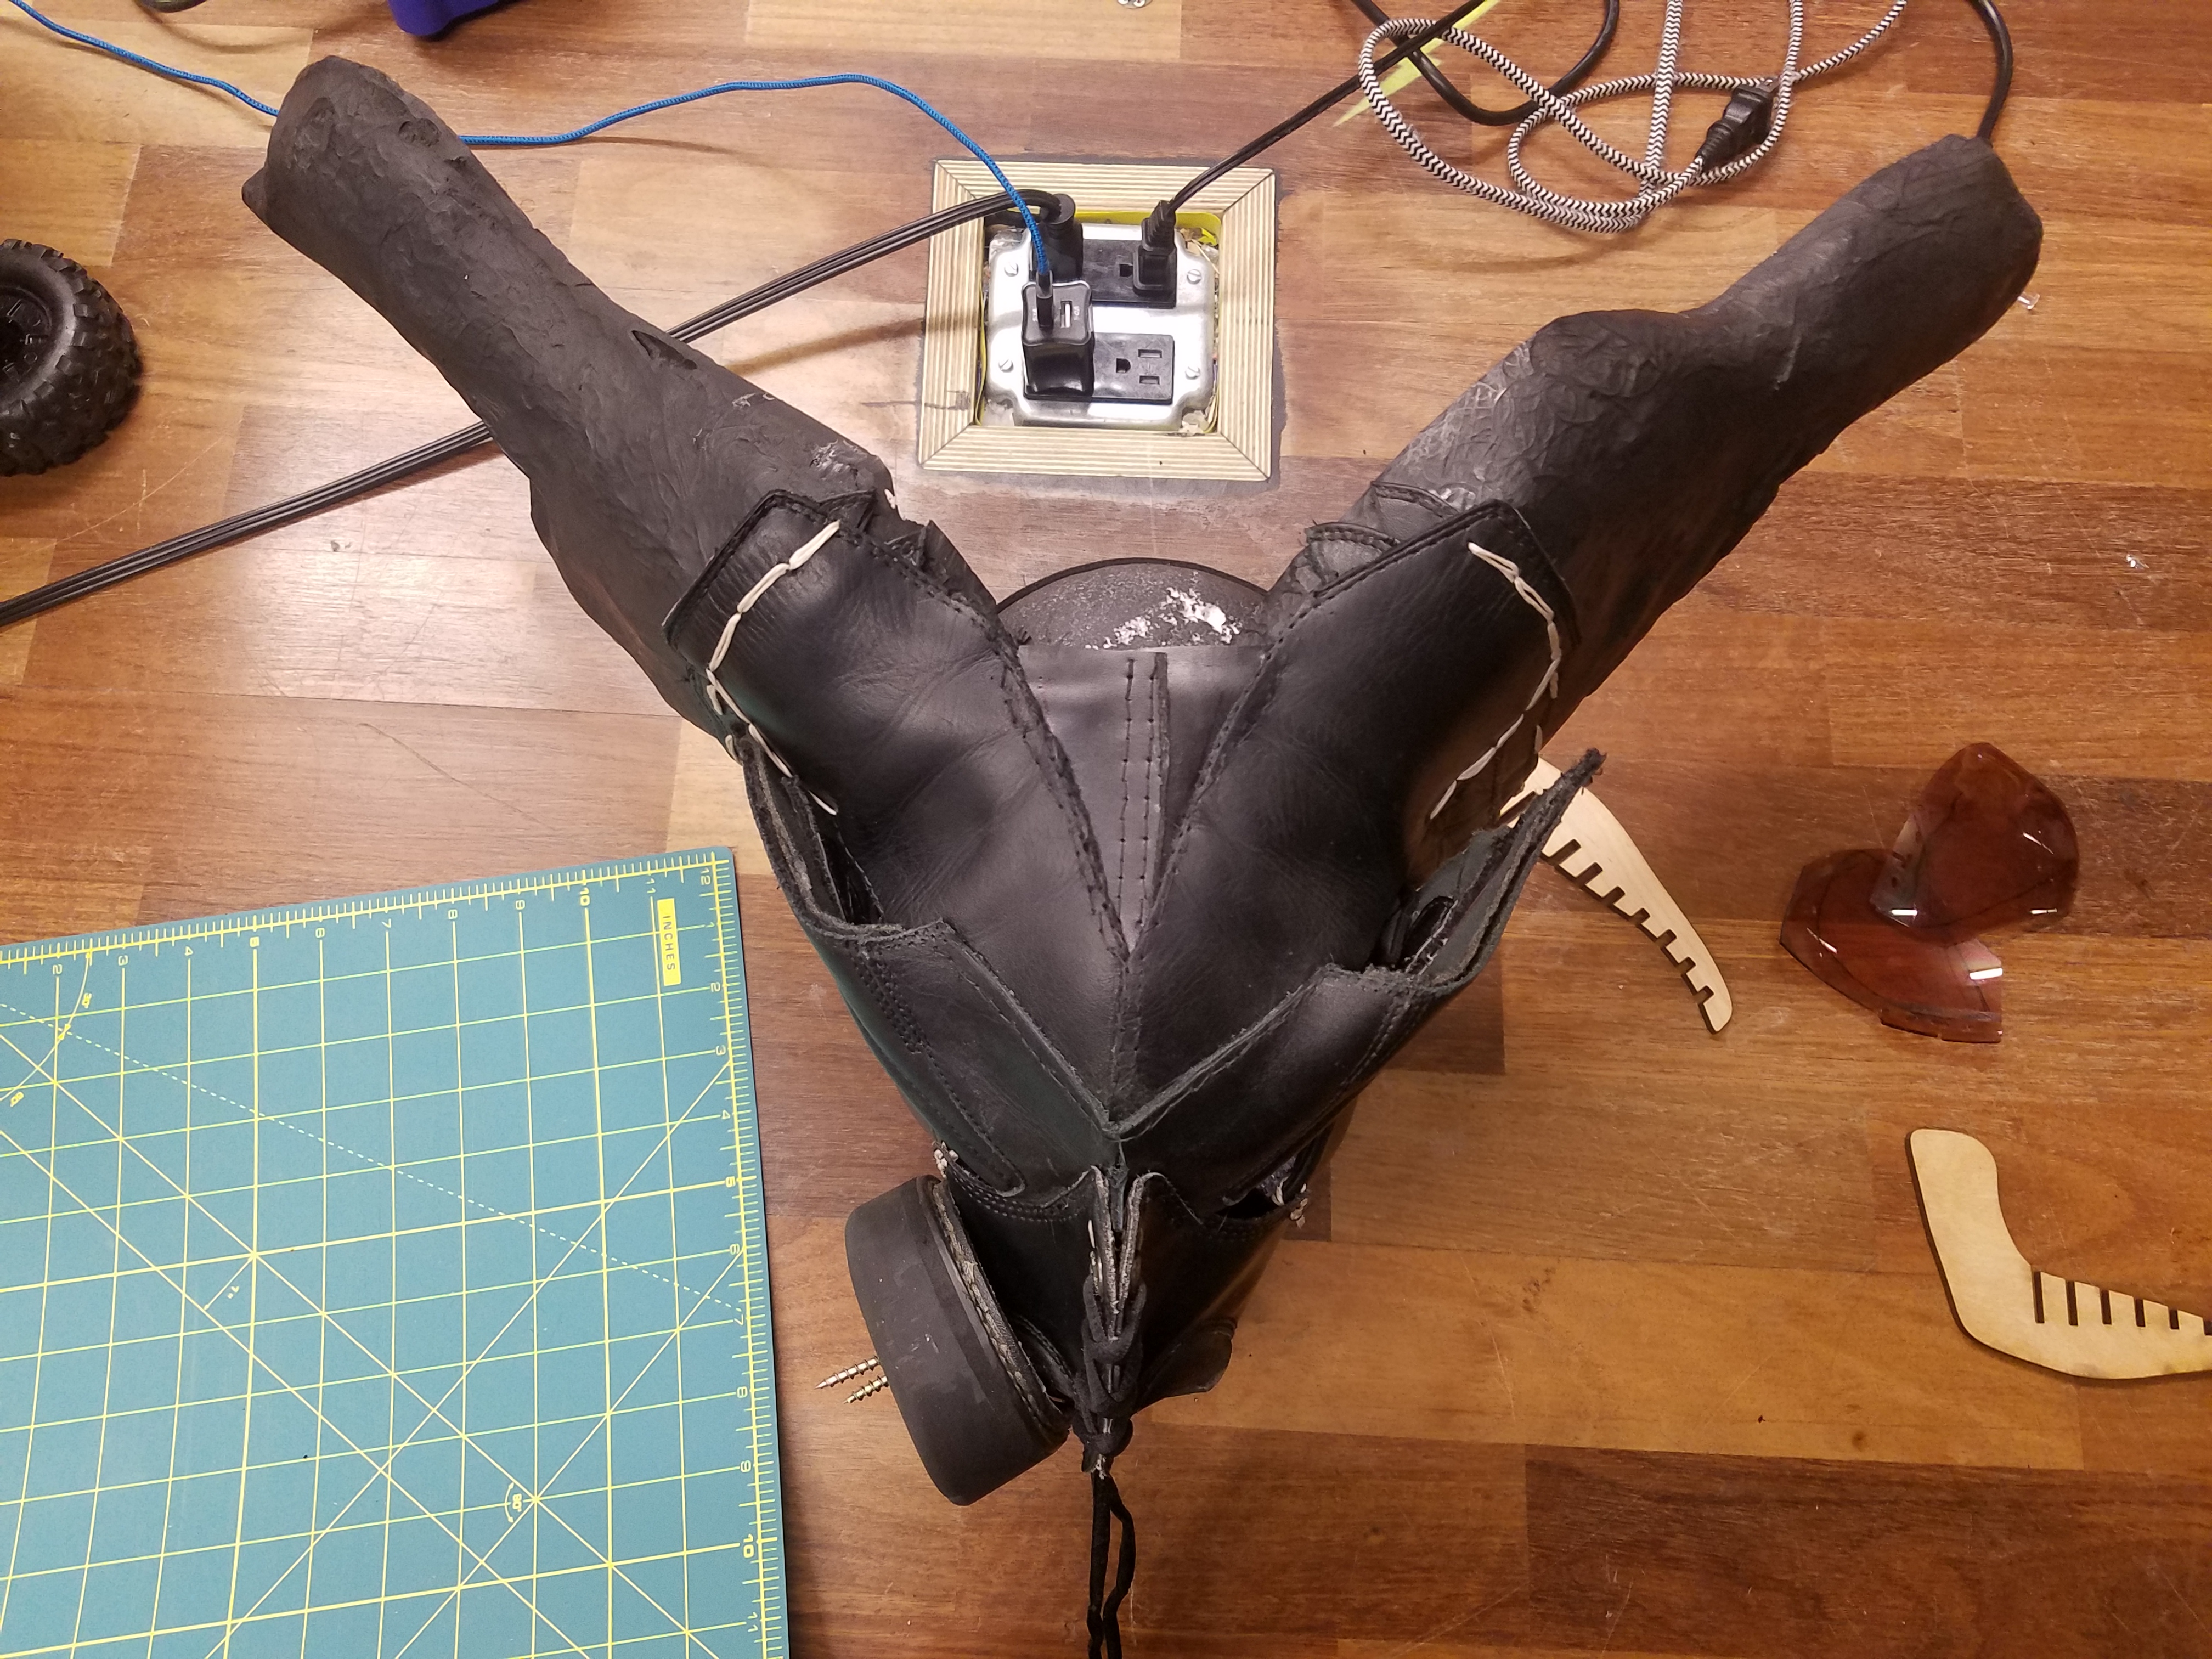
Now that all the parts have been assembled, its time to fully assemble the mask. I started by stitching the panel that goes around the back of the shoes together and the same parts from the other shoe around the eyes. Next, I drilled holes into the horns and glued strips of leather to the base of the horns to create a fluid transition from the leather mask to the horns. I then attached the tongues of the shoes to the base of the horn and the forehead of the mask.
Make sure that the thread you are using is sufficiently strong to hold the leather together. I glued the pieces with Bish glue then punched holes with a large tack before stitching the pieces together. I also tried to add two lines of stitching to each seam for added strength. In addition, to the thread being functional, it can also be decorative. I used a waxed beige thread to add accents to certain parts of the mask.
After adding the horns, I added more leather between the tongues on the horns so they would rest evenly on the head. I then attached the front of one shoe into the snout of the mask.
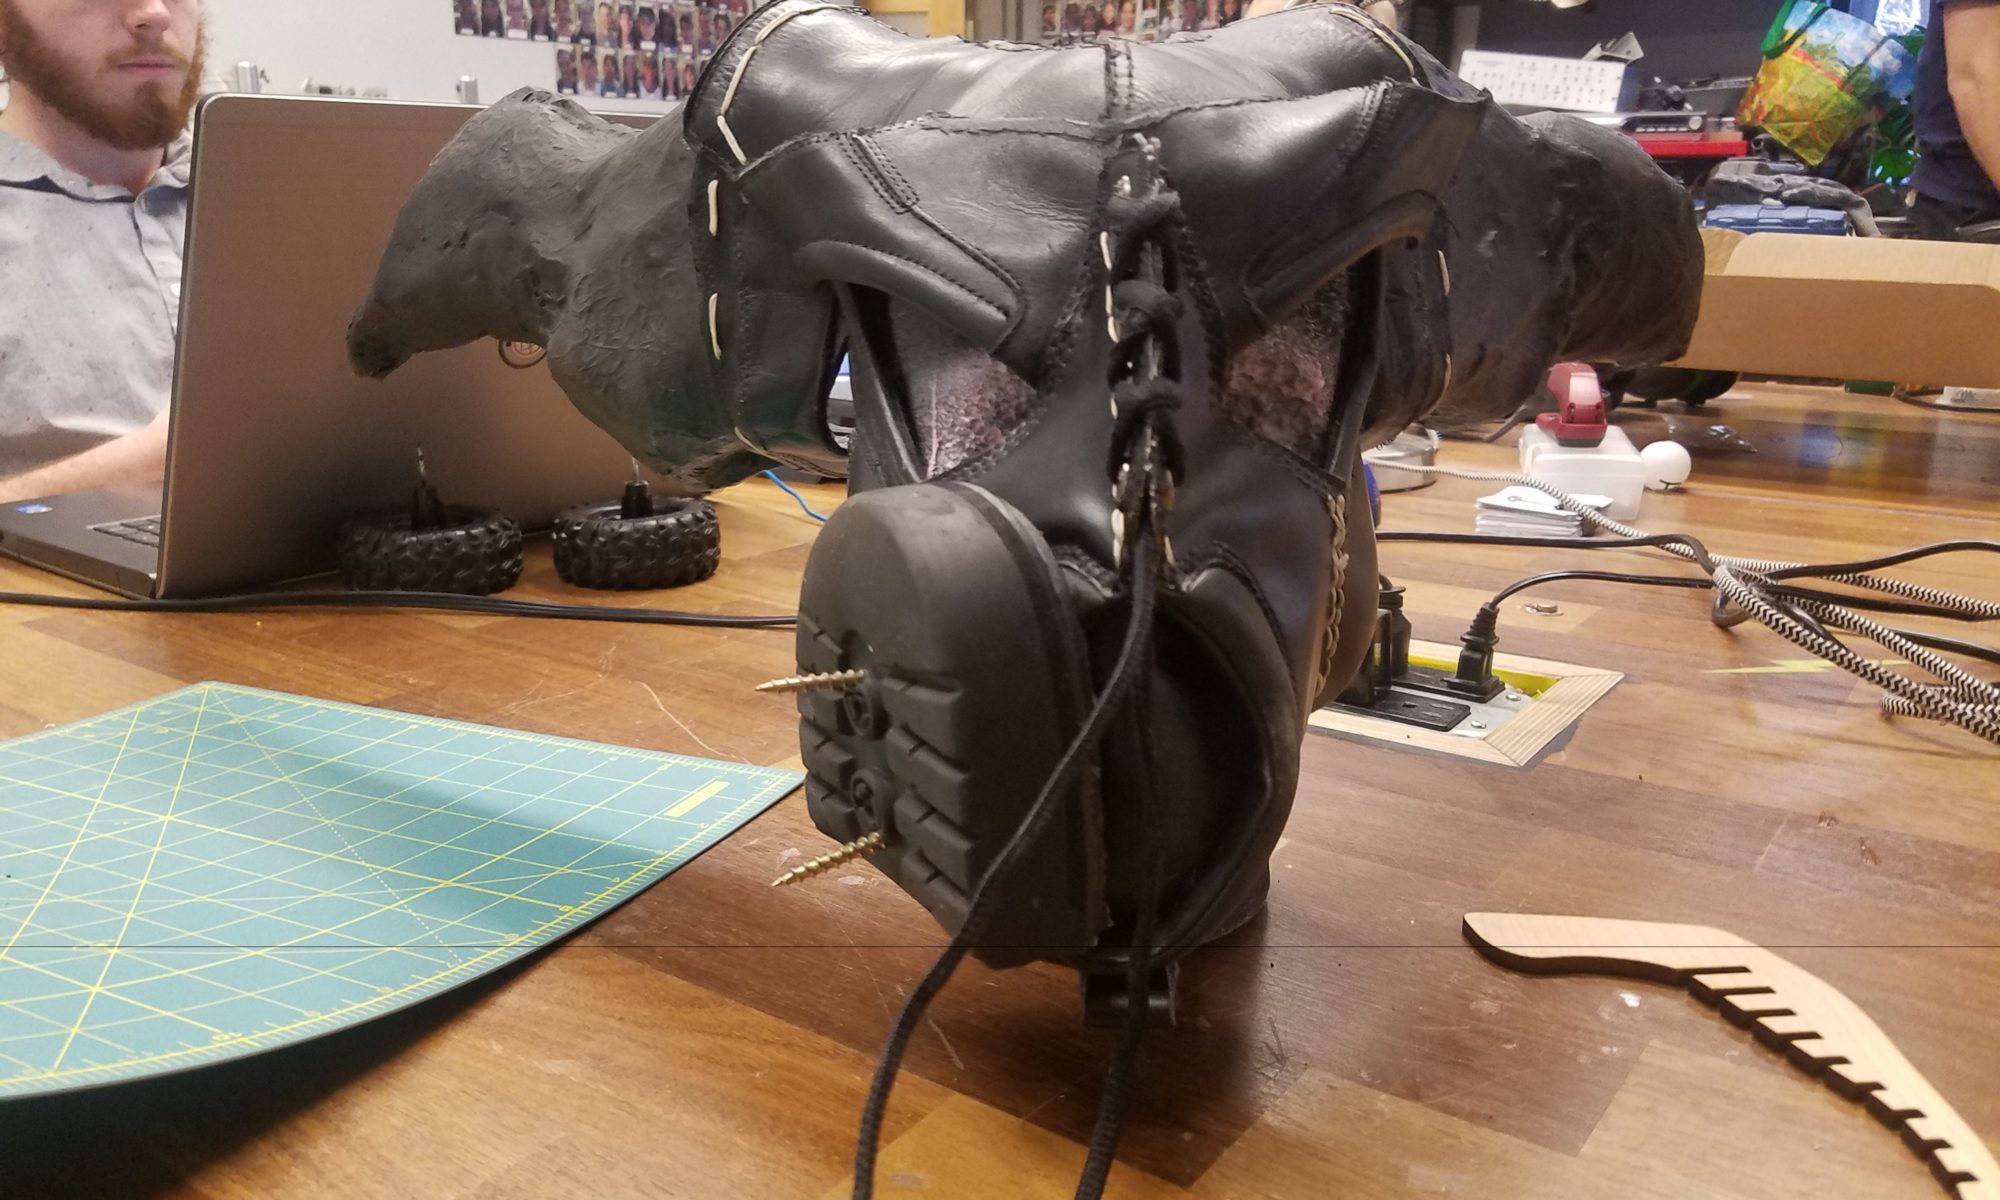
For the ‘filter’ of the mask, I used the heel of one of the shoes. The rubber of the sole was hard to work with and required a lot of sawing and sanding to look right. It was then screwed onto one side of the mask.
Next, it was onto the eyes. I split the ski mask in half and traced the eye holes onto the halves. Using a drill press, I added the stitching holes and stitched them in.
Lastly, I added the jaw bones I had laser cut earlier. These, I created using similar techniques to this trophy head
Problems
As originally intended, there would have been lights in the eye sockets as well as behind the horns. Maybe, a speaker would have been added to the front. Unfortunately, my head as was too big to fit all that and my head.
I also ran into problems with the symmetry of the mask. The parts were hard to work with as most of the leather had an insulation component which made hole punching an inexact science.
Lastly, there was the problem of cost. the whole things cost around $200 dollars including the tools I had to get. For a project of this size, the cost could have been reduced if there were some patterns to follow.
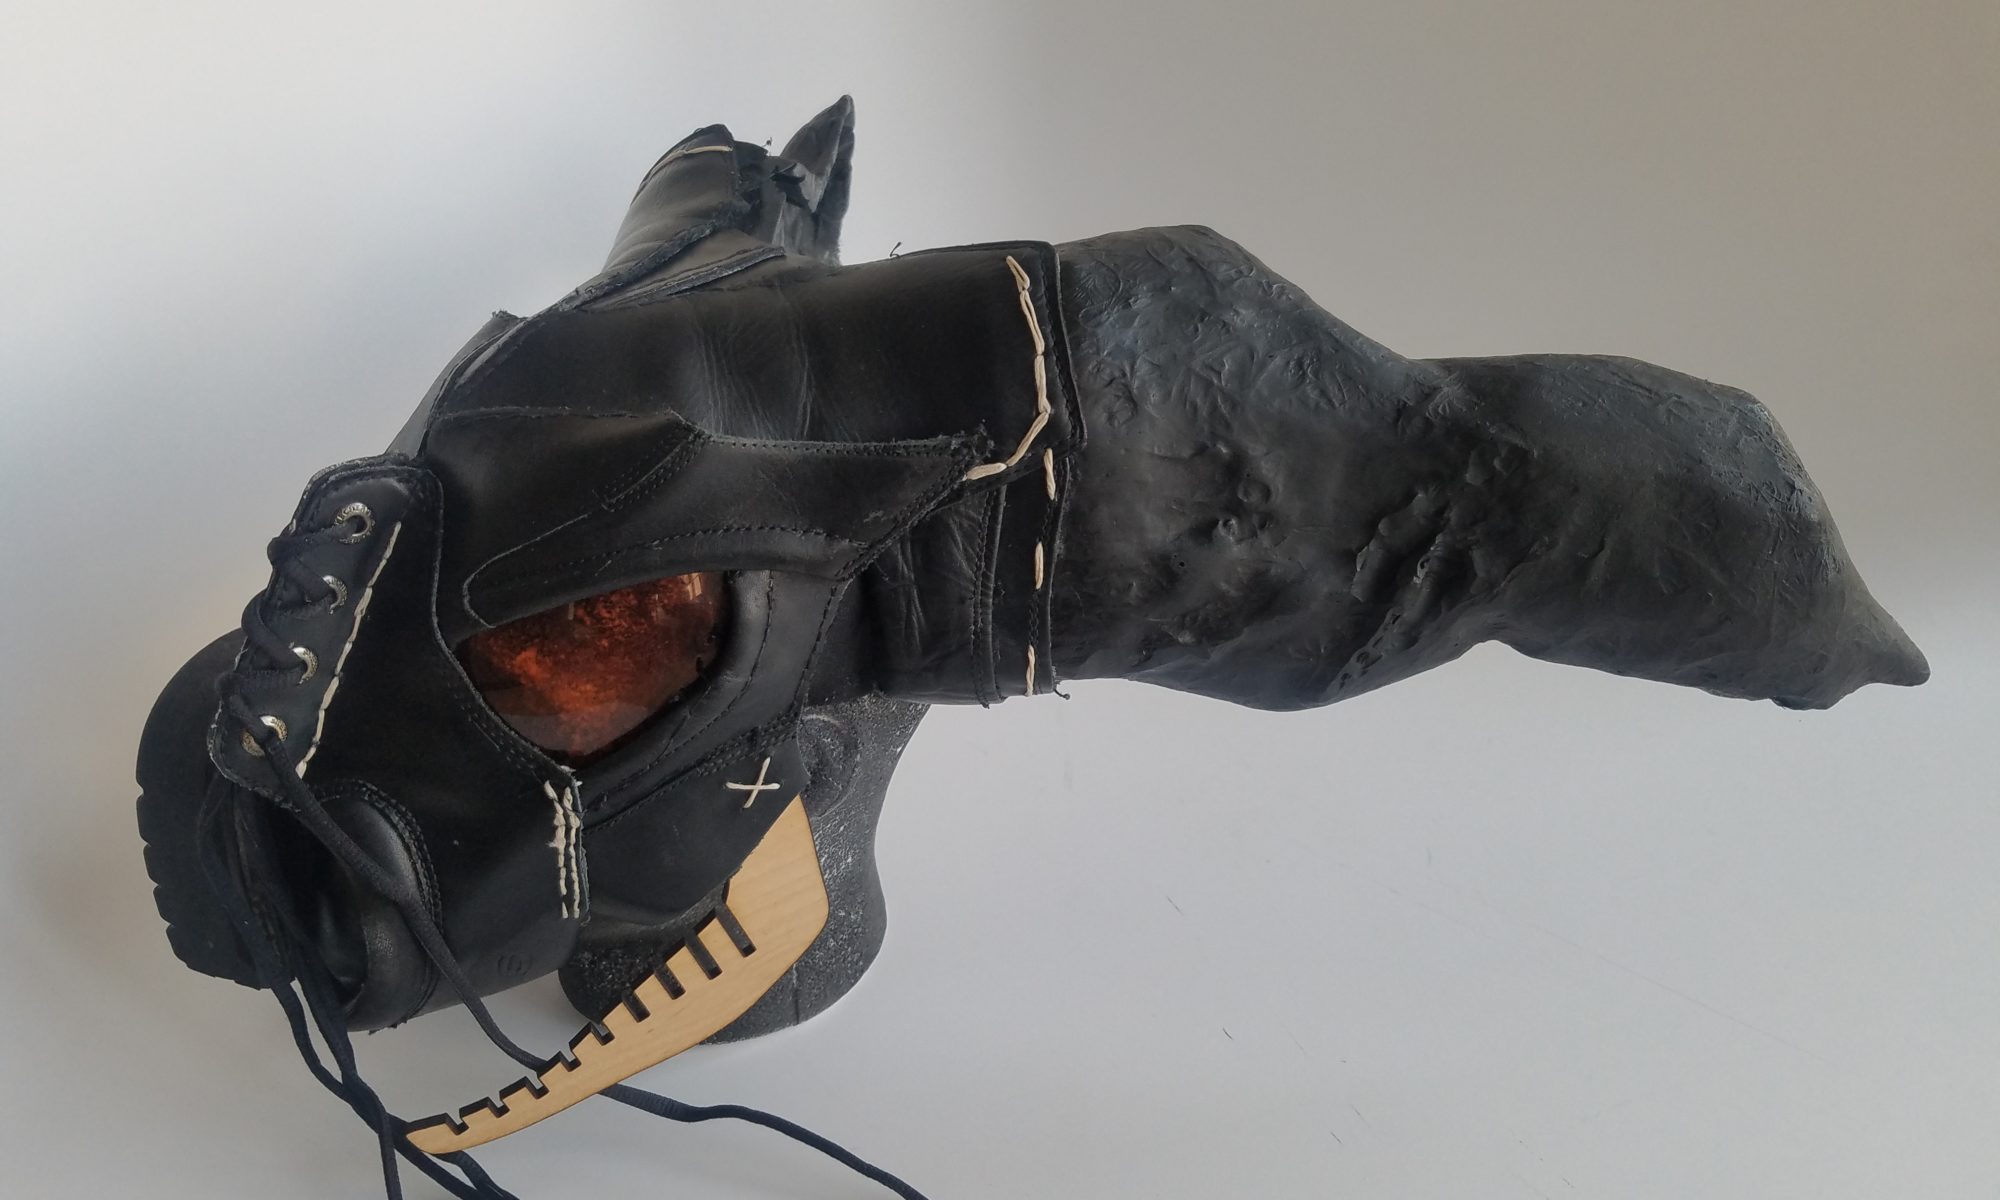
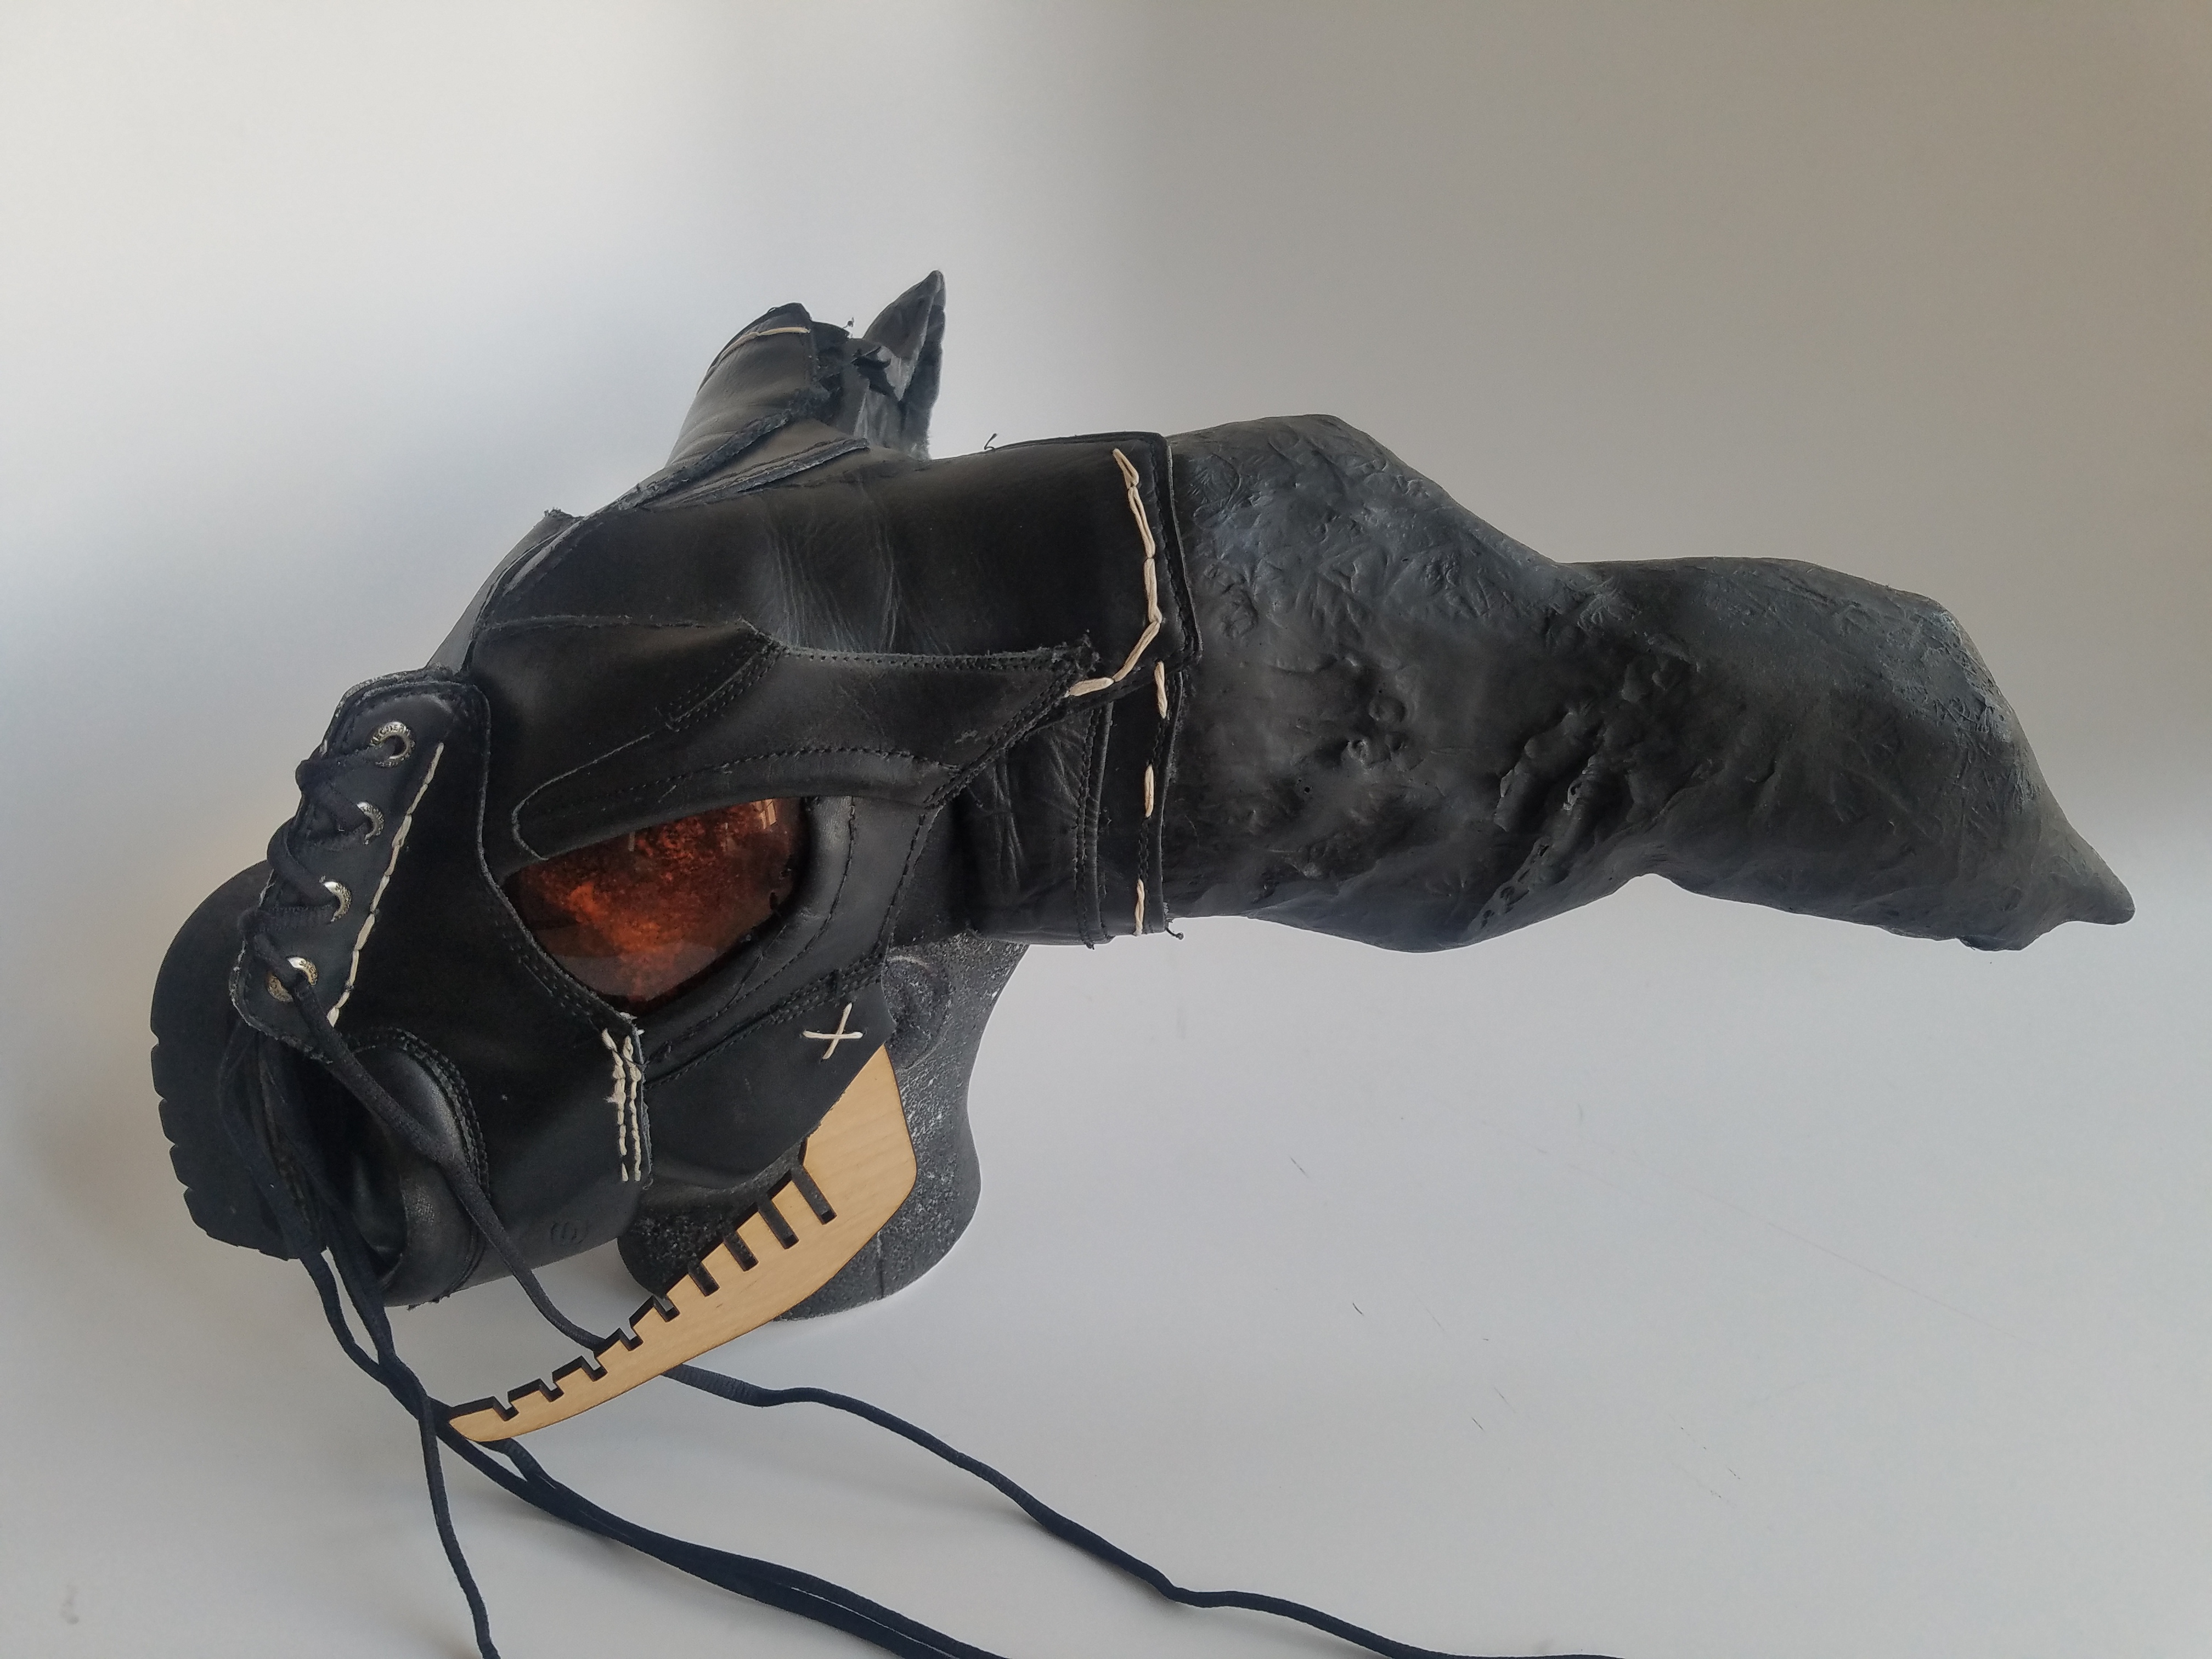
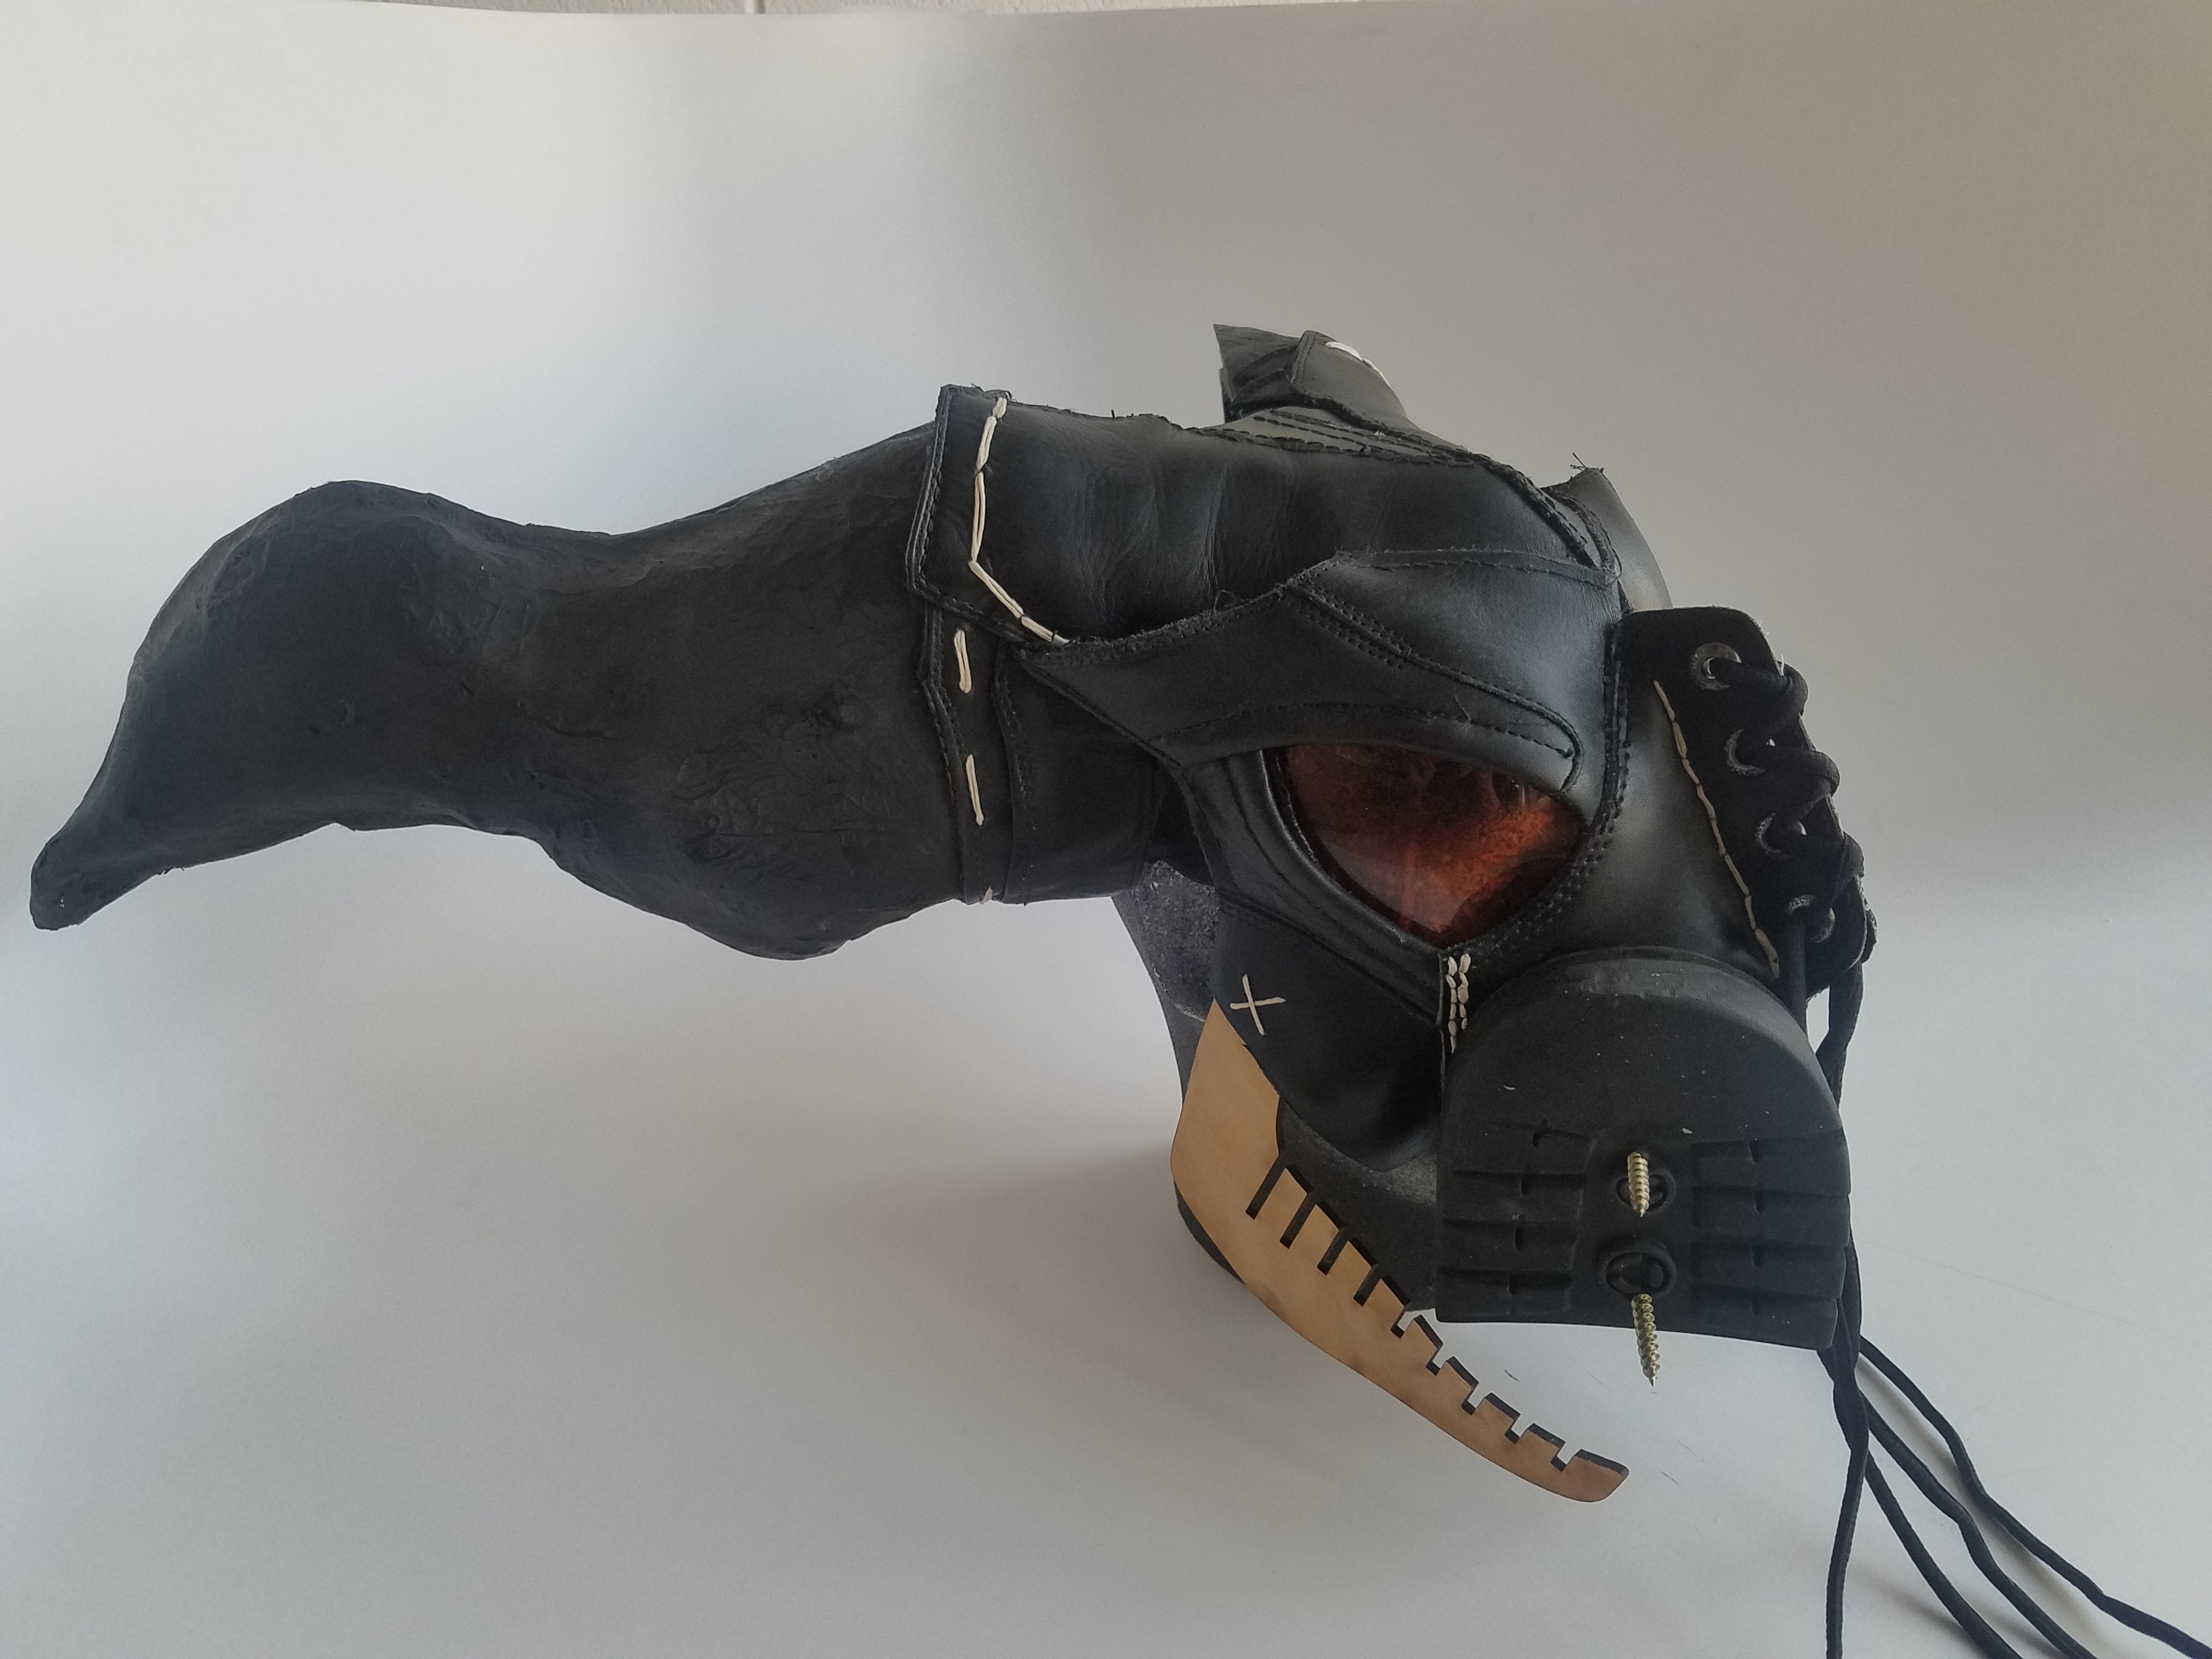
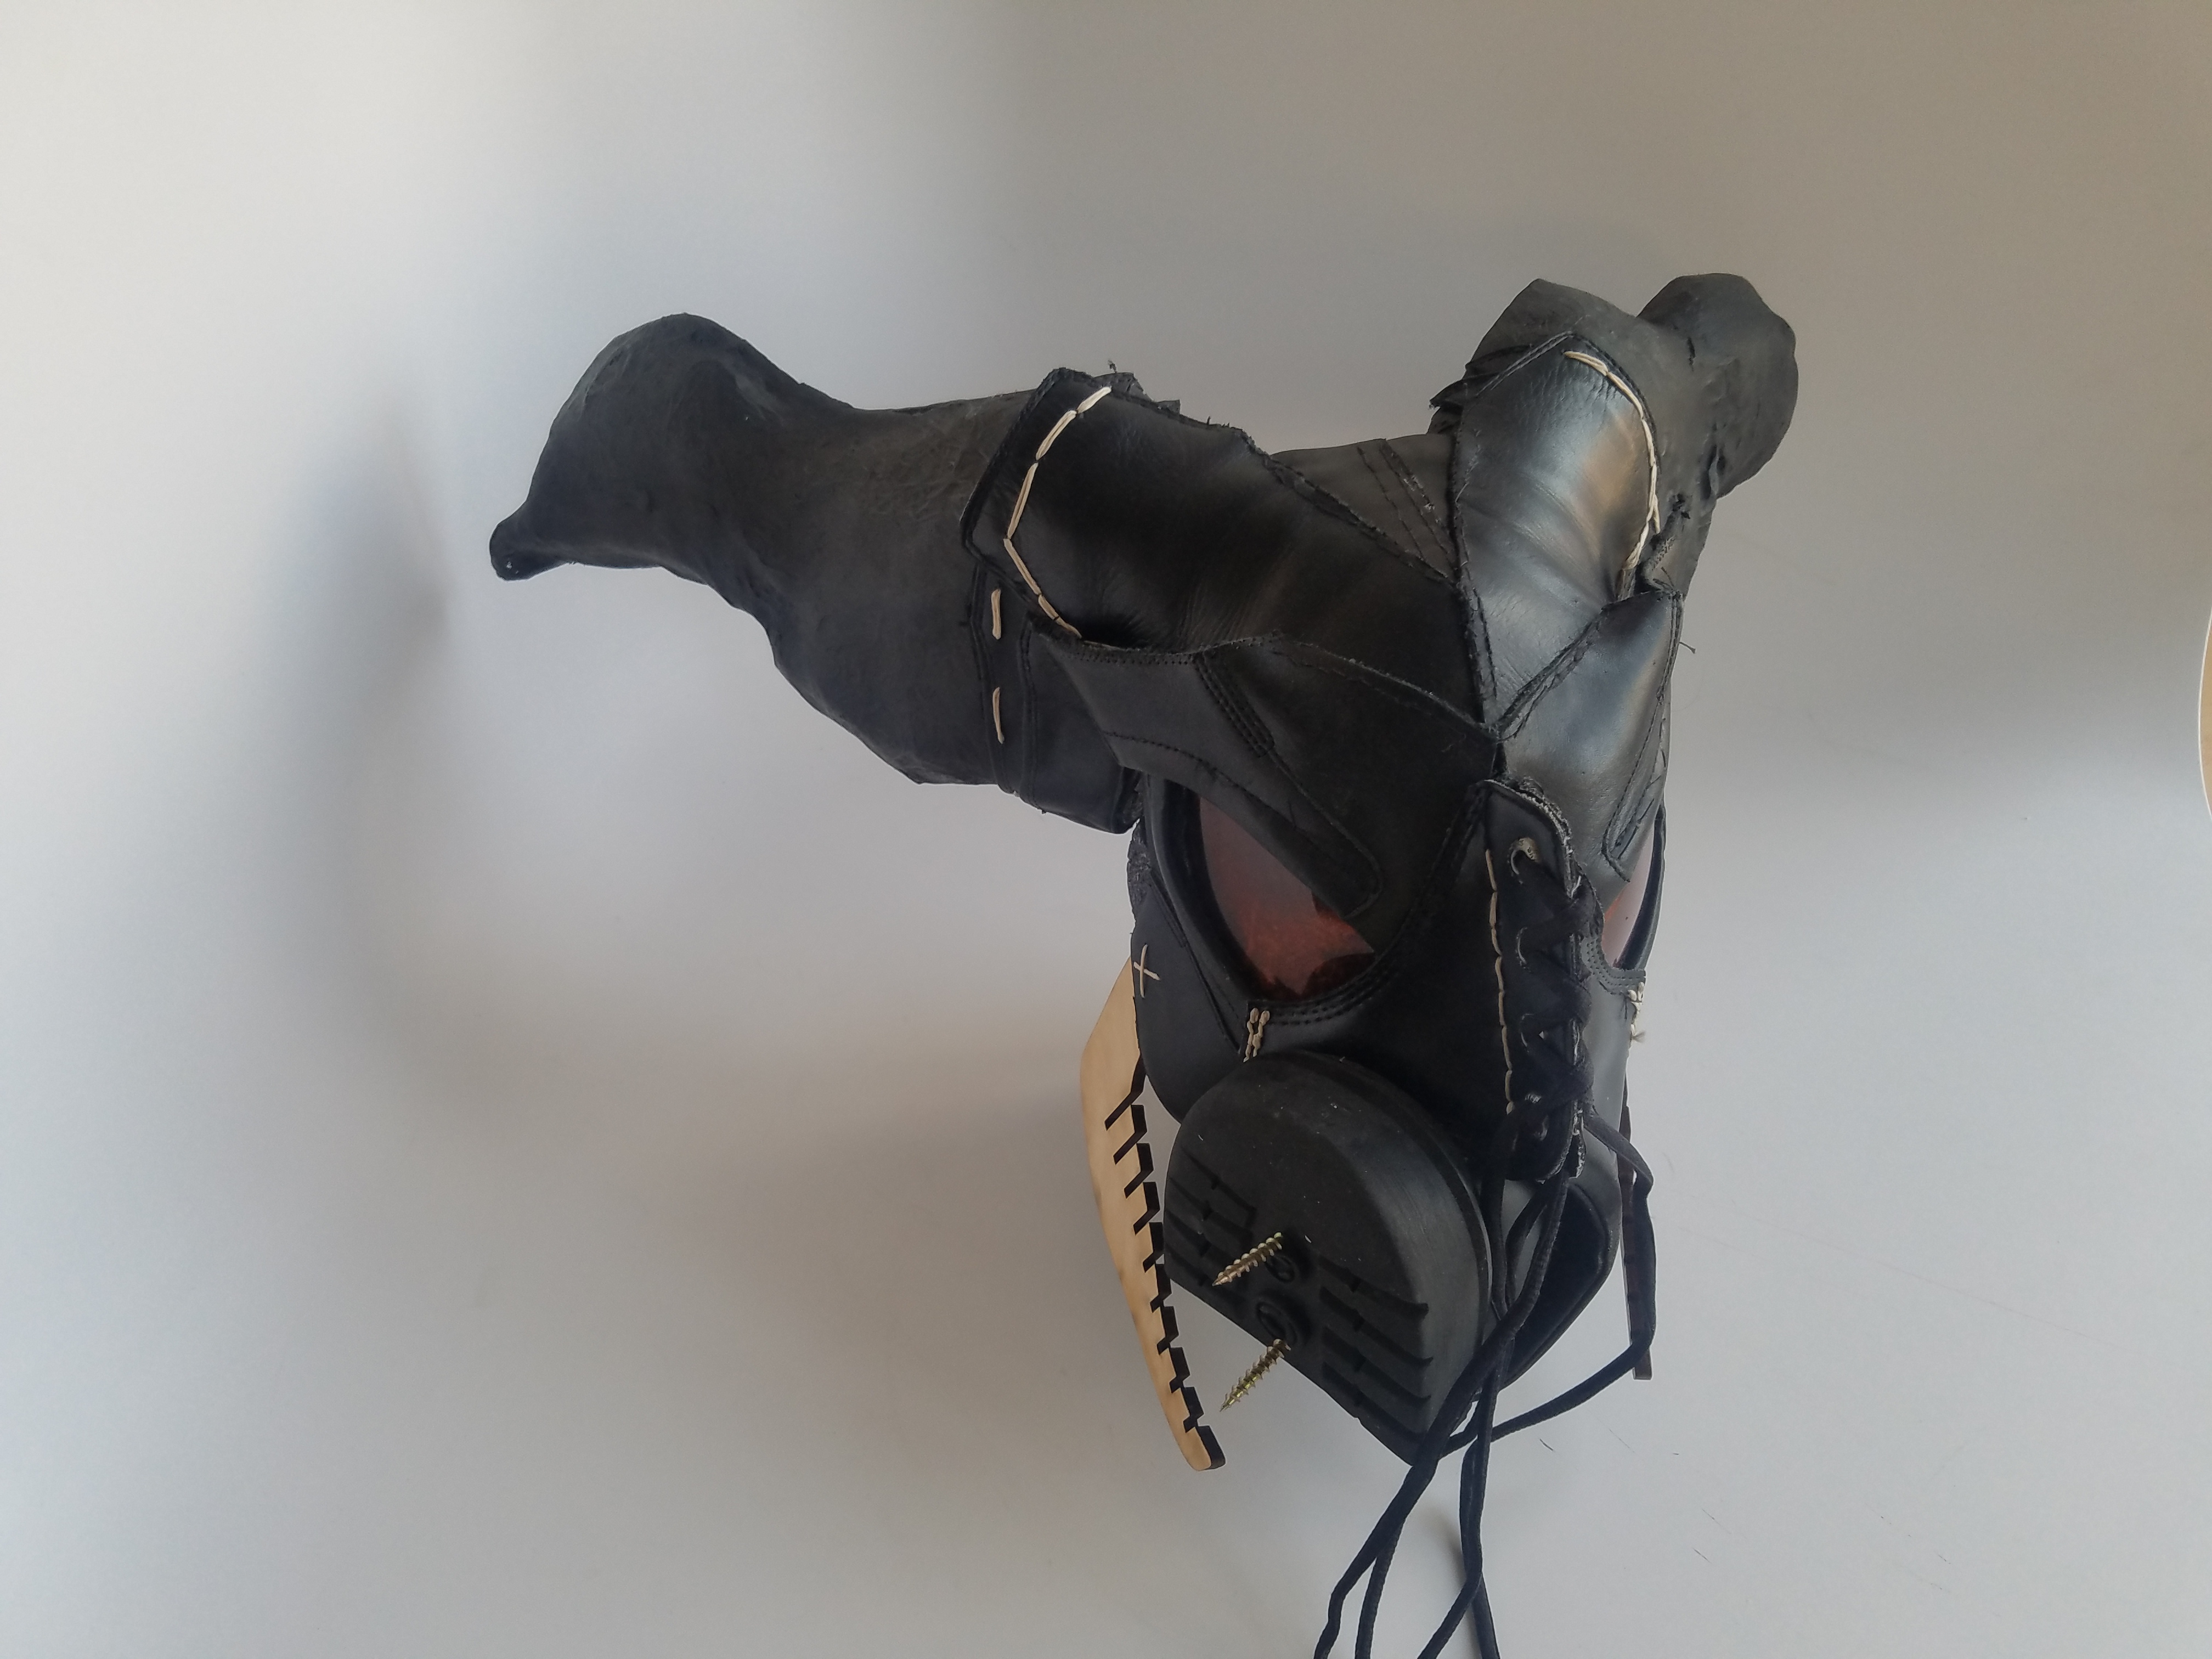
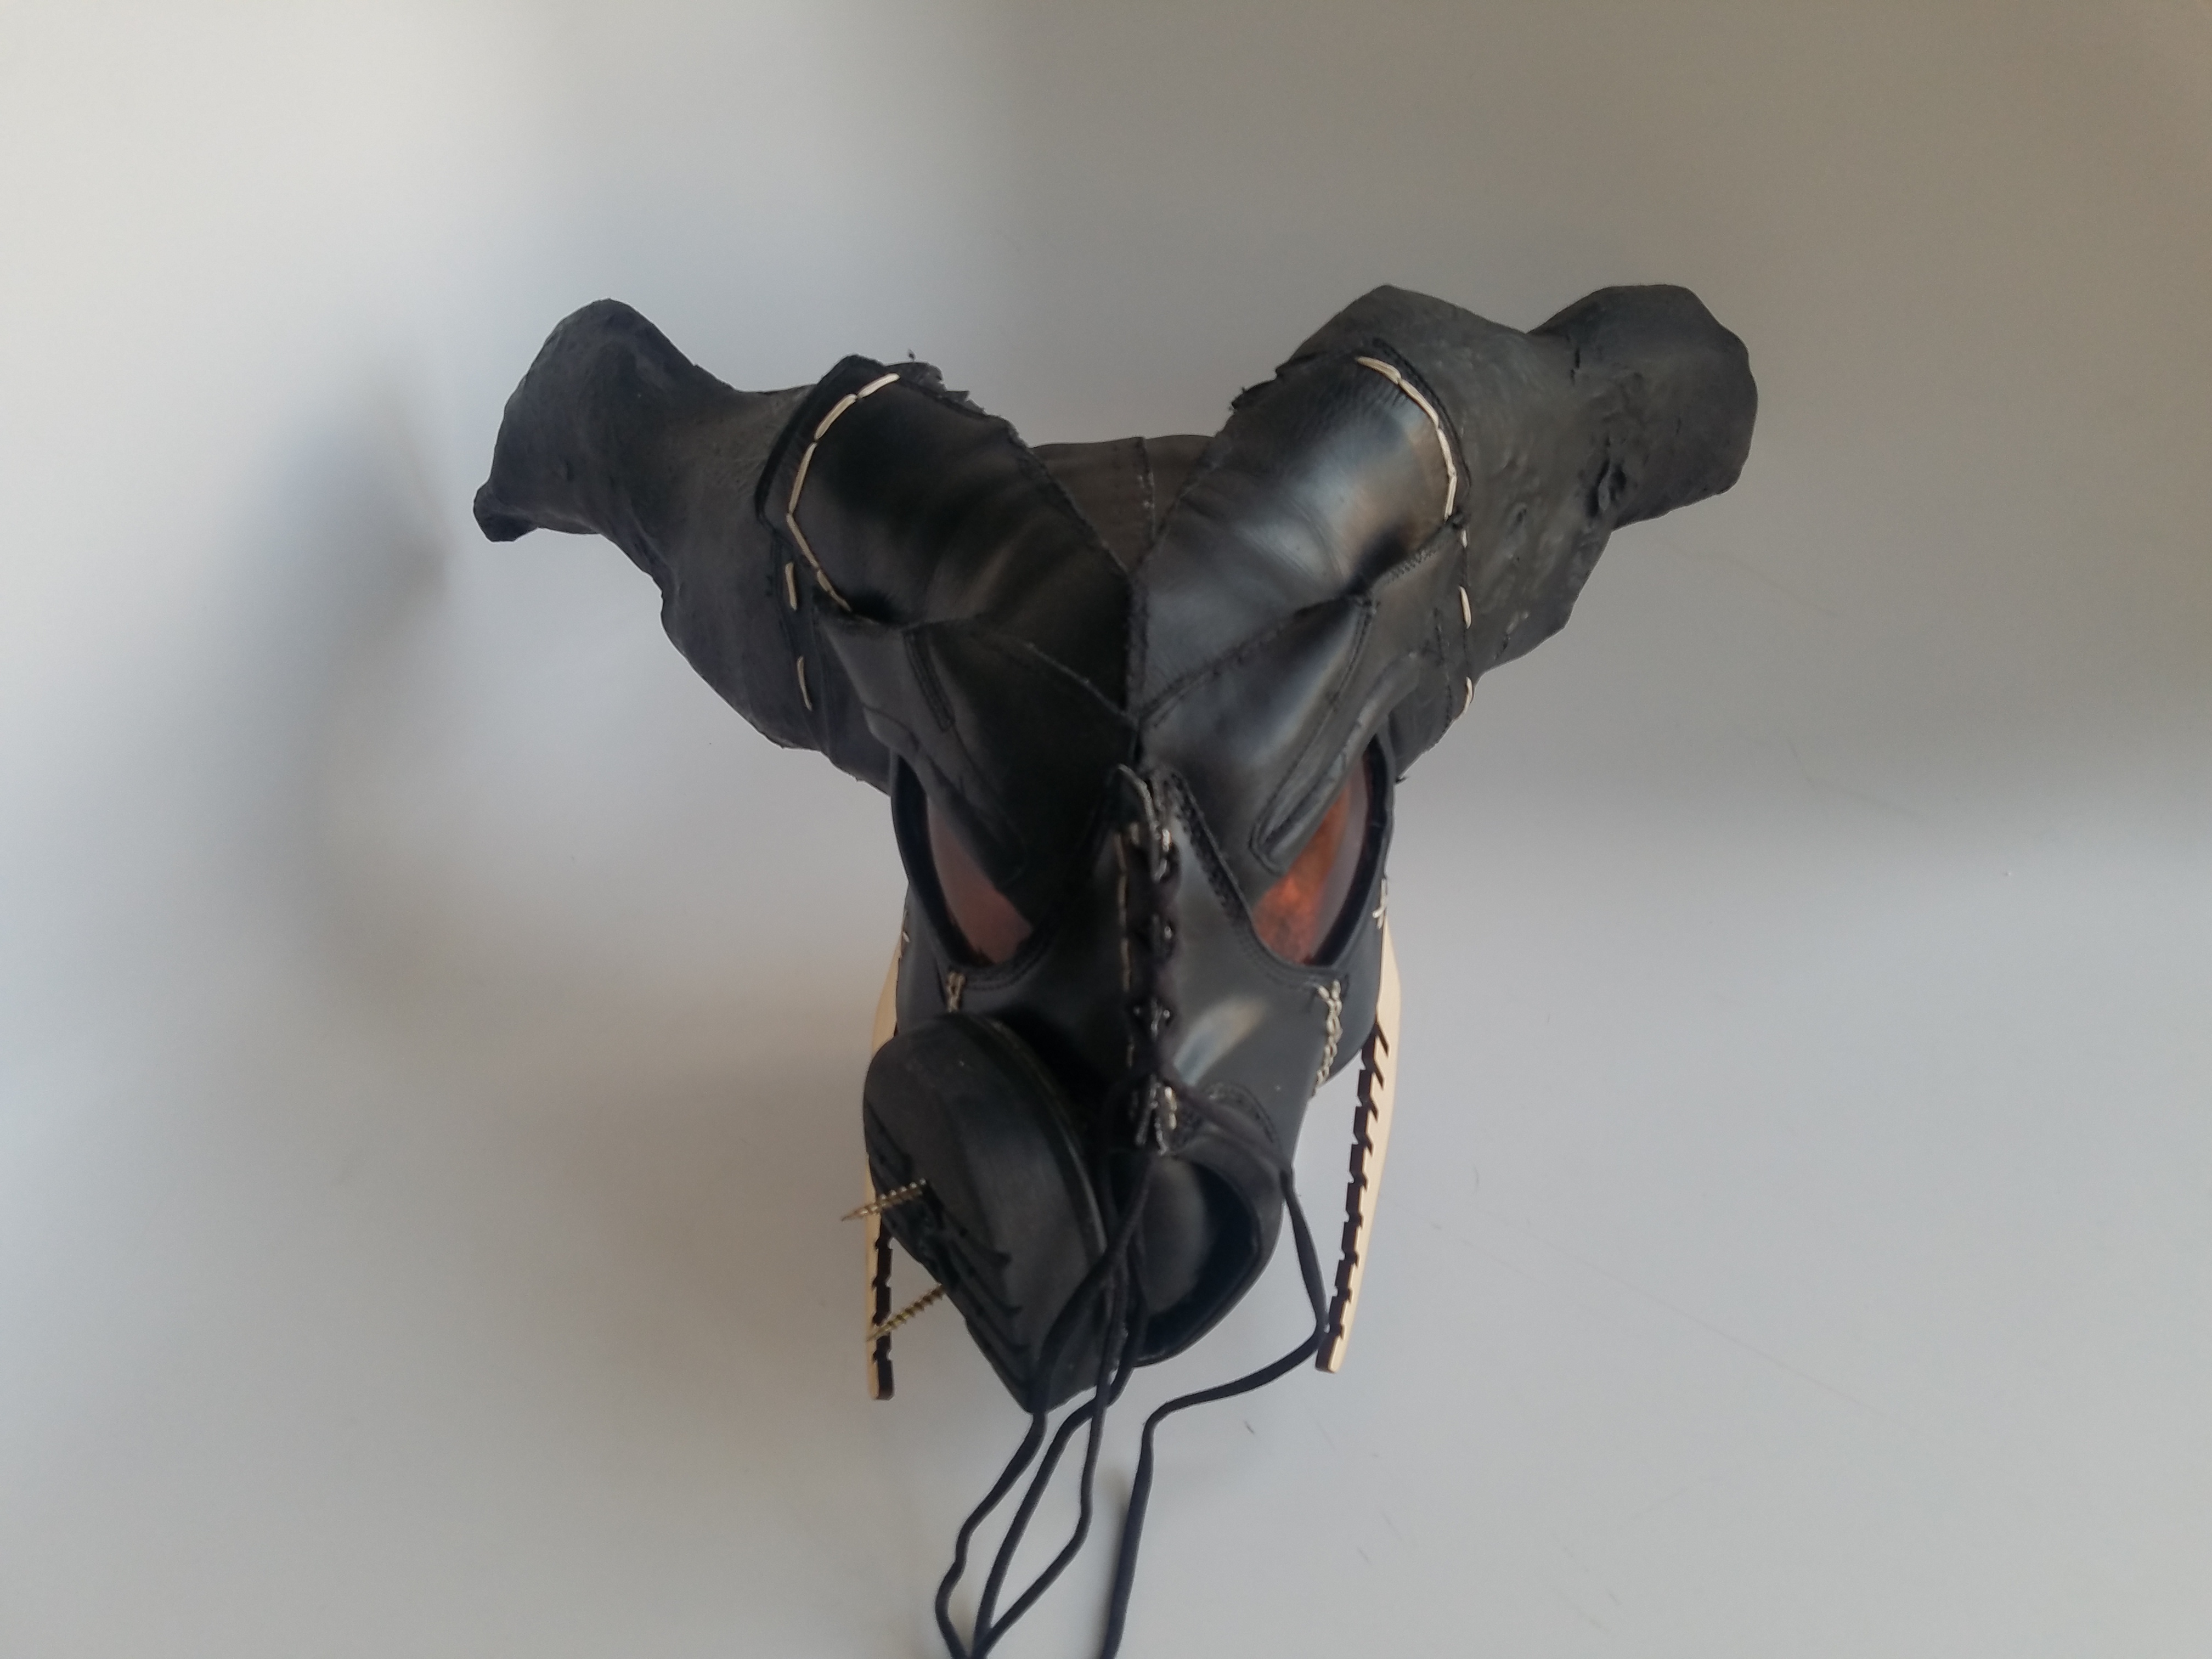
Final
Name: Sold Soles
Tagline: For when old soles.
Artist’s Statement: This piece is inspired by the work of Freehand Profits as well as my eternal love for Lovecraft. Most parts of the mask are made from old and recycled objects. It speaks to our consumerist culture that demonizes the waste as a byproduct of society as opposed to materials to be utilized.
Post-mortem. While Android is far more universally used. It has had trouble unifying it’s look and code protocols. I found this to be a problem when trying to create my Project 2 as some articles said one to add settings while other said another way. While I could have ditched using Preference class, and used data persistence and hand code activities, I tried to code within the confines of Android.
Process. I defaulted to w\finishing my app at the last minute. I assumed it would be as easy as Apple was with a single way to do anything and good documentation on how to do it. It was not. I should have tried to do things another way when using Preferences didn’t work. As Android doesn’t have a set of a look, cheating out a set of settings would have still looked “Android”.
Going forward. I liked the design of my app and the general idea. If I was to make a v2.0, I would make the settings in a drop down as was originally planned. I would my also drop data persistence as it is not super necessary for such a simple app. Lastly, I would add some drop shadows and adhere to Material Desing a bit closer.
Android is harder than I previously anticipated. Unlike iOS, where everything has only one right way, Android has many ways to do things that seem to change from patch to patch as few of third-party documentation were consistent.
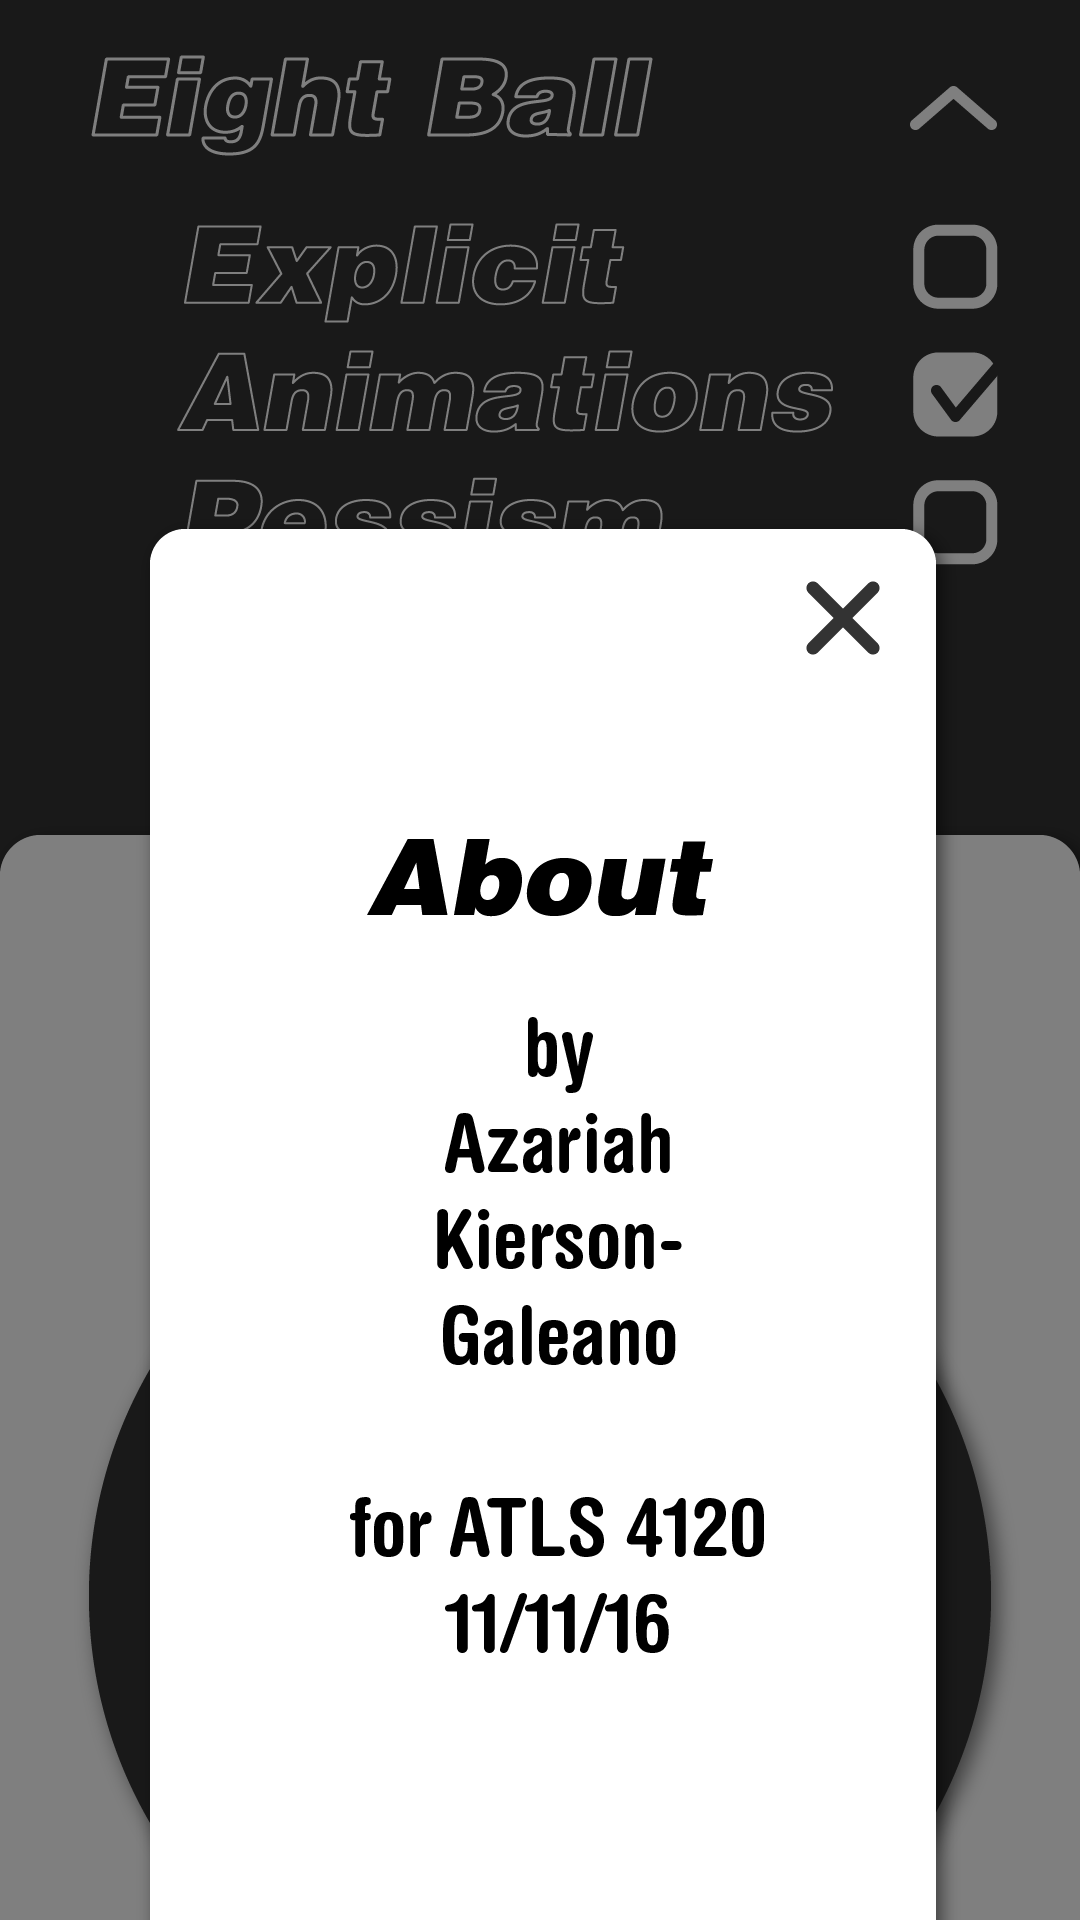
In particular, I was looking for the “right” way to have settings as an overlay after clicking a hamburger nav. However, in addition to there not being a consensus on how to properly do it, the language that Google added, in the form of “Toasts” and “Snackbars”, makes it even more difficult to understand if what I have been reading for the past fifteen minutes is actually relevant or not.
I was able to add most of the functionality. This includes the menu that changes as well as the shake function. I stil have to implement the final app design to be more minimalistic
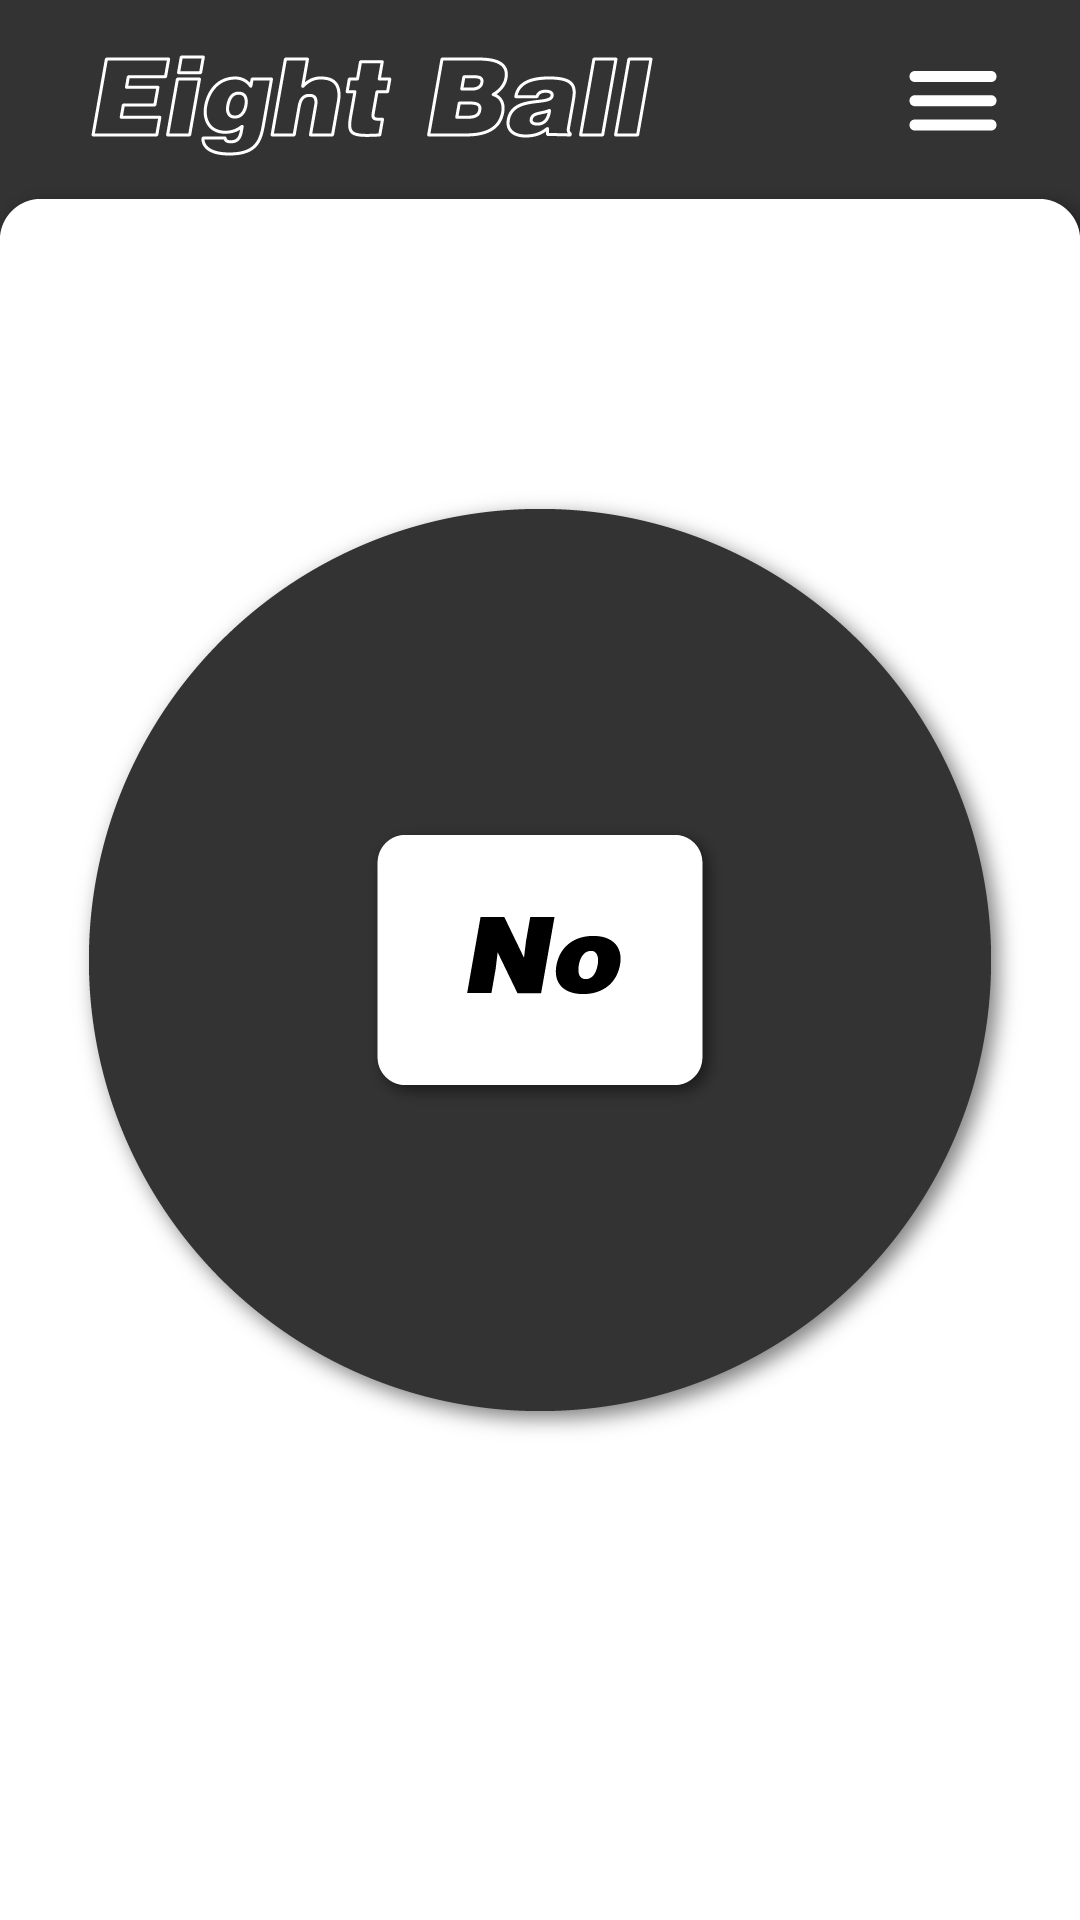
For the second project, I wanted to be less useful. While it is nice for all apps to be useful in a strictly productive manner, a lot of apps are needed to fulfill every niche idea that someone has: poop tracking, virtual fidget spinners, Vedic astrology, you name it there’s an app for that.
However, when I was looking for Magic 8-Ball apps that followed Material.io’s guideline, I was at a loss as most apps on Google’s play store are rather ugly and lack the consistent, paper-esque quality that Android apps should have.
My second app will be a pseudo-random number generator in the form of a magic 8 ball. Users will shake the ball (phone) and have a “random” answer to their question. I will also add on options for extra negativity to go with the drab gray theme as well as an option for expletives, in case of very serious matters. I believe a material compliant dice roller would be a nice addition to the Play Store.
After a few initial attempts to work with the leather shoes, I was able to punch holes through the leather with a thumbtack and use a heavy thread to saw parts of the mask. I also used the waxed thread as an accent. I sawed the front part of the mask together to create a frontal crest.
As the initial propyl ethylene piping did not work well for horns, I decided to use fiberglass for the horns as it can conform to what plug I use as well as be a shiny coat. I watched some YouTube videos on how to use fiberglass. One of the videos I watched suggested using foam insulation as a plug and then tape the exterior to allow for easy removal. I bought some foam insulation and attempted to glue it using regular Elmer’s glue. Unfortunately, it was too cold for the glue to congeal. Next, I attempted to use a spray on glue. Unfortunately, this also did not work as it melted the foam when put on too thick. Lastly, I used the Elmer’s glue to tack the layers together and then used a propane torch to melt the layers together. Lastly, I took a hacksaw and shaped the layers into a single horn shape. I then layered clear Gorilla Tape onto the plug and spread it out to the board I was working on
I bought some fiberglass and resin as well as gloves, brushes, and a respirator. In order to dye the resin, I looked at a variety of paints and dyes. I settled on using 100% pigment acrylic paint for one horn and 100% oil based paint for the other. The acrylic paint worked better as the oil didn’t mix fully into the resin and created an inconsistent coating.
The horns finished drying after 24 hours. They also detached from the board easily, given the tape under them. I then used a Dremel to sand the horns and cut them down to size. Lastly, I used black spray paint to cover over the inconsistencies from the oil paint pigment.
The process of applying the fiberglass and resin was surprisingly simple and was easy enough with the brush. However, fiberglass is awfully toxic and fumigated my house even though the whole process was done outside.